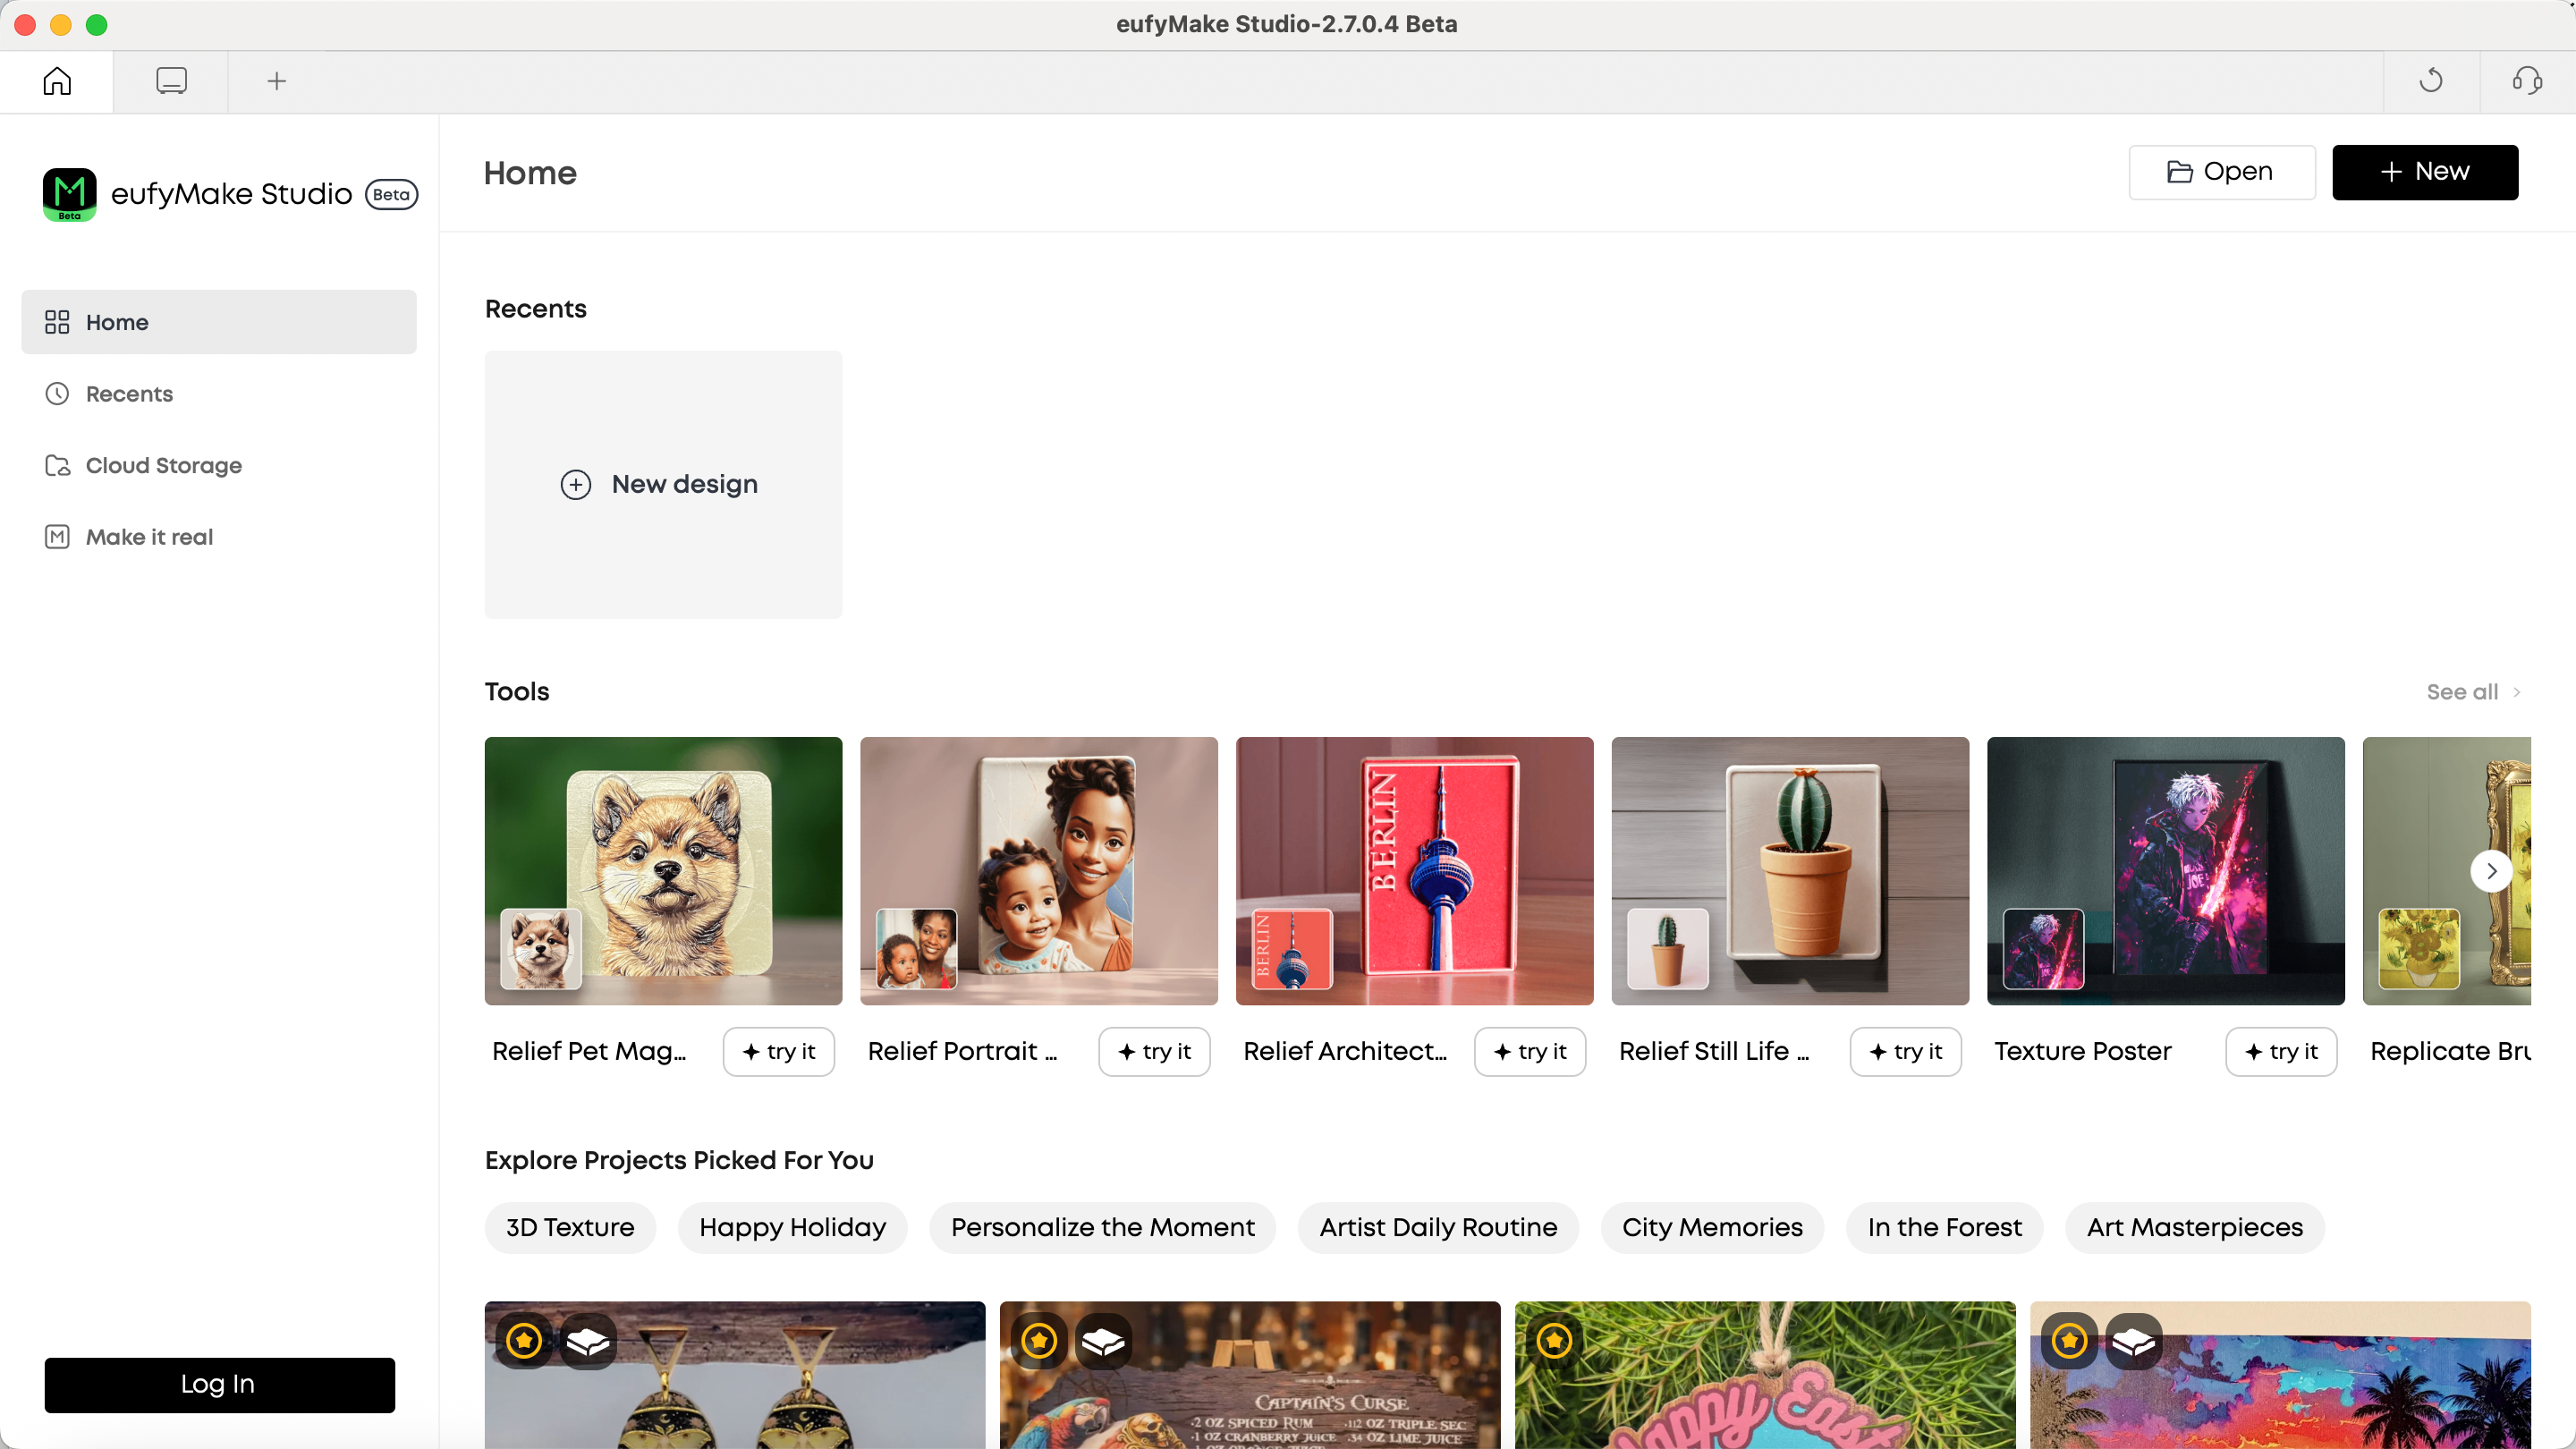
¶ What's New
This release is shaped by your real-world experience with eufyMake—the “it’d be great if…” moments and the small points of friction that impact everyday use. We read every piece of feedback. And the 3.7 release is our answer.
You told us you wanted a desktop app that works like the professional tools you already know. You wanted smarter ways to handle irregularly shaped objects without manual prep work. You wanted finer control over print alignment and maintenance timing. This update addresses all of that, plus a number of smaller quality-of-life improvements across the App, PC studio, and firmware.
Here's what we'll walk through today:
- What's New — 3.7.1 Release: The key features and workflow updates based directly on your feedback
- Bug fixes : The issues you flagged and we resolved
- What's Coming Next: A preview of the upcoming features already in our development pipelin
- Co-Creation FAQ:Our Commitment to Co-Creation and Continuous Improvement
¶ What's New — 3.7 Release
Download the new version>> https://www.eufymake.com/eufymake-studio
¶ PC / APP
¶ 1. Local Mode — All-New PC Client(New PC Only)
See more>> Local mode introduction
The Upgraded PC Version
We know it can feel frustrating when your workflow depends on an internet connection — losing unsaved work after a crash, or not being able to simply press Ctrl+S to save a project the way you would in Photoshop or Word.
That's why we built an entirely new local-mode PC client. Your projects are now saved as .empf files directly on your computer, giving you full control over your files.
Here's what this means for your daily workflow:
- Cmd/Ctrl+S to Save: Save and overwrite your project file instantly, just like traditional desktop software
- Version Control: Create copies with Cmd/Ctrl+Shift+S to manage different design versions without losing the original
- Work Offline: No internet? No problem. Your editing experience remains completely uninterrupted
- Crash Recovery: If the application closes unexpectedly, your work is automatically recovered on the next launch
Local Mode and Offline Mode are independent concepts — you can use local files while online (accessing cloud AI features), or work locally while offline (with built-in AI algorithms). Four usage scenarios cover every combination of network and login status.
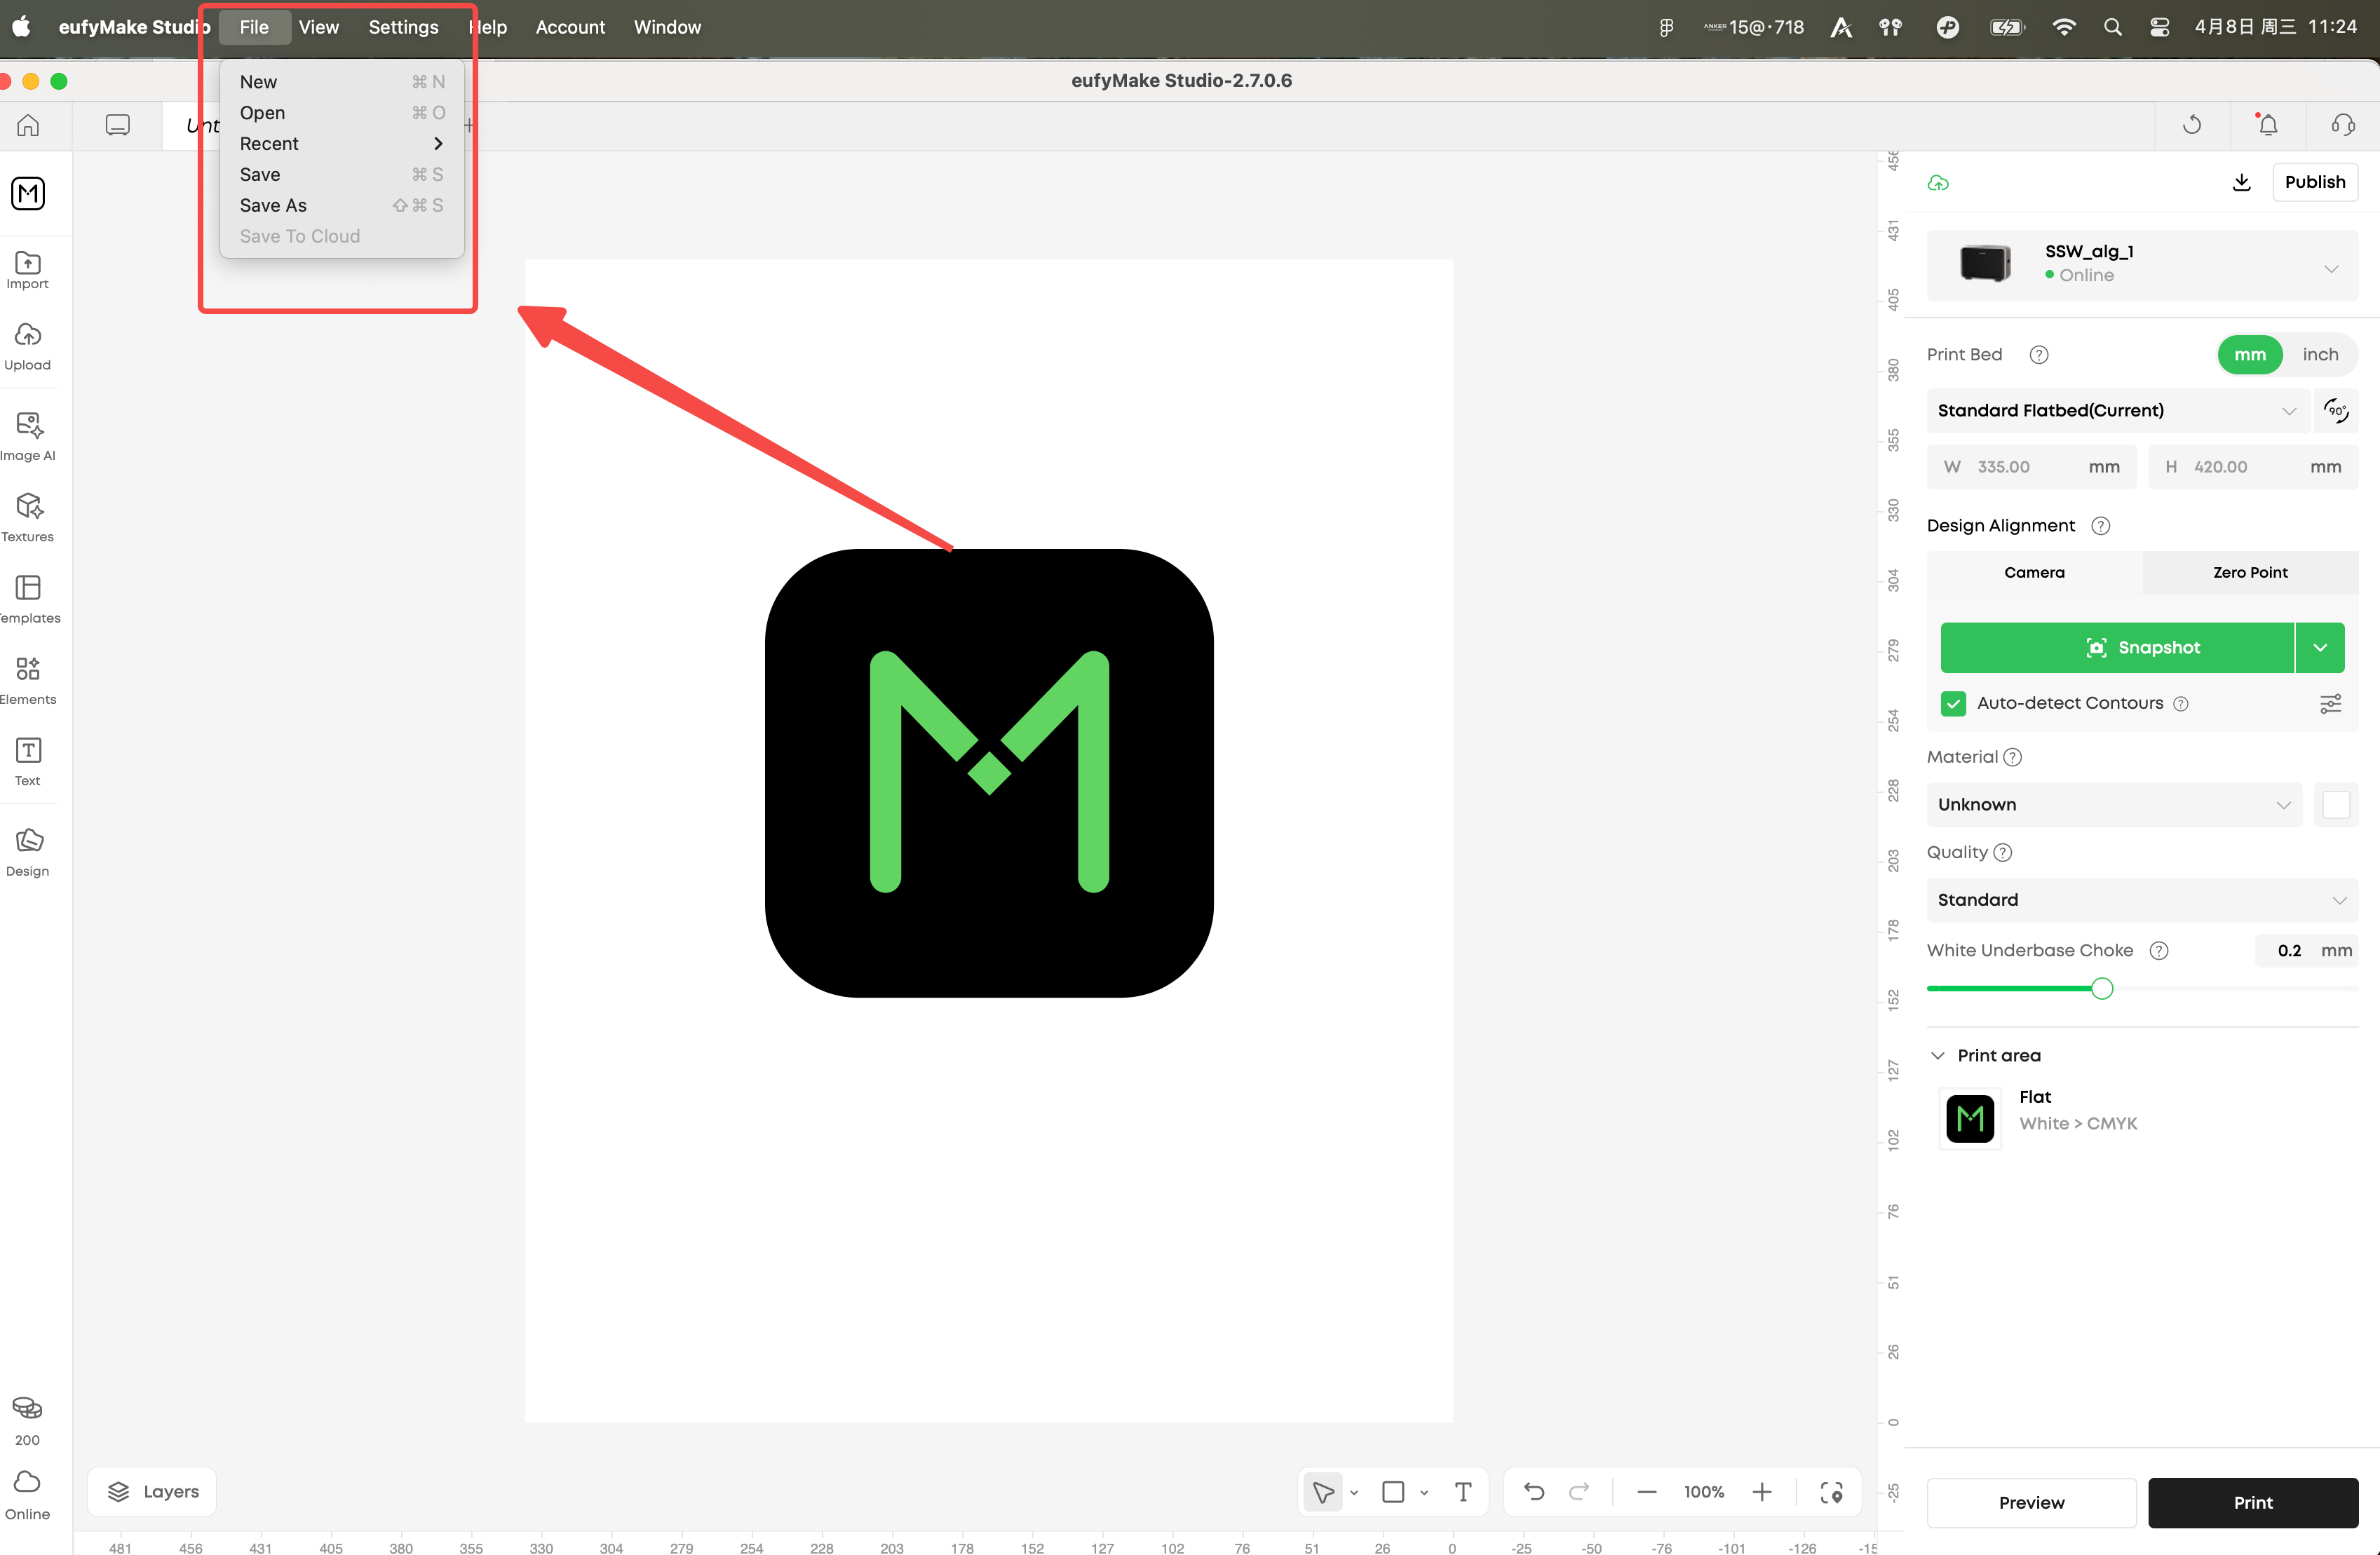
Access it via the File menu in the top menu bar or using keyboard shortcuts.
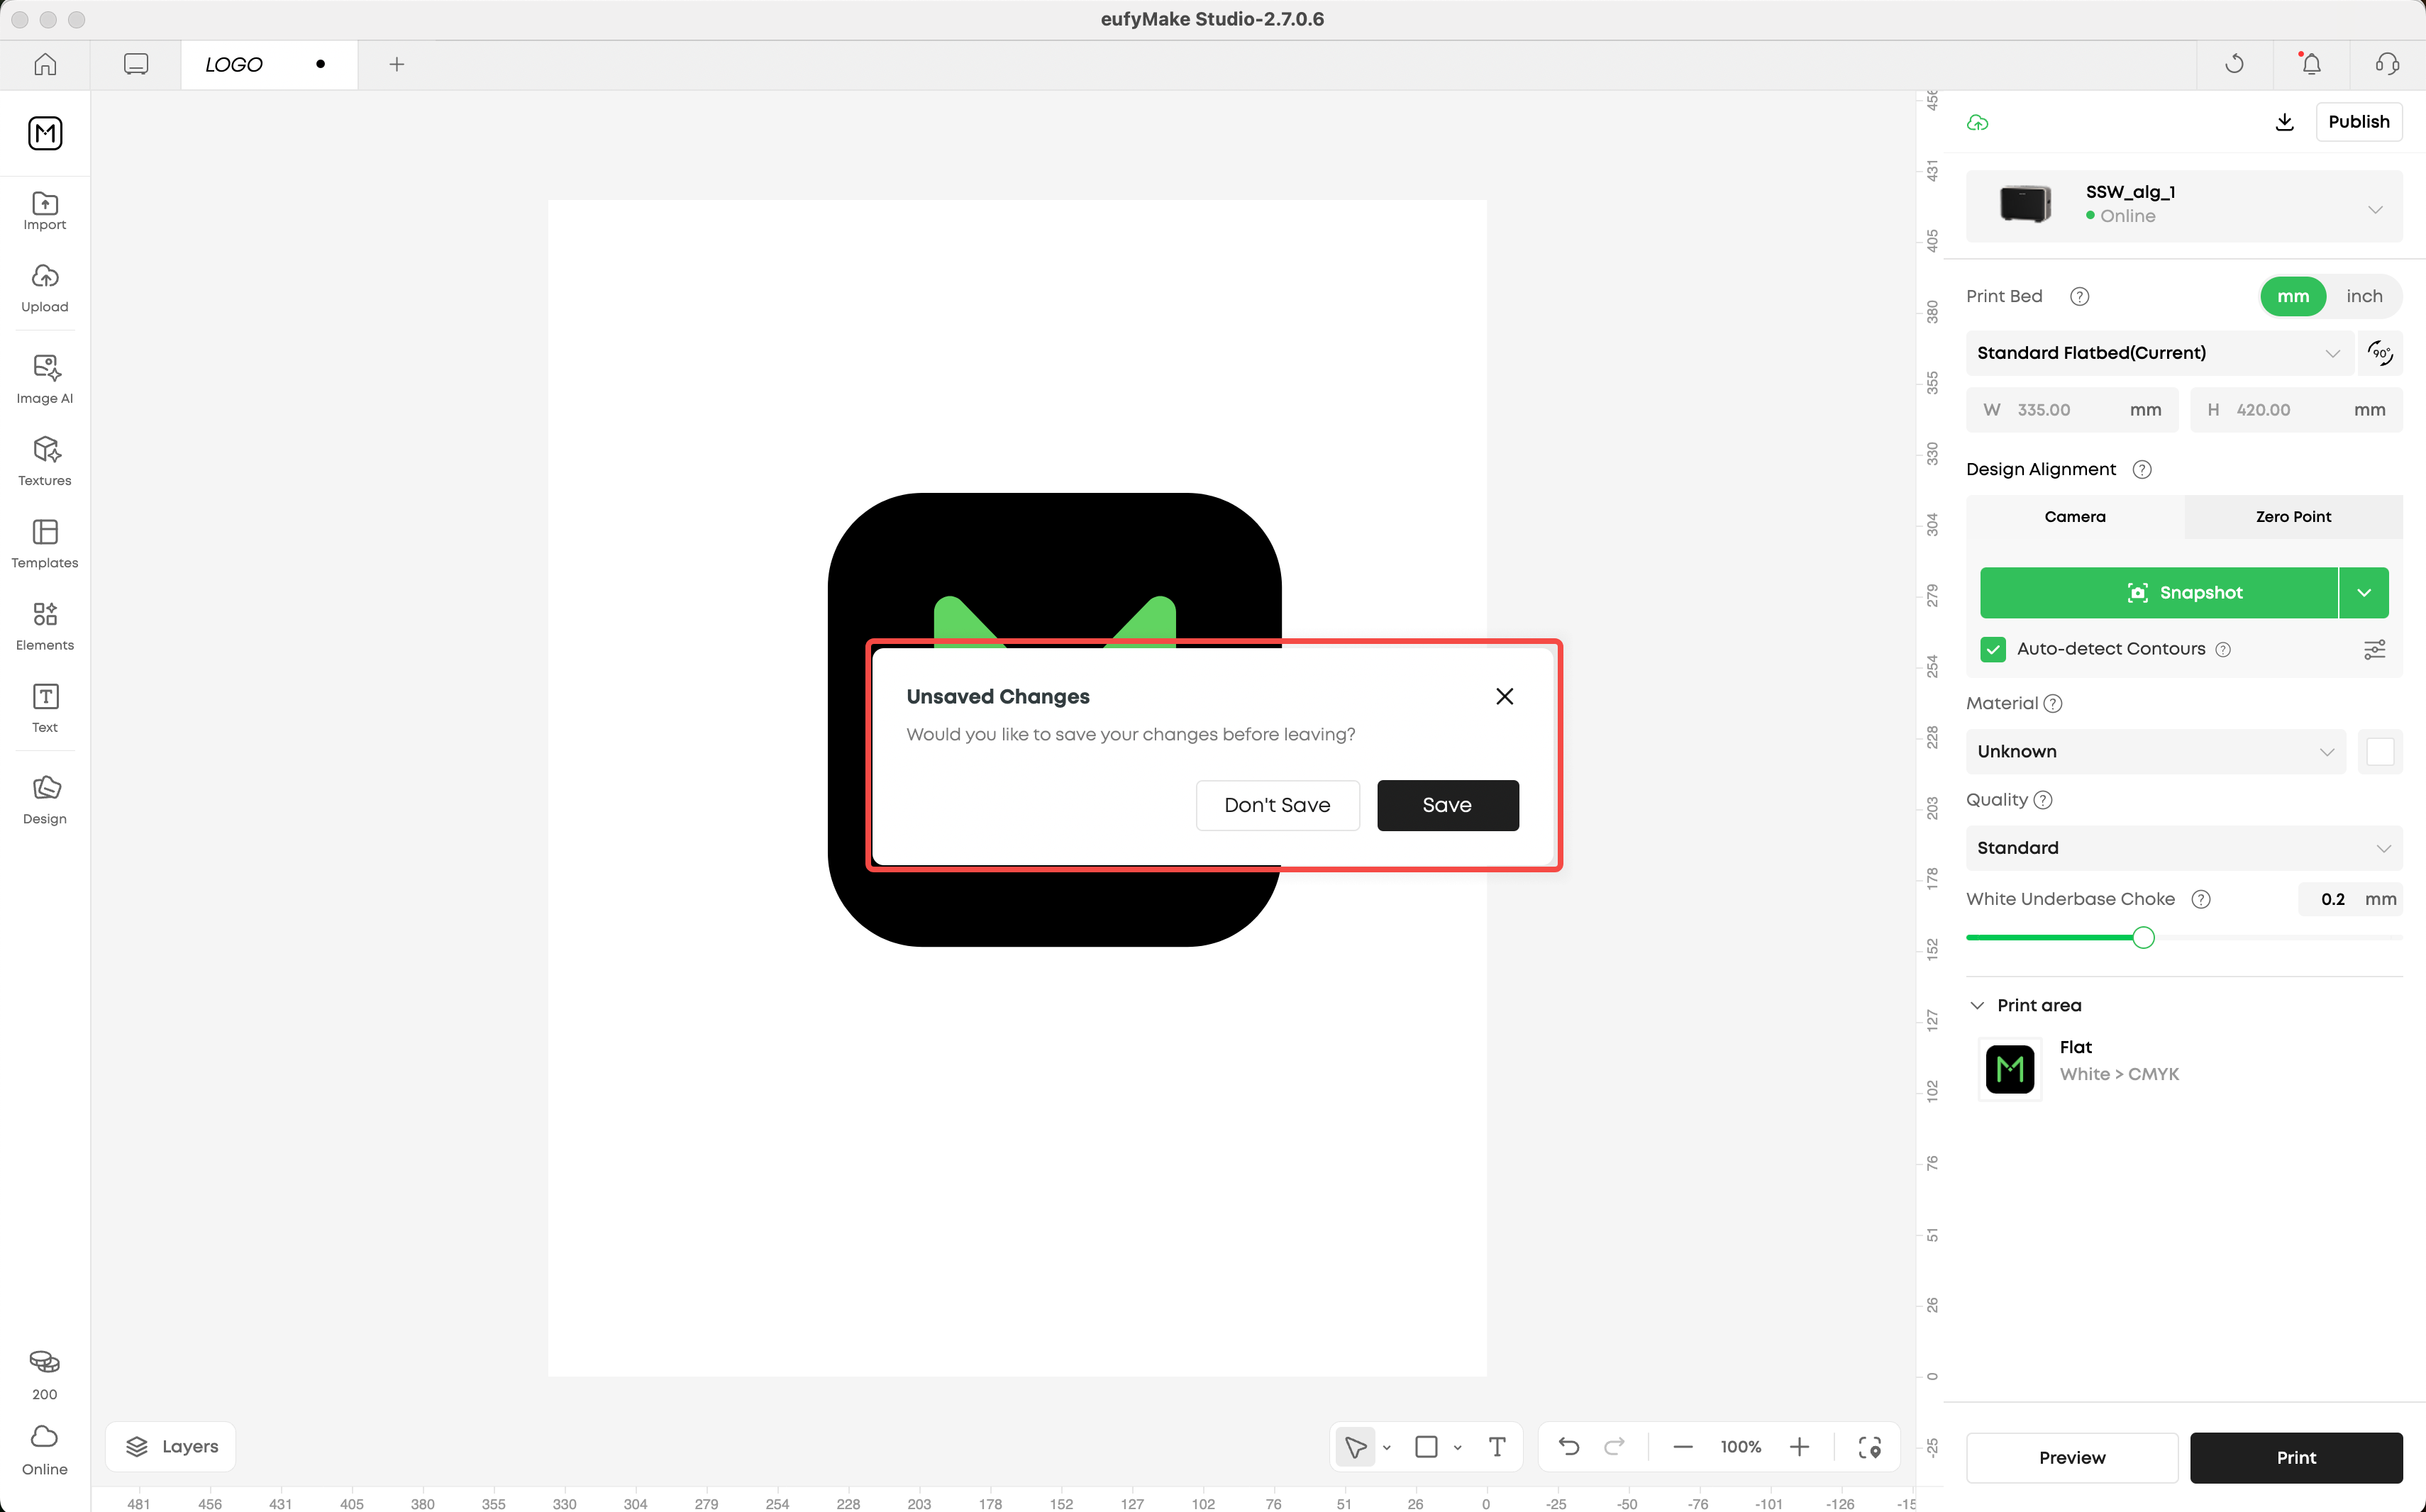
Save prompt when closing
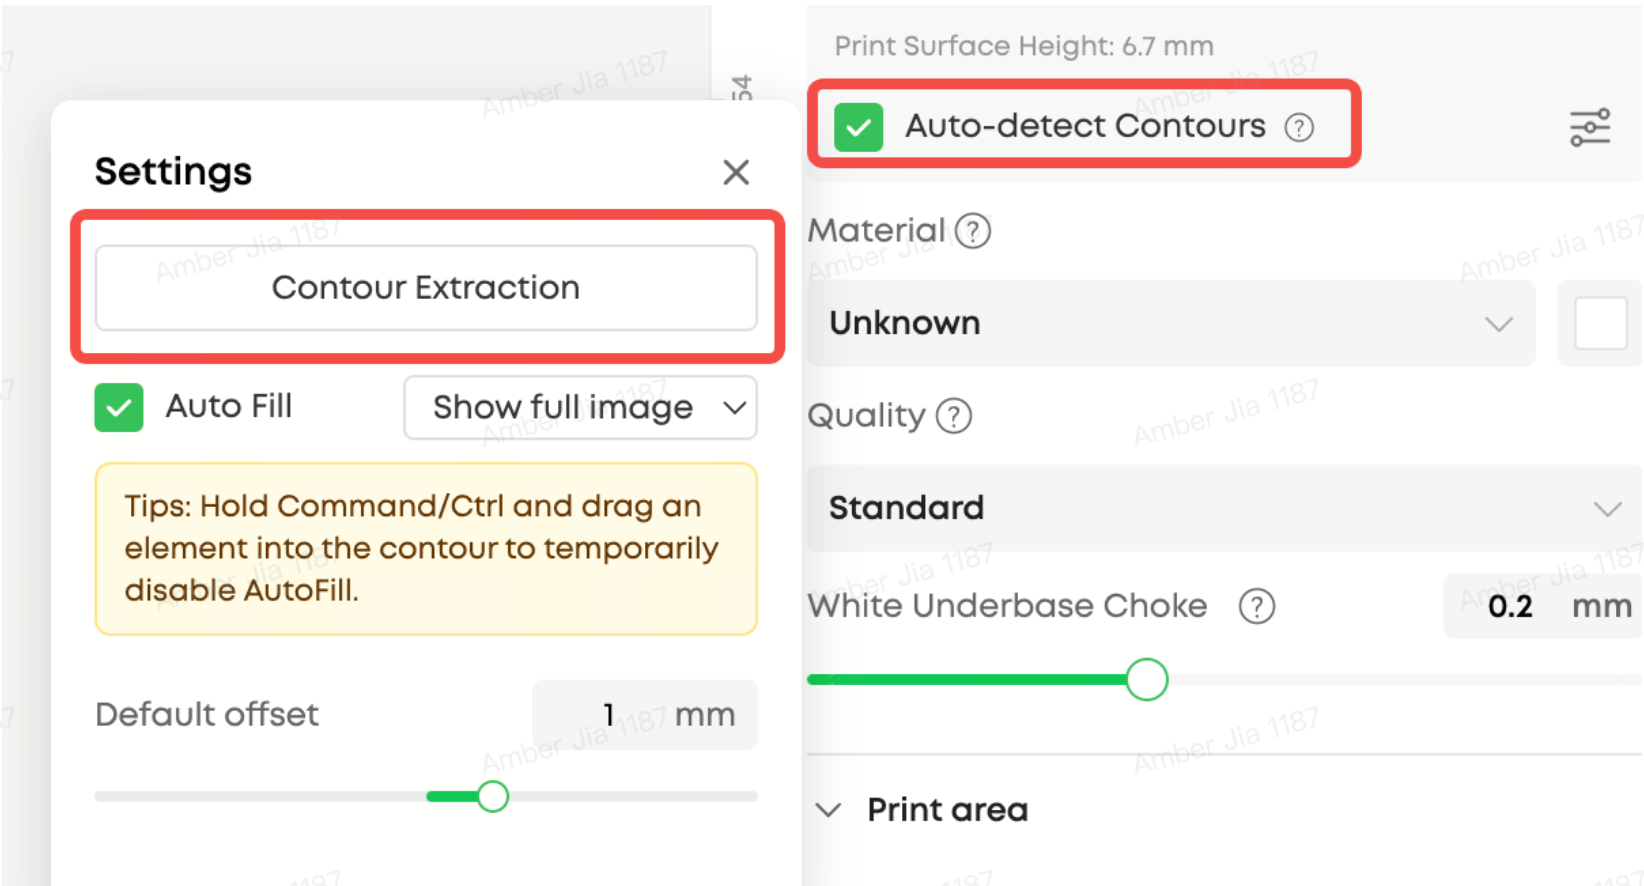
¶ 2. Contour Recognition & Batch Fill(New)
See more >>Contour Recognition and Autofill
Printing on irregularly shaped objects — phone cases with camera cutouts, natural stones, custom-shaped coasters — used to require manual masking in Photoshop before you could start designing.
Now, simply take a photo of the objects on your print platform, and the system automatically detects their outlines. A single click fills all matching contours with your design, automatically adjusting rotation and scale for each one.
What makes this powerful:
- Auto-Detect: Enable automatic contour recognition after every photo, or trigger it manually when you need it
- Smart Batch Fill: Design once, then fill all identical contours across your print platform in one click
- Editable Contours: Fine-tune detected shapes with brush tools, smart selection, and offset adjustment (-5mm to +5mm)
- Two Fill Modes: Show the full design within each contour, or crop and fill to completely cover the shape
Whether you're printing 20 identical coasters or one irregularly shaped stone, this feature eliminates the manual alignment work that used to slow you down.
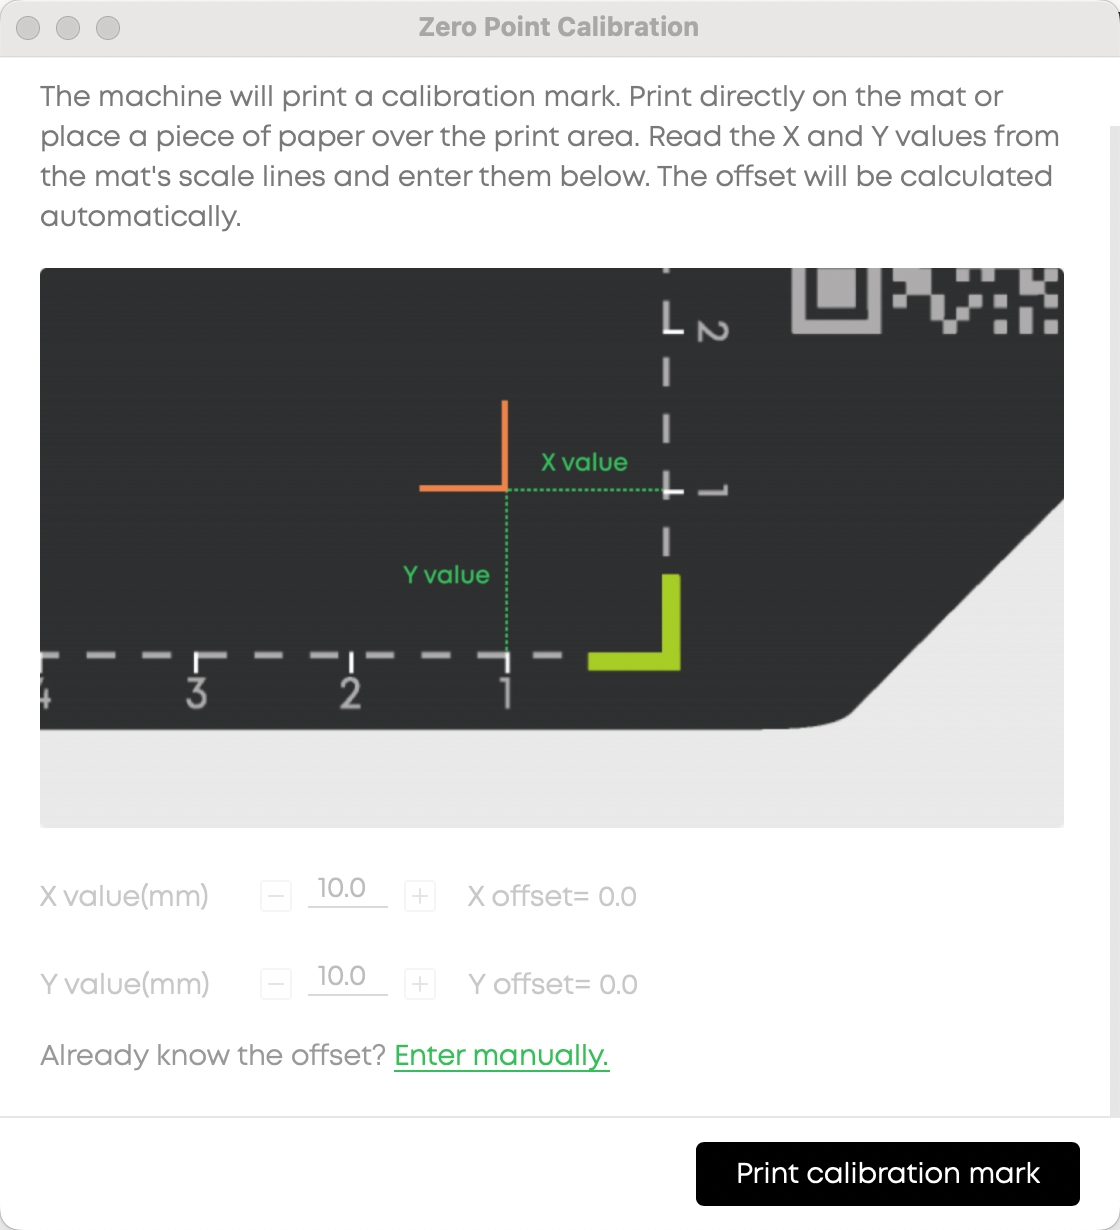
¶ 3. Design Alignment Improvement(Improved)
See more >> Zero Point Calibration and Zero Point Alignment
Accurate alignment between your on-screen design and the actual printed result is critical — especially for batch production and repeat printing.
In this update, you can now manually adjust the zero-point offset value (X and Y axes) for fine-tuned alignment, without needing to re-run the full calibration process every time. Experienced users who already know their offset measurements can enter them directly and start printing immediately.
We've also reorganized the alignment settings UI for clarity:
- Three calibration paths: Full calibration (first-time users), skip-to-offset (after auto-calibration), or direct offset adjustment (experienced users)
- Instant apply: Offset changes take effect immediately — no need to restart the calibration flow
- Print calibration marks: If you're unsure of your offset, the system can print reference marks for you to measure
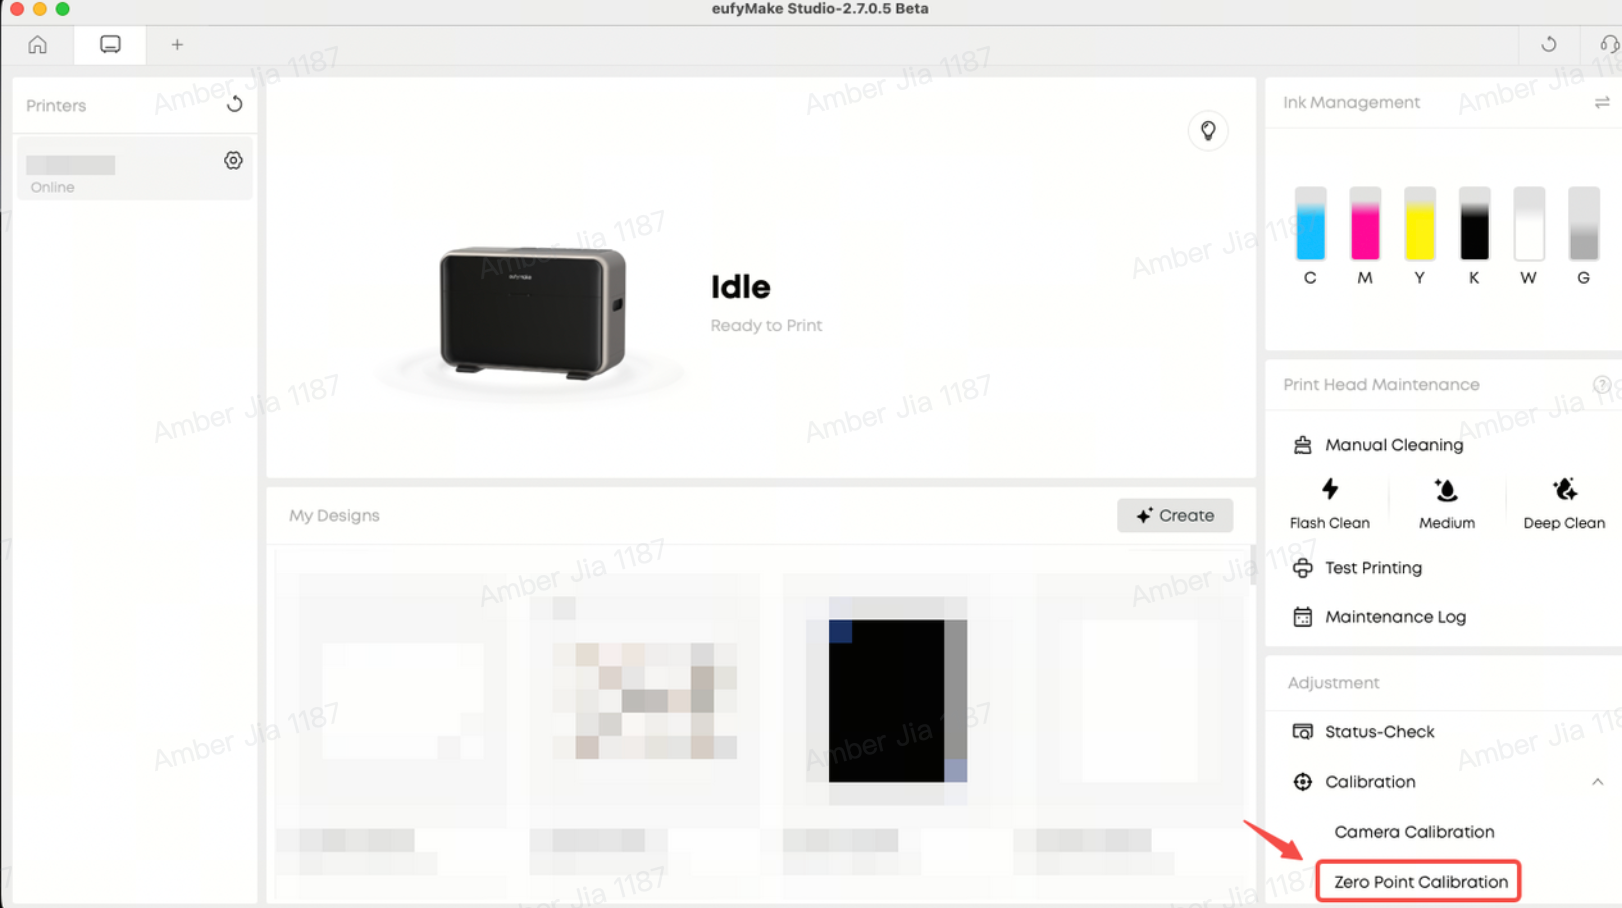
Zero Point Calibration
Zero Point Alignment
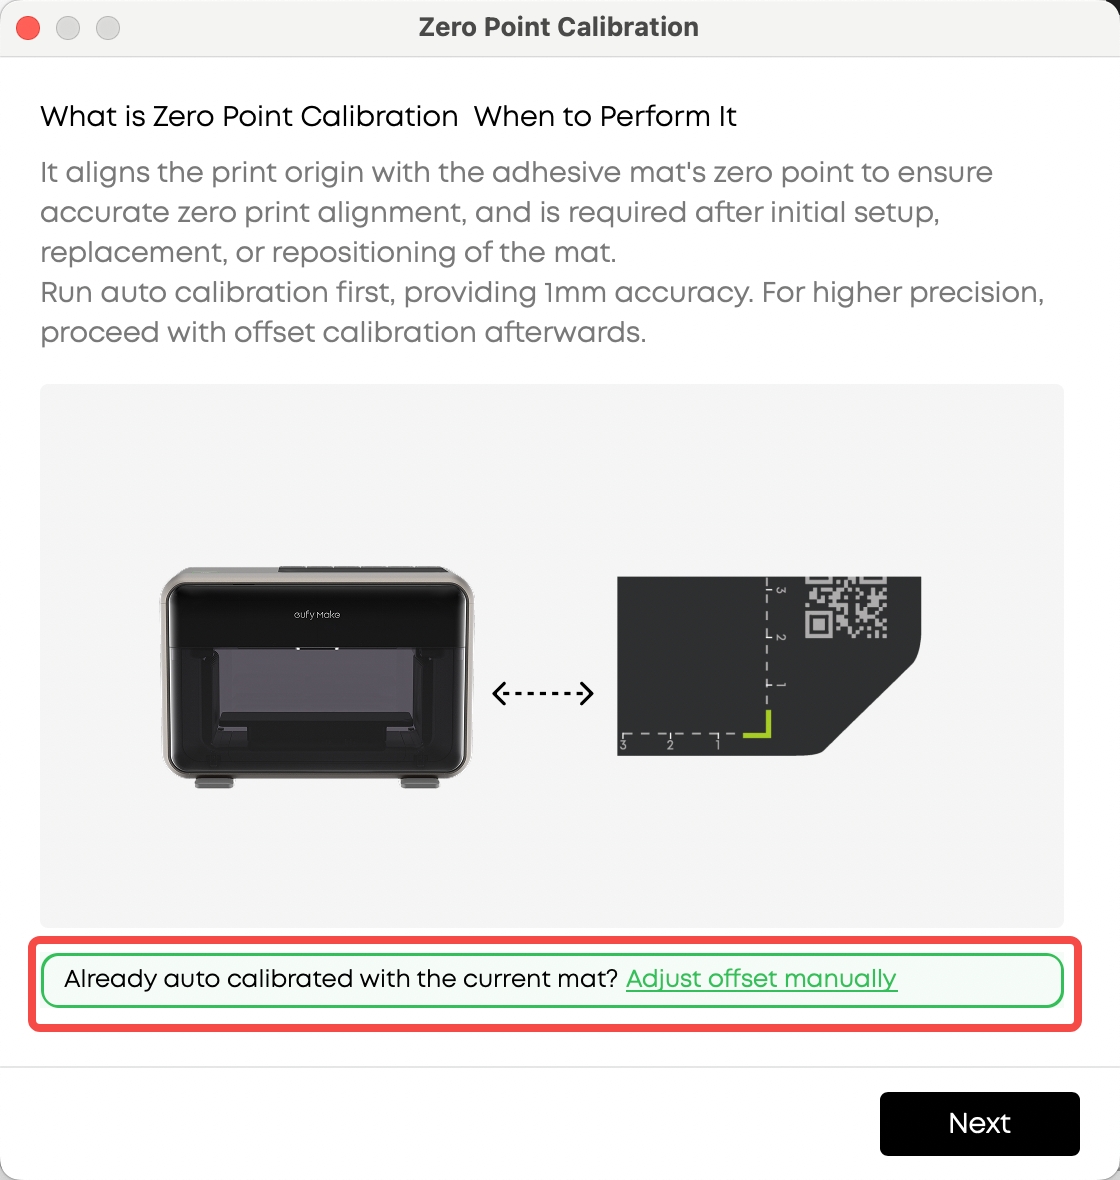
Known Offset: From the Zero Point Calibration homepage, use the dedicated entry to open Offset Input and enter the value.
Unknown Offset: Run Auto Measurement first, then proceed to Offset Calibration.
¶ 4. Custom Maintenance(New)
See more >>Cleaning and maintenance strategy & Update of specific ink consumption
Print head maintenance is essential for consistent quality, but remembering to run it at the right time can be easy to forget.
You can now set a preferred trigger time for automatic print head maintenance, along with an advance reminder. Whether you want maintenance to run at the start of your workday or during a scheduled break, you're in control of your maintenance routine.
¶ 5. mm / inch Unit Toggle(New)
See more >>Dimension Unit Switch
The unit toggle has been refined to apply only where it matters: Print Bed dimensions and Image Position / Size fields. A quick-access toggle has been added to the right of the Print Bed section header, so you can switch units without digging through settings.
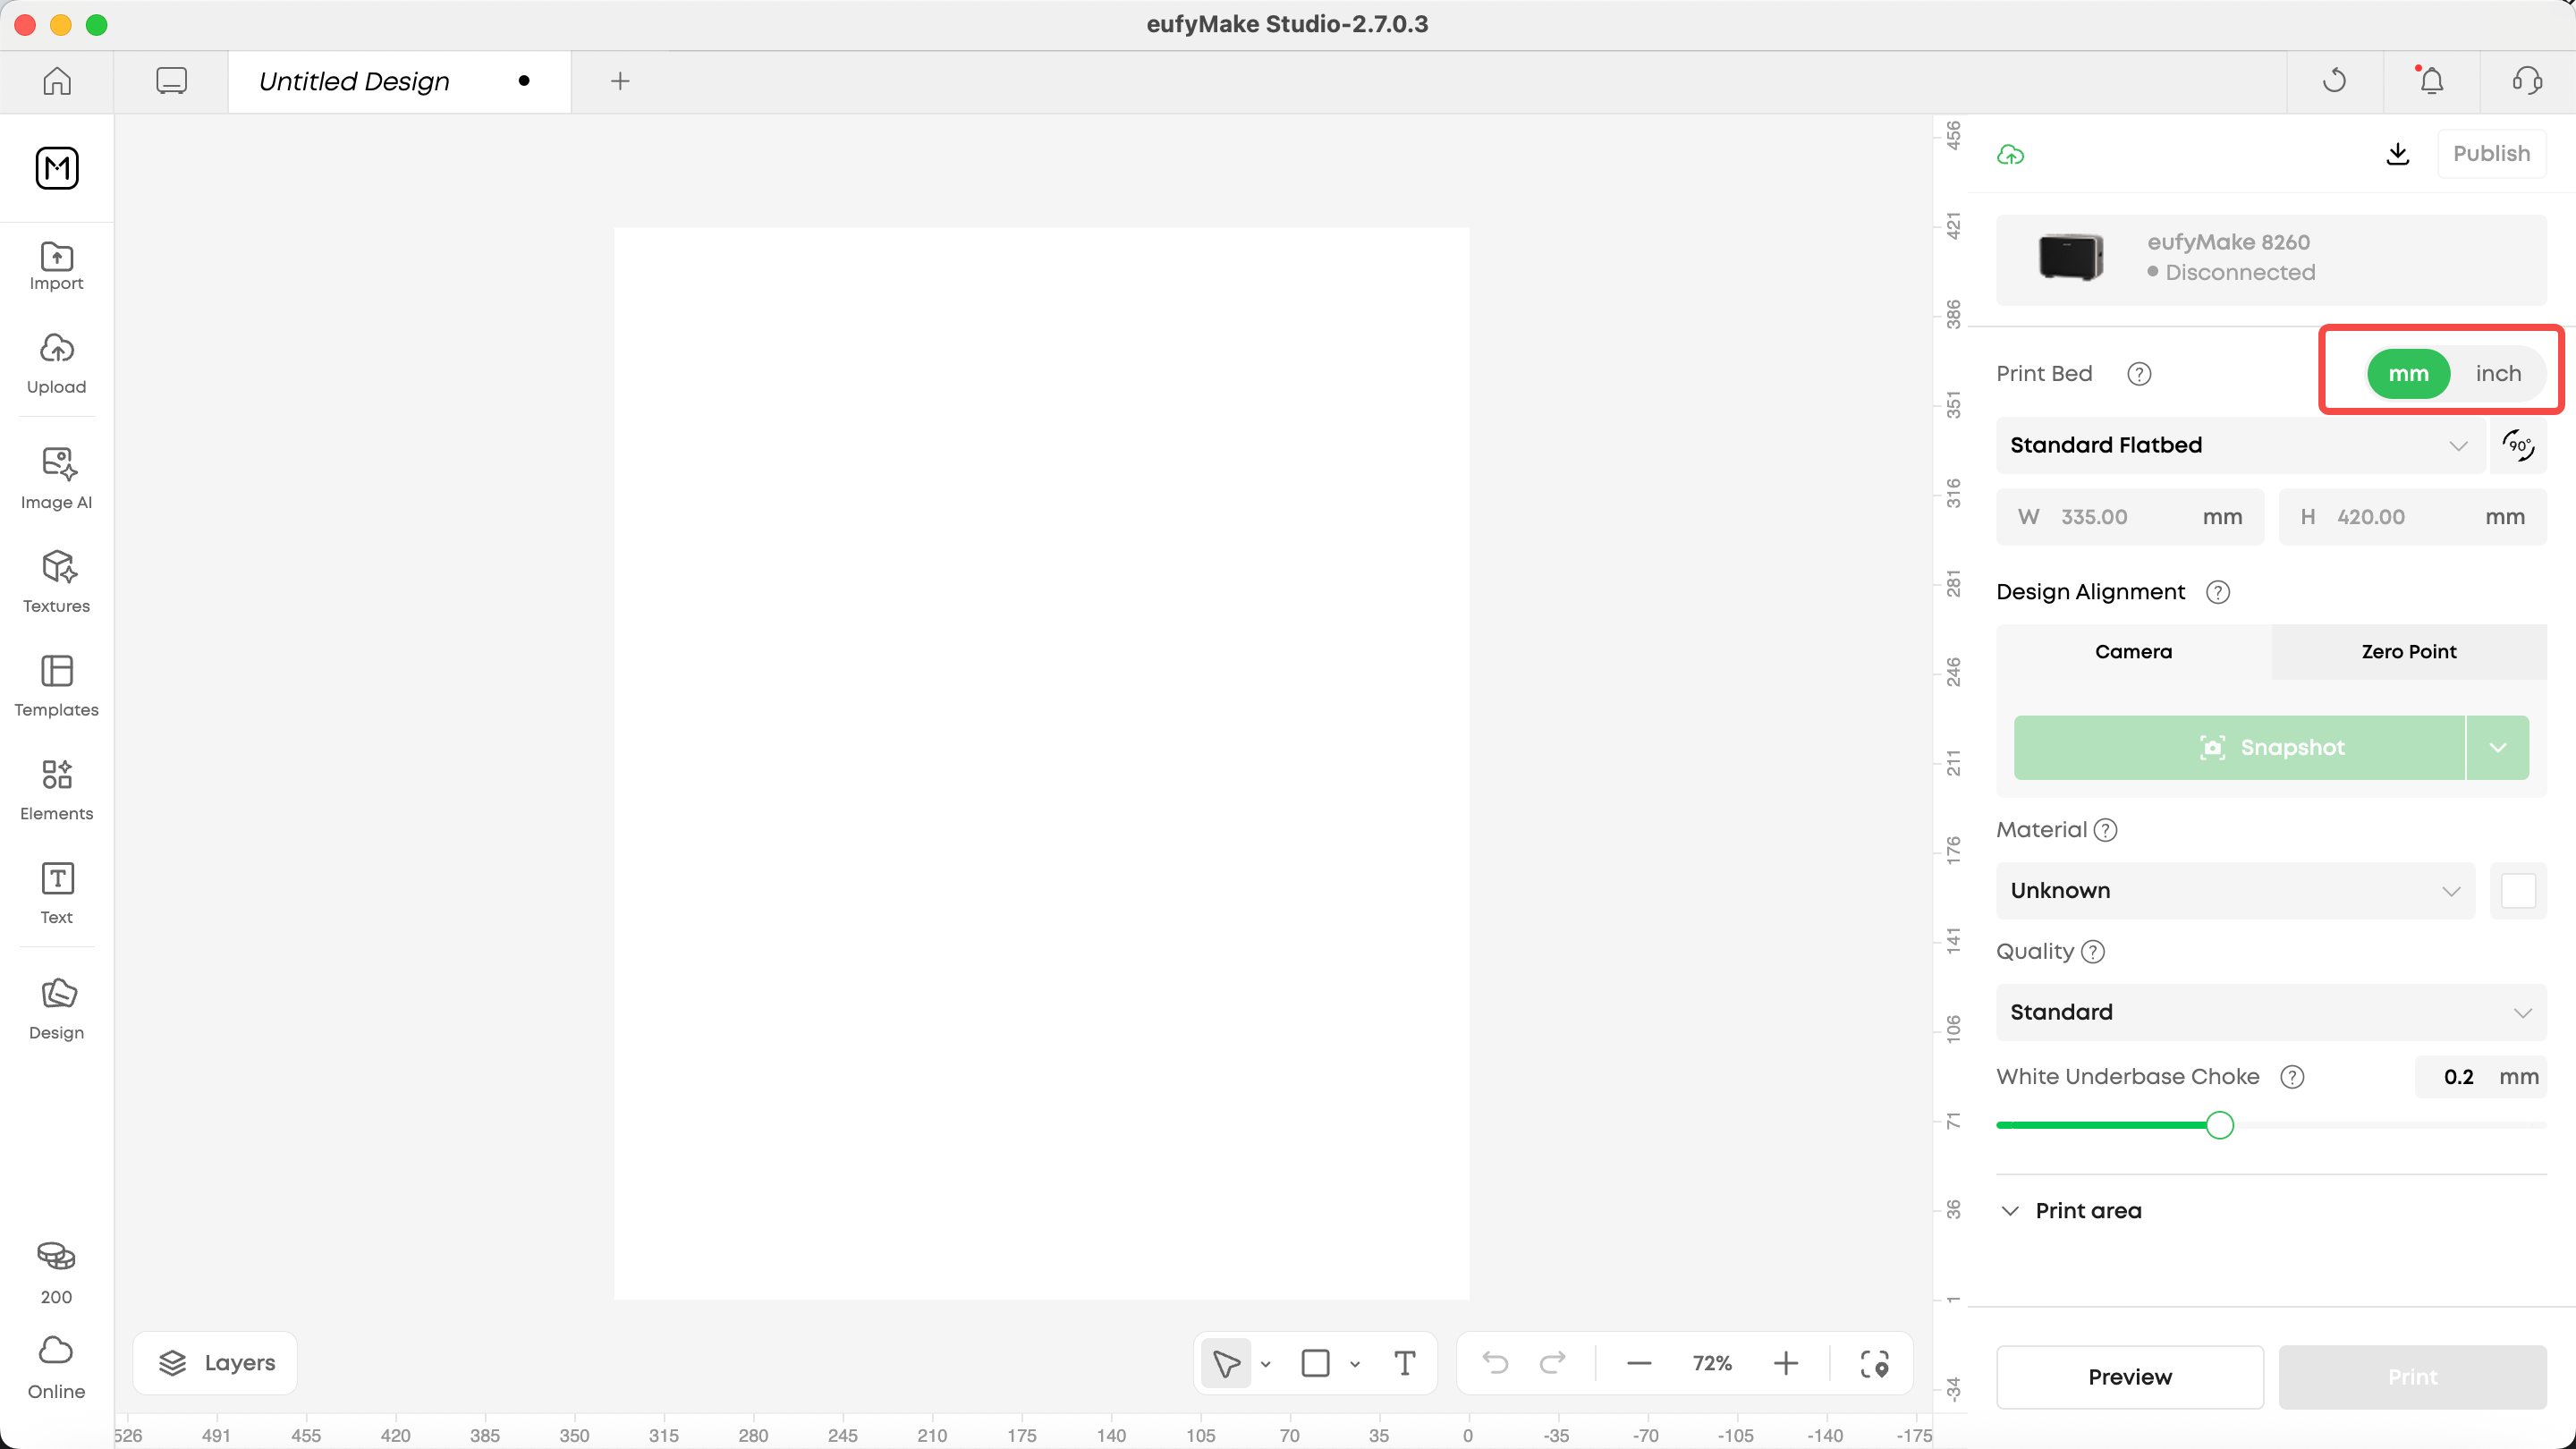
Click to switch between mm and inch.
¶ Optimized
¶ Background Removal Upgrade(Improved)
We've upgraded the AI algorithm behind background removal to deliver finer cutout results with more natural edge transitions. You'll notice cleaner edges, especially around hair, intricate patterns, and semi-transparent areas.
¶ Ink & Cleaning Cartridge Expiry Alerts(New)
A pop-up reminder now appears when your ink or cleaning cartridges are approaching their expiry date. This prevents unnoticed consumable degradation from affecting your print quality.
¶ Show Measured Object Height(New)
The actual measured height of your object is now displayed during the print flow. This gives you a chance to verify dimensions before printing, helping you avoid height-related failures before they happen.
¶ Manual Maintenance Confirmation(Improved)
A second confirmation dialog has been added before manual maintenance is executed, preventing accidental triggers that could interrupt your workflow.
¶ AP Mode Optimization(Improved)
We've improved the device connection flow and stability in AP mode across both the PC client and firmware. Network setup is now smoother and more reliable, whether you're pairing a new device or reconfiguring your connection.
¶ Message Center Relocated(Improved)
Following the PC client redesign, the Message Center has been updated for easier access and look.
¶ Standard Flatbed Calibration Guidance(Improved)
Before starting the self-check during manual standard flatbed calibration, guided prompts now appear to help prevent users from forgetting to remove the foam pad on the platen.
¶ Firmware
¶ Design Alignment Improvement(Improved)
The same zero-point offset adjustment capability is now available on the firmware side, ensuring consistent alignment accuracy across both PC and device.
¶ Temperature Detection(New)
Real-time ambient temperature monitoring has been added to the print process. The print head high-temperature threshold has also been recalibrated to better protect print quality under varying environmental conditions.
¶ AP Mode Optimization (Improved)
Improved firmware-side connection handling in AP mode for more reliable device pairing and network configuration.
¶ Rotary Print Quality(Improved)
We've optimized the vertical streaks that occasionally appear during rotary printing, delivering cleaner results on cylindrical objects.
¶ Important Note
To improve software stability and focus on the core UV printing experience, starting from V3.7.1, the PC client no longer includes 3D printing functionality. eufyMake Studio is now positioned as a dedicated UV printing software.
If you use an AnkerMake M5 or other FDM 3D printer, please download eufyMake Studio 3D from: www.eufymake.com/eufymake-studio
¶ Bug Fixes
We reviewed 55 issues across the system this cycle. This release resolves 33 of them (about 60%). The remaining 22 are scheduled for v3.8.0.
Here's what we fixed, grouped by category so you can find what matters to you:
¶ Printing & Workflow
- Fixed an issue where elements marked as "skip print" were still being printed
- Fixed ink saving data not being saved correctly
- Fixed inaccurate initial print time estimation on the progress screen
- Fixed Studio getting stuck on the loading screen after clicking the print button
- Fixed the print button failing to start a print job
- Fixed white ink printing abnormalities
¶ Hardware & Sensors
- Fixed print head initialization ink injection failure caused by low temperature
- Fixed ink injection failure when the printer's top cover was removed during initialization
- Fixed false open-circuit error reports from the cleaning pump
- Fixed false open-circuit error reports and frequent repeated errors from the stirring motor
- Fixed false open-circuit error reports from the lifting electromagnet
- Fixed laser sensor errors on first use after a firmware update
- Fixed the device freezing during photo capture and being unable to upload logs
- Fixed inaccurate printer temperature reporting
¶ Power Management & Notifications
- Fixed low-power anomalies that interrupted automatic cleaning cycles
- Fixed false power-loss notifications in low-power mode
- Fixed abnormal behavior after enabling power-saving mode
- Fixed duplicate shutdown notifications being sent
- Fixed the need to reconnect to WiFi and re-enter details every time
¶ UI & Editor
- Fixed a blank page issue when clicking the sidebar again after maximizing right-side content
- Fixed the colors slider being cut off on iPad
- Fixed the login button being obscured at high zoom ratios or ultra-high resolutions
- Fixed the SOP read button not appearing during the initialization flow with large font settings
- Fixed log upload failures on the Mac desktop application
¶ System & Connectivity
- Fixed upload failures for specific images
- Fixed abnormal C ink cartridge expiry notifications
- Fixed false "ink cartridge not installed" warnings after firmware updates
- Fixed photo capture failing at 23% progress
- Fixed inability to connect to phone hotspots
¶ What's Coming Next
eufyMake Studio 3.8 focuses on editing efficiency and print precision, solving key pain points including editing trial-and-error, multi-element layout inefficiency, and rotary print positioning offset.
¶ What's Coming Next
eufyMake Studio 3.8 focuses on editing efficiency and print precision, solving key pain points including editing trial-and-error, multi-element layout inefficiency, and rotary print positioning offset.
¶ Editor Core Upgrades
¶ Smart Ink Estimation
- Auto-estimate ink & time in preview without device binding
- View ink changes with parameter adjustments, 80% less trial-and-error
¶ Convert to Contour Mask
- Transform text, images, vectors into fillable contours with one click
¶ Layout Functionality
- Arrange multiple elements with specific spacing in one click
- 50%+ layout efficiency boost
¶ Rotary Print Optimization
- Start Point Calibration
- Print Quality Enhancement
- Support for more non-standard cup types
- Independent ink configs for cylinder/cone shapes
¶ Contour Feature Refinements
Support manual editing of auto-detected contours for optimal adjustment.
¶ Our Commitment to Co-Creation and Continuous Improvement
Thank you for being part of this journey with us.
Everything in this update — from the fixes to the stability work to the new features — started with a conversation we had with you. Your messages, your questions, and the moments when you pointed out that something didn't feel right all helped us understand the product the way you experience it every day.
Your feedback shows us where things fall short and where the experience needs to improve. We take that seriously. Many of the changes you see today began with a single comment, a screenshot, or a simple "something feels off here." Those moments matter, and we're grateful that you took the time to share them.
We'll keep showing up the same way — listening closely, responding quickly, and improving steadily, week by week. eufyMake isn't something we build behind closed doors. It's something that grows alongside the people who actually use it.
Thank you for your patience, for testing new updates, and for speaking up when something didn't feel right.We're excited for what comes next and for continuing to shape a more reliable, more capable, and more creator-friendly eufyMake together with you.
If you have suggestions or ideas for our next release,feel free to reach out to us, or share your thoughts on our community channels.