¶ Contour Recognition and Auto-Fill
¶ What is Contour Recognition & Auto-Fill?
Contour Recognition & Auto-Fill is a powerful feature in eufyMake Studio that automatically detects the outlines of objects placed on the printing platform. It enables you to quickly align designs to irregularly shaped objects and batch-fill identical contours with the same design — saving significant time and effort.
¶ Use Cases
Batch Printing on Identical Objects
When you need to print the same design on multiple identical objects (e.g. business cards, coasters, phone cases), the system automatically recognizes each object's position and orientation, then intelligently fills all matching contours with your design in one click.
Precise Printing on Irregular Objects
For irregularly shaped objects (e.g. phone cases with camera cutouts, natural stones), the system automatically generates an accurate contour mask so your design perfectly matches the object's edges — no manual masking in Photoshop required.
¶ How to Use
Step 1: Take a Photo
Take a snapshot of the objects on the print platform (either Quick Snapshot or assisted photo works).
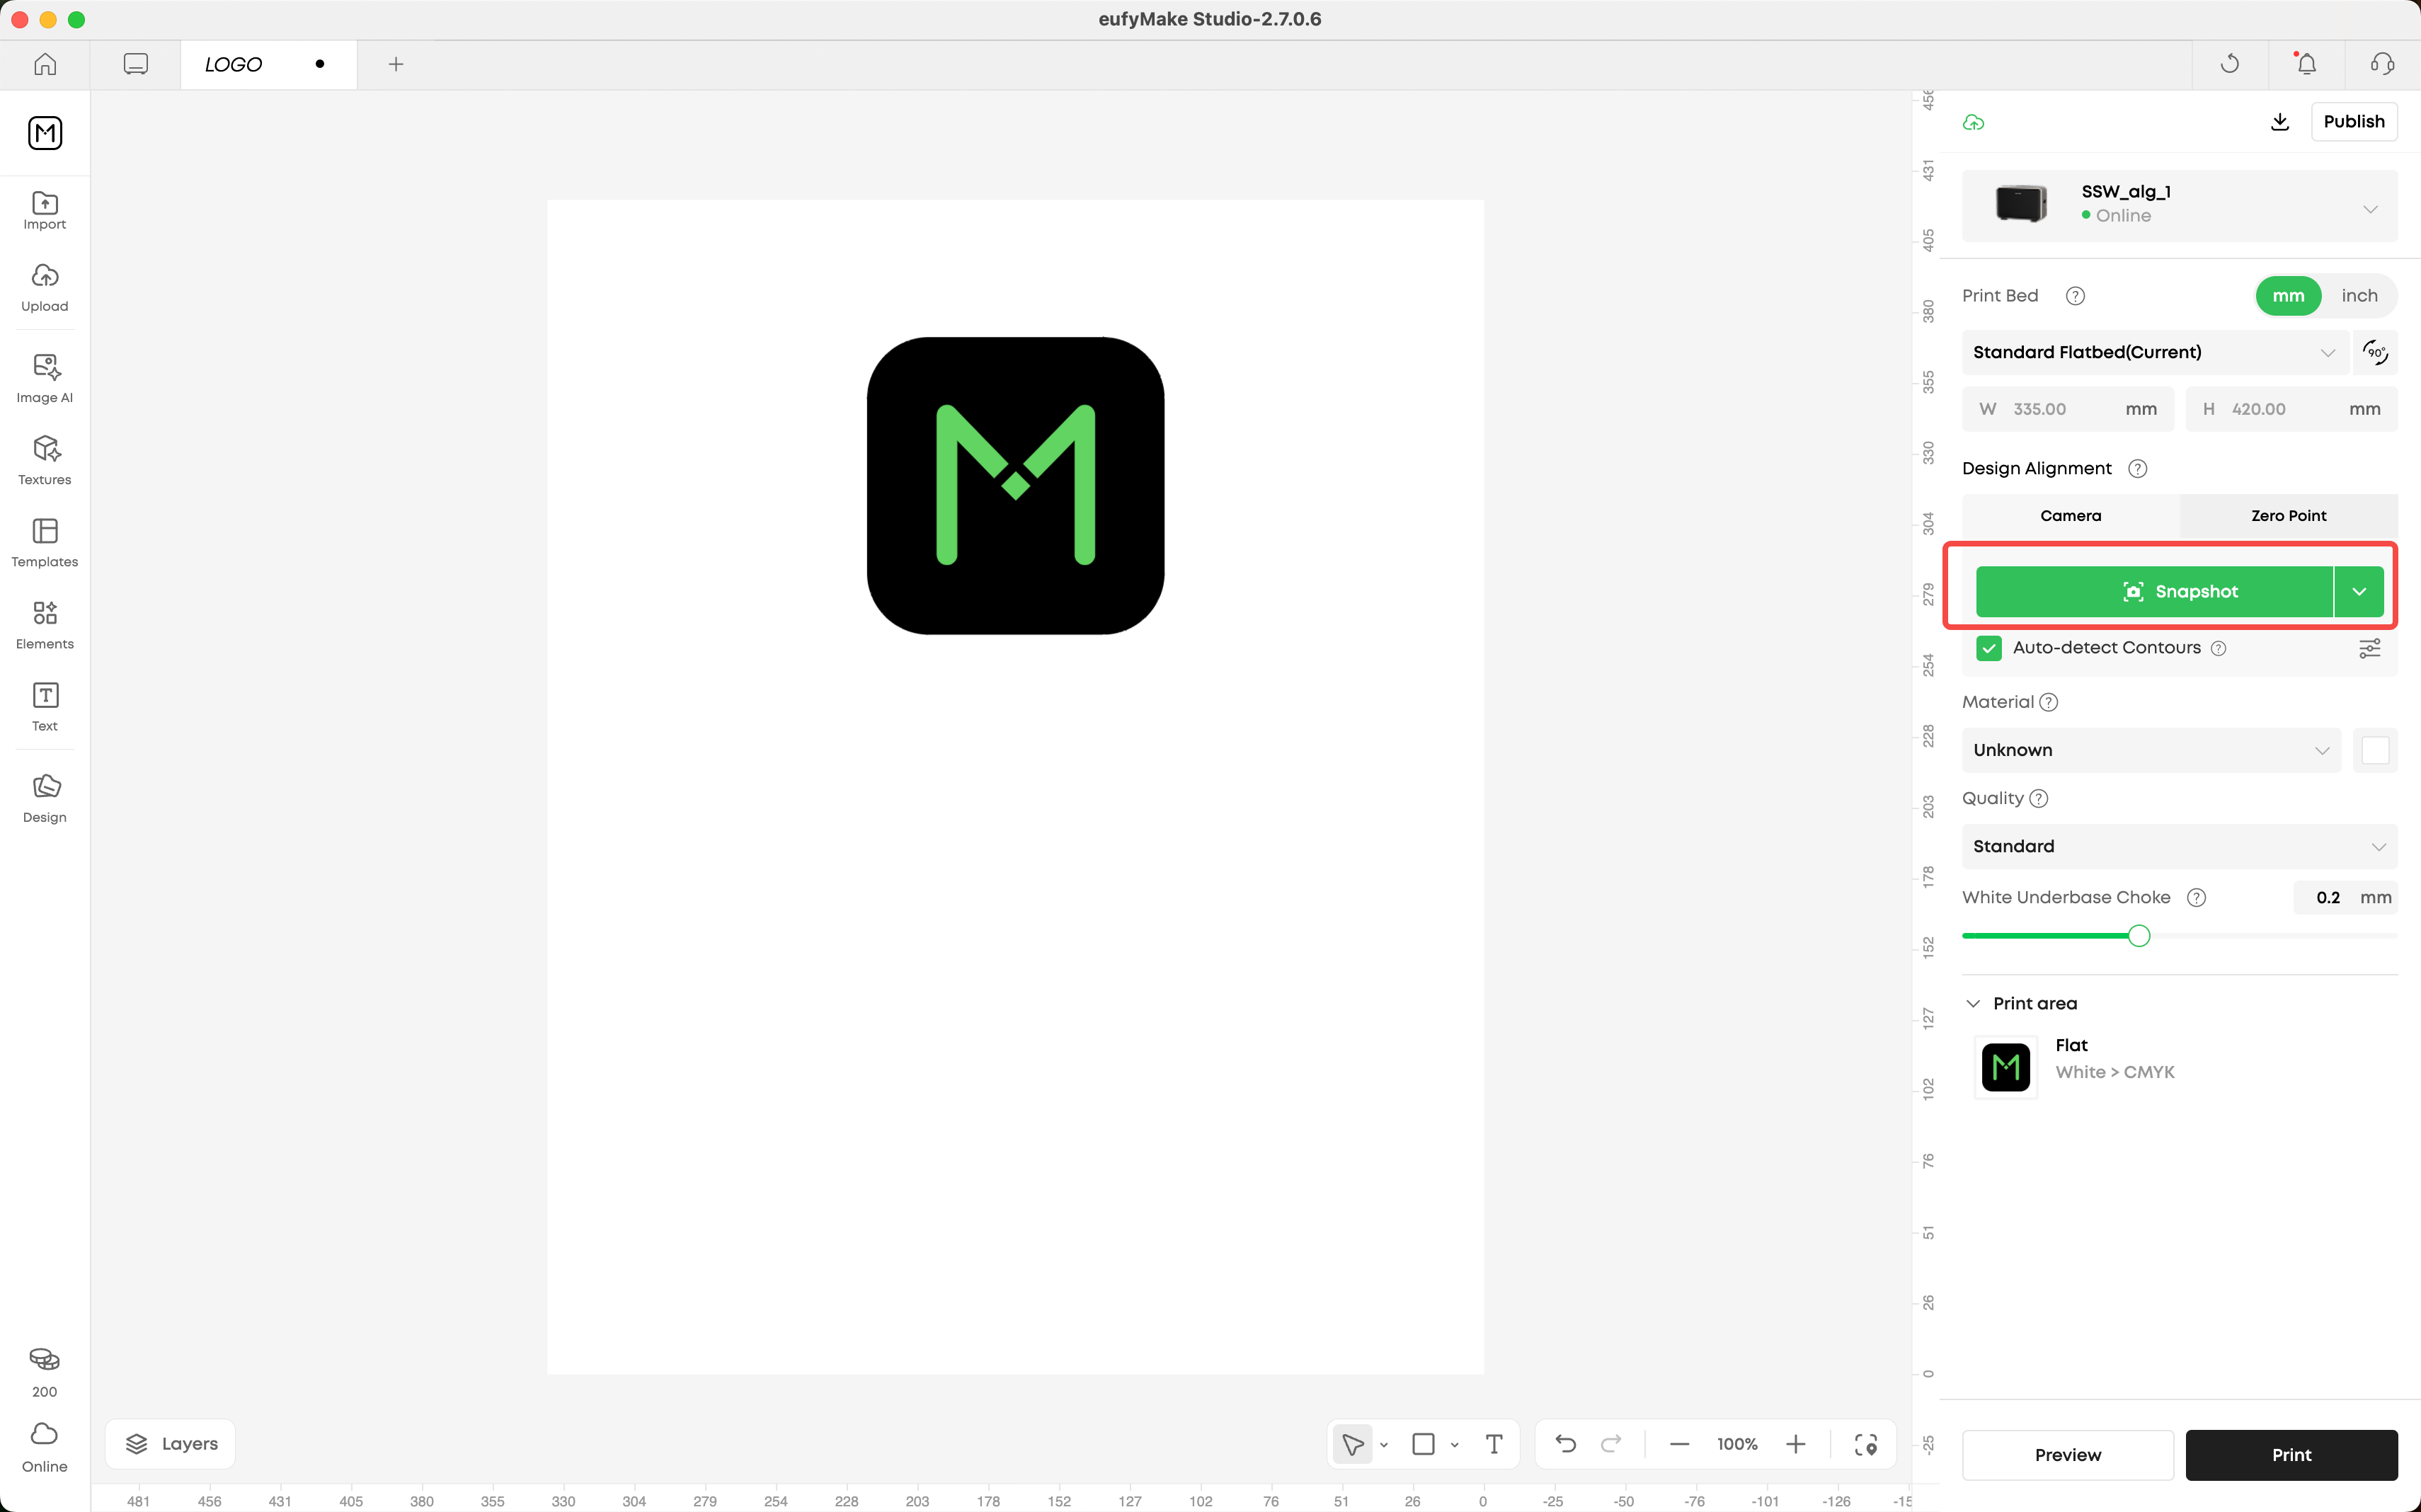
Step 2: Contour Recognition
After taking the photo, the "Contour Recognition" button appears on the right panel. You can choose between two modes:
- Auto-detect: Check the "Auto-detect Contours" option. After each photo, contours are automatically recognized and imported to the canvas.
- Manual trigger: Leave the checkbox unchecked. Click the Contour Recognition button to manually start recognition when needed.
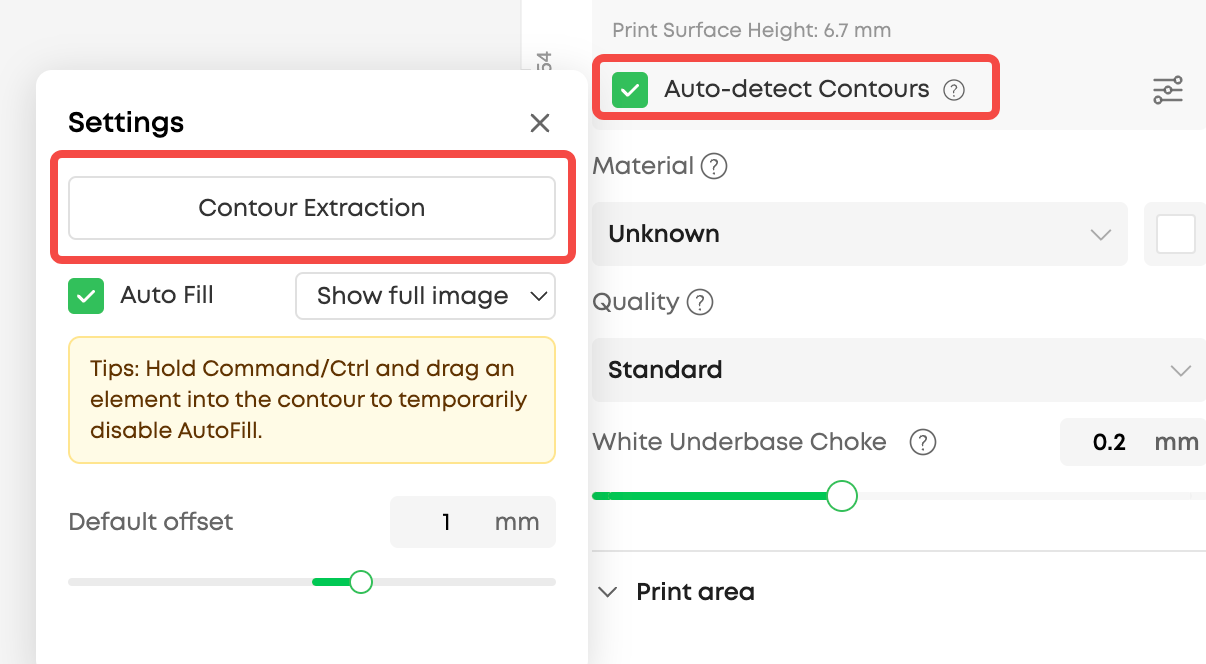
Tip: Regardless of the checkbox state, the Contour Recognition button is always visible. You can click it anytime to re-run recognition (the button is grayed out while recognition is in progress). If contours already exist on the canvas, you'll be prompted: "Existing contours will be cleared. Continue?"
Step 3: Review Contour Results
After recognition, an extraction result panel appears:
- Review the recognized contours overlaid on the photo
- Rate the recognition quality (optional). If rated 4 stars or below, the system uploads the result for quality improvement
- Click "Import to Canvas" to import the contours to your design canvas
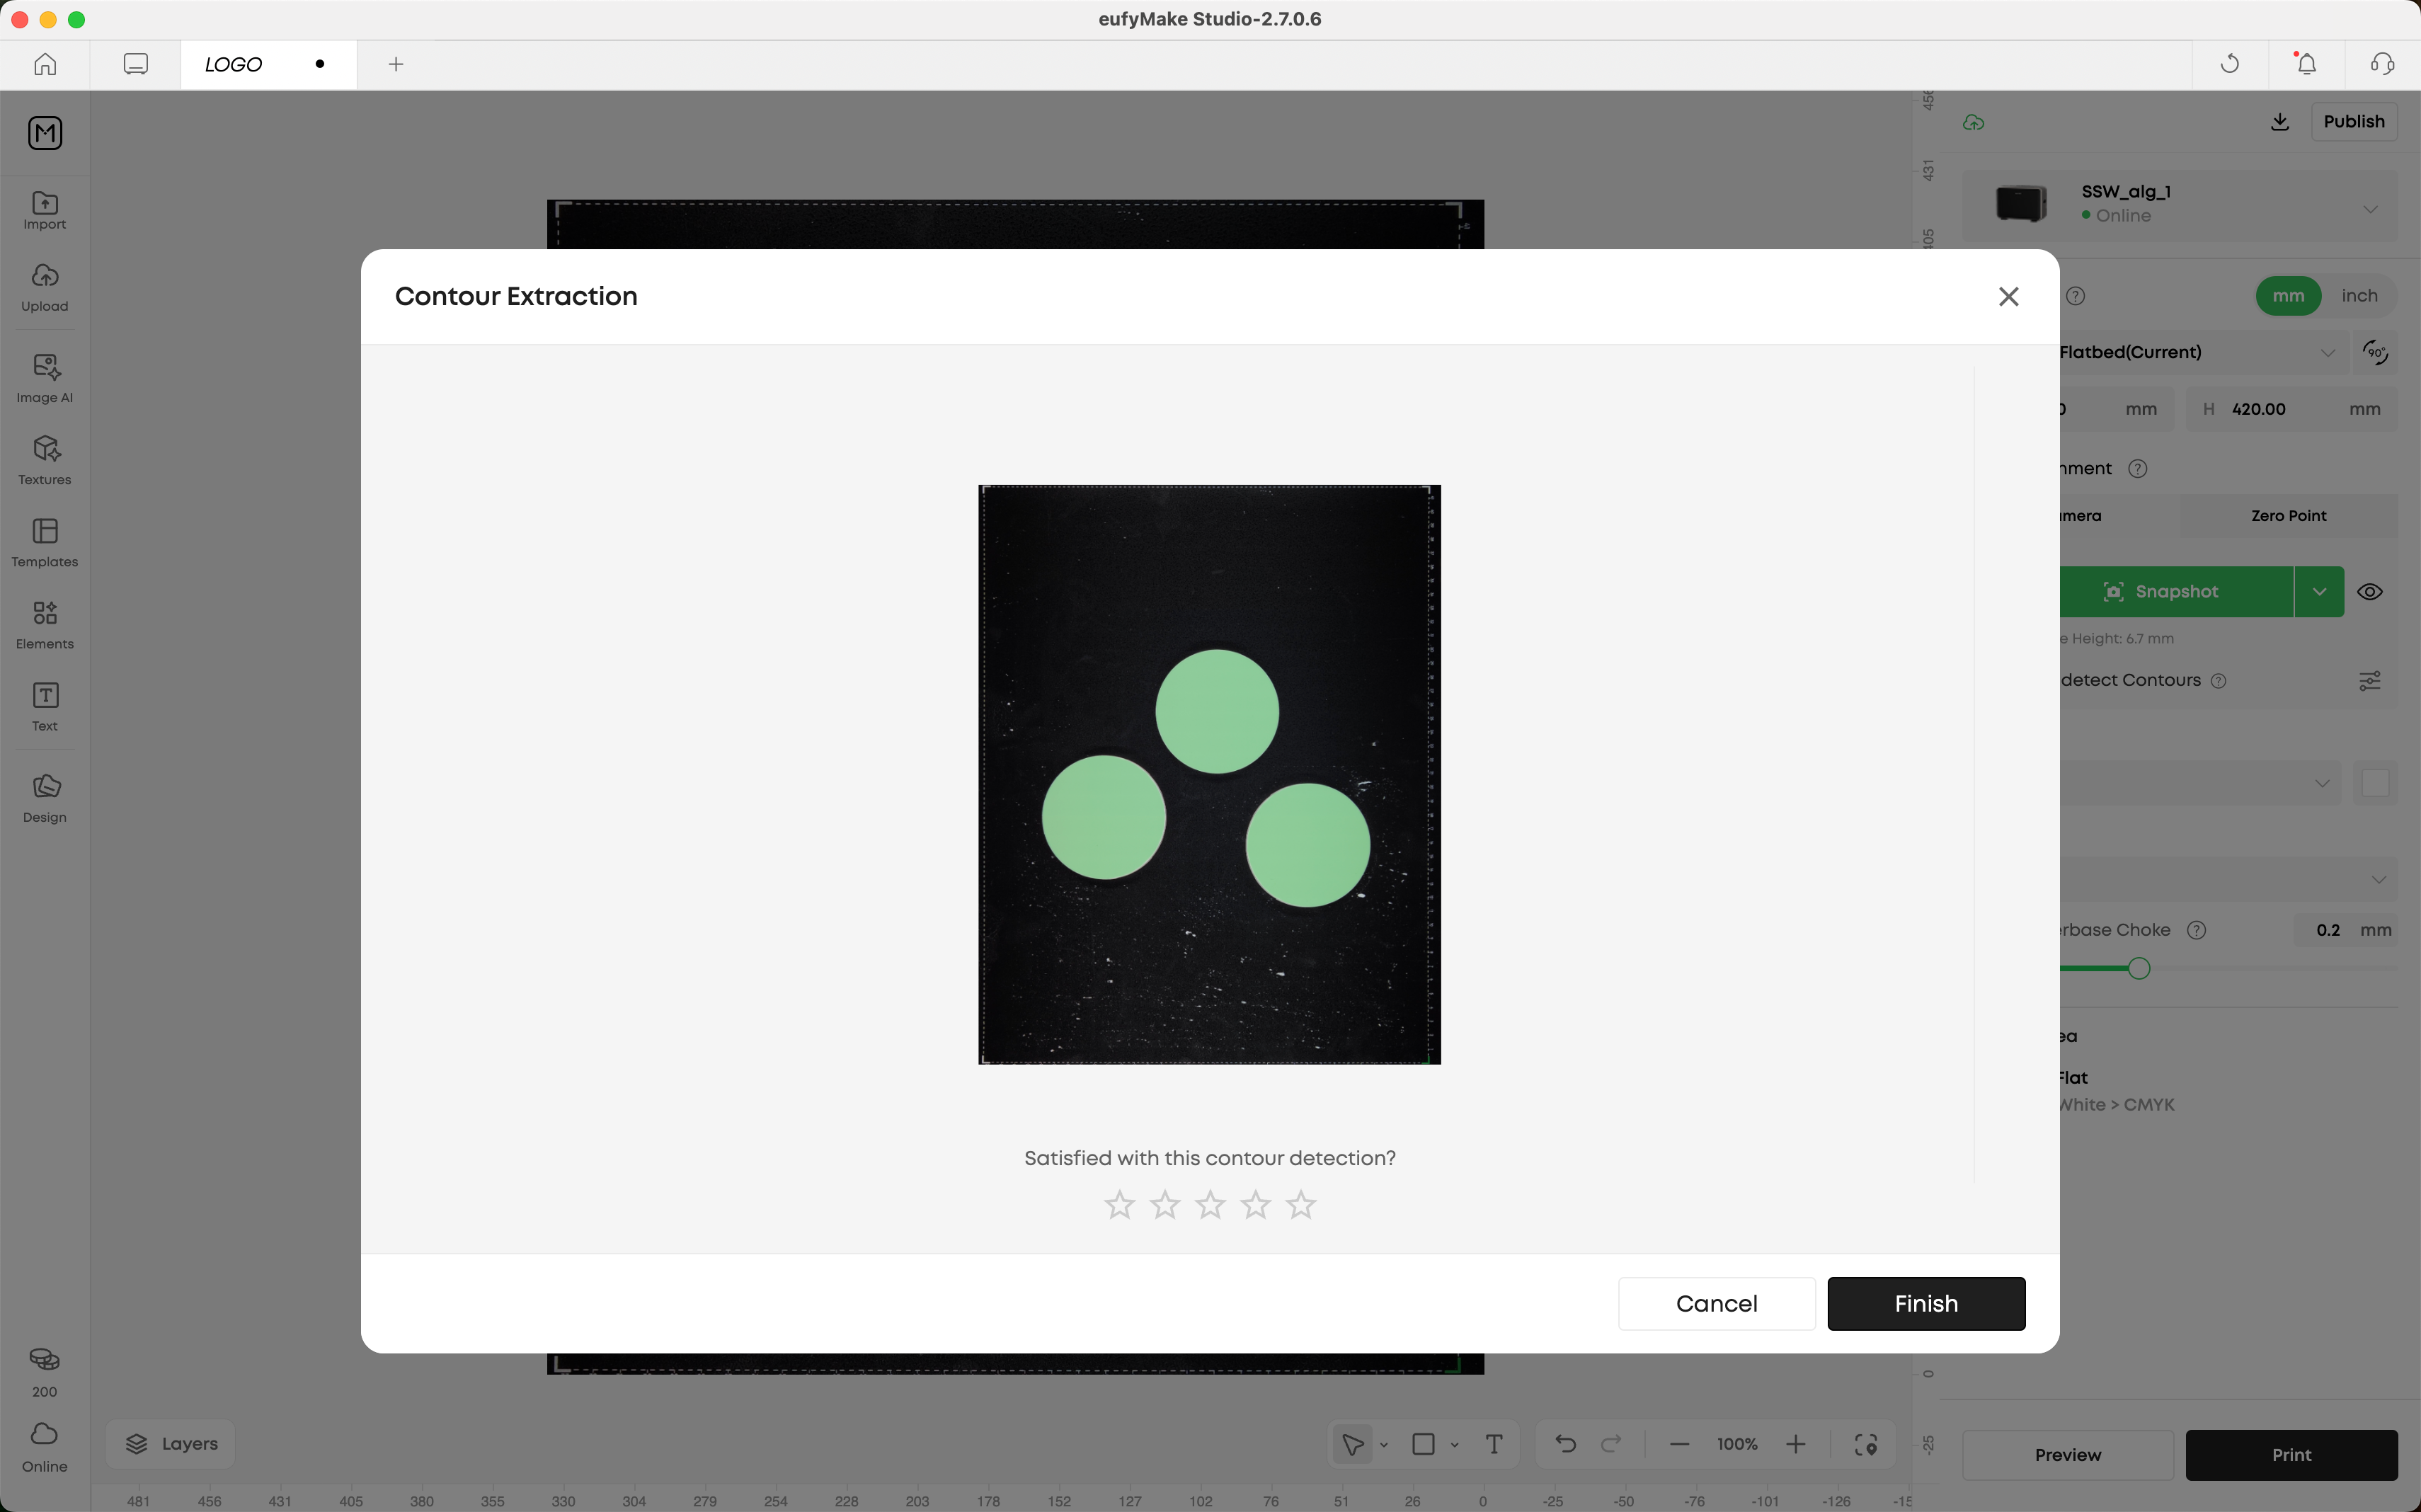
Note: A slight visual offset between the contour and the actual object edge may appear due to height differences. This is normal — the system has auto-corrected for print accuracy.
Step 4: Edit Contours (Optional)
Select a contour on the canvas and click "Edit" in the toolbar to open the contour editing panel.
Smart Selection:
- Left side (Original): Shows the original photo. Hover to highlight detected objects; click to add or remove contours.
- Right side (Preview): Shows the current selection preview in real time.
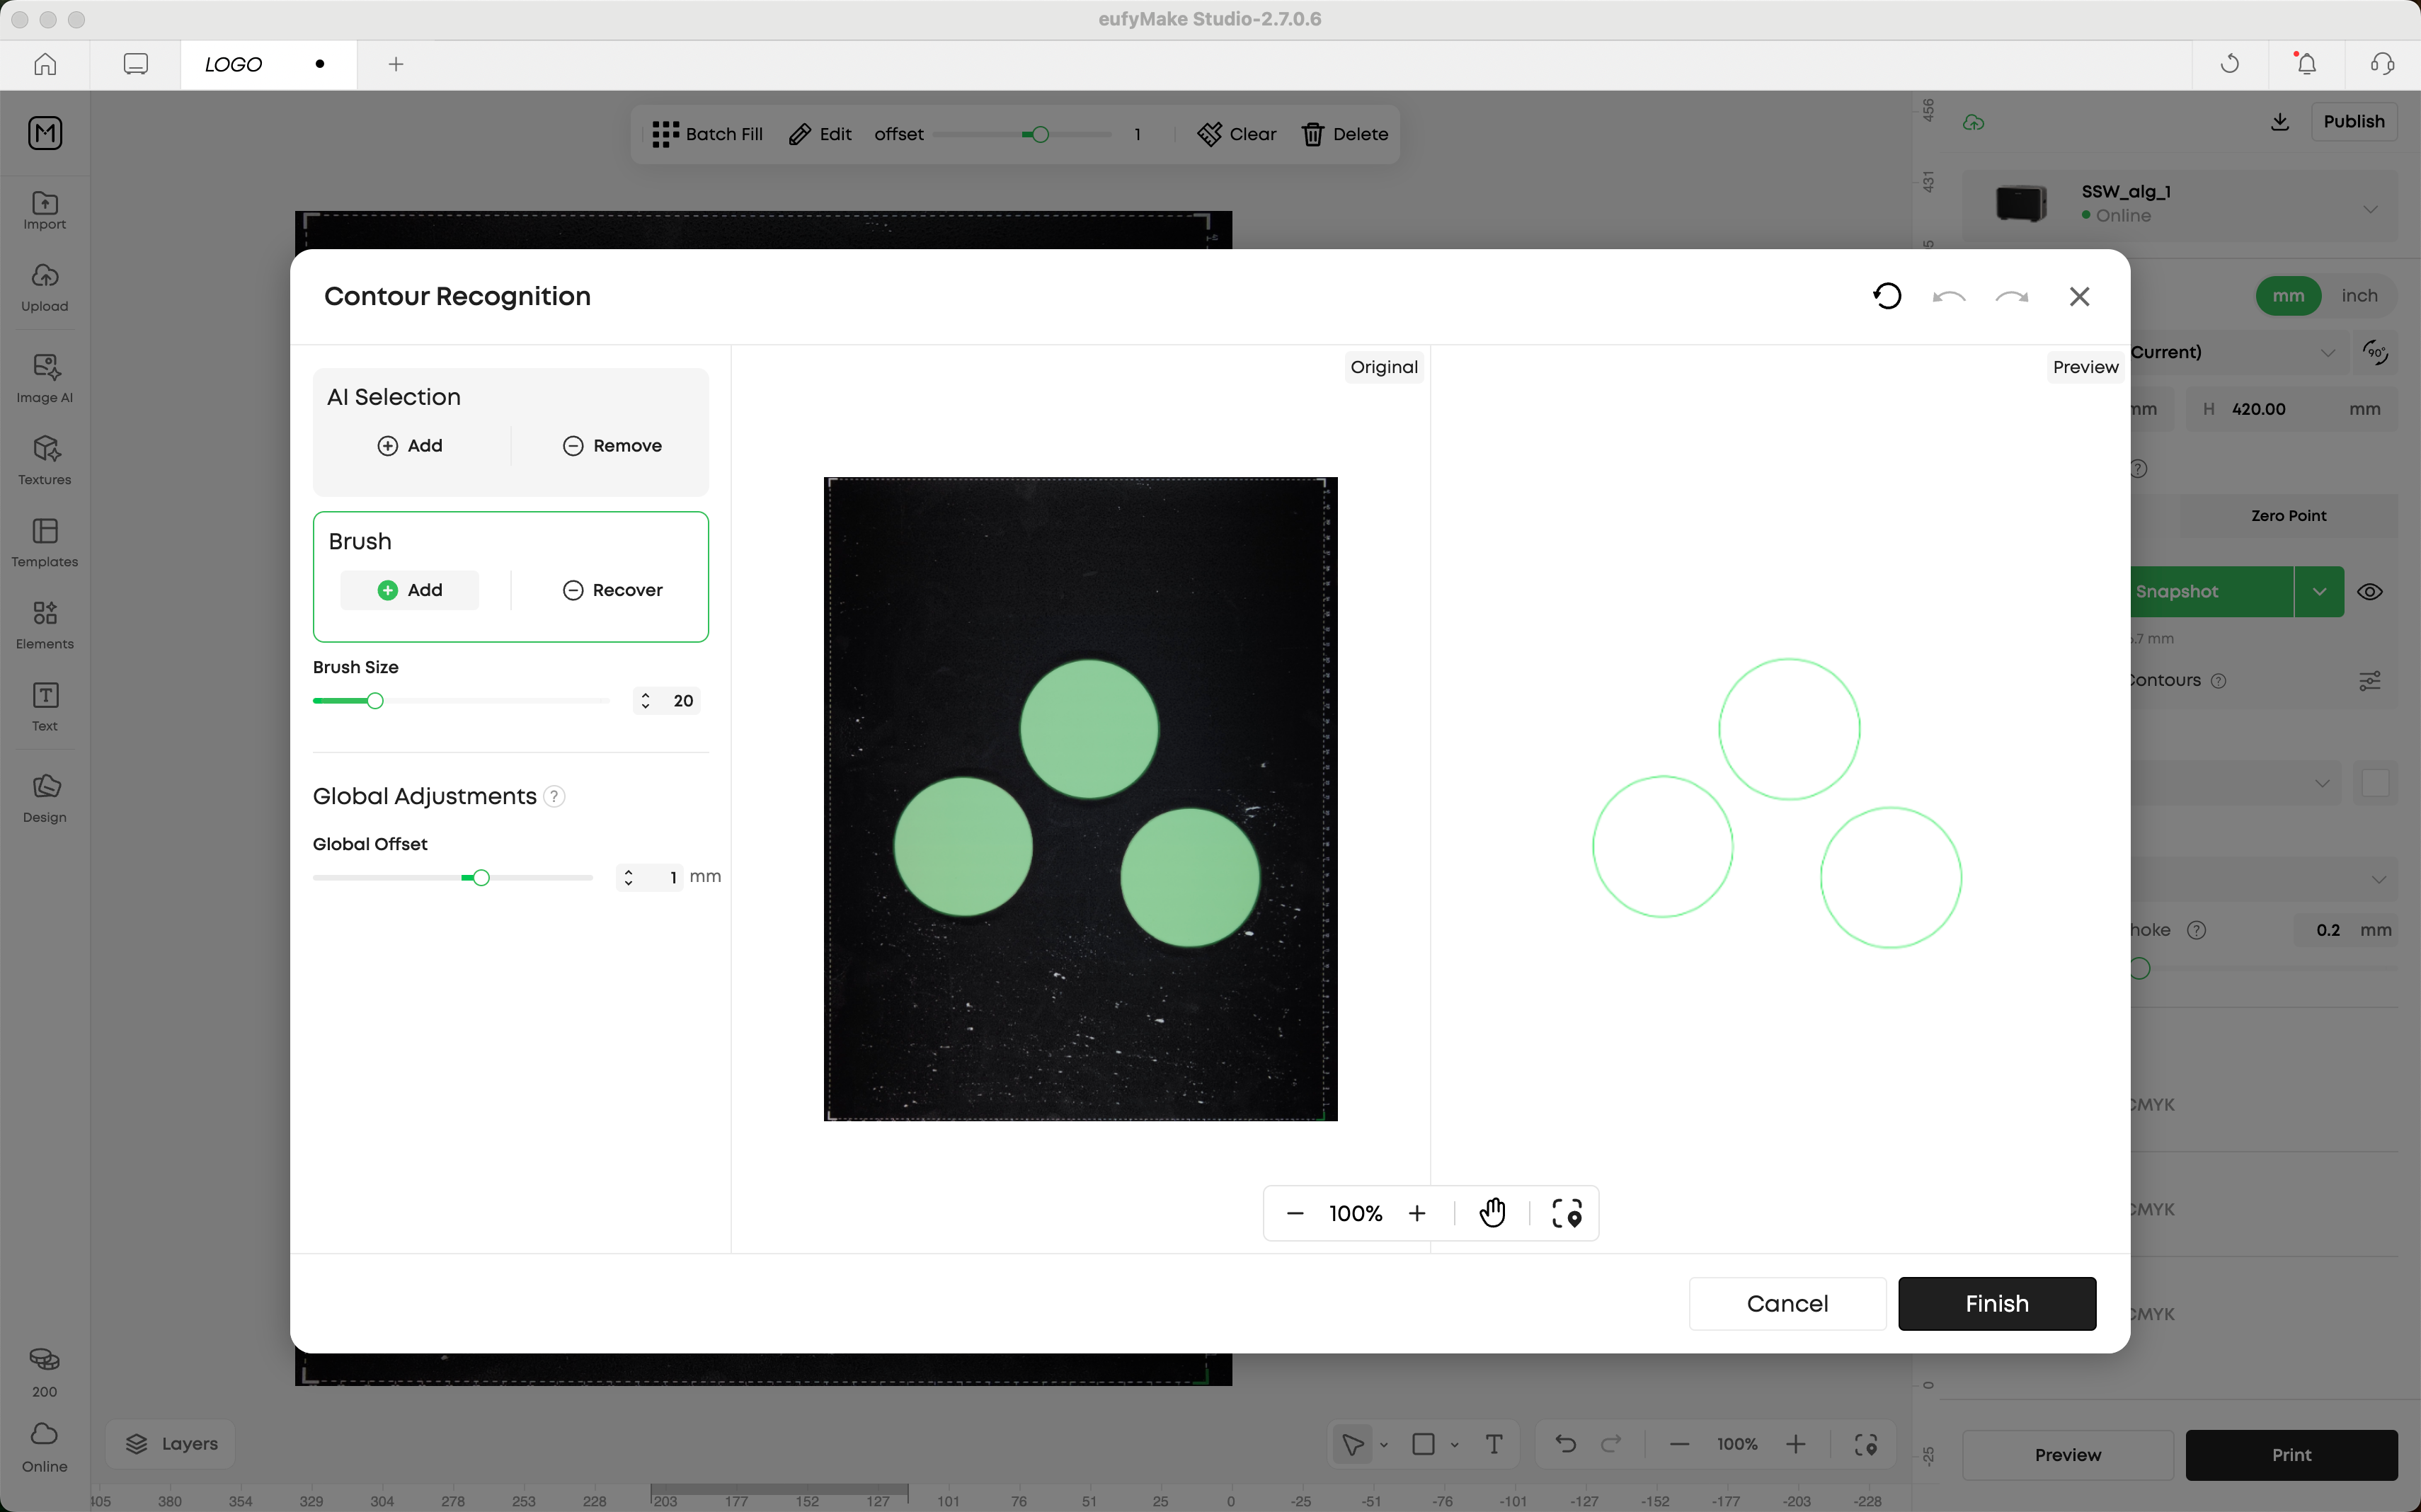
Brush Tool:
- Add: Draw to add new contour regions. Overlapping contours merge automatically.
- Remove: Draw to erase contour regions.
- Brush size: adjustable from 1px to 100px (default: 20px).
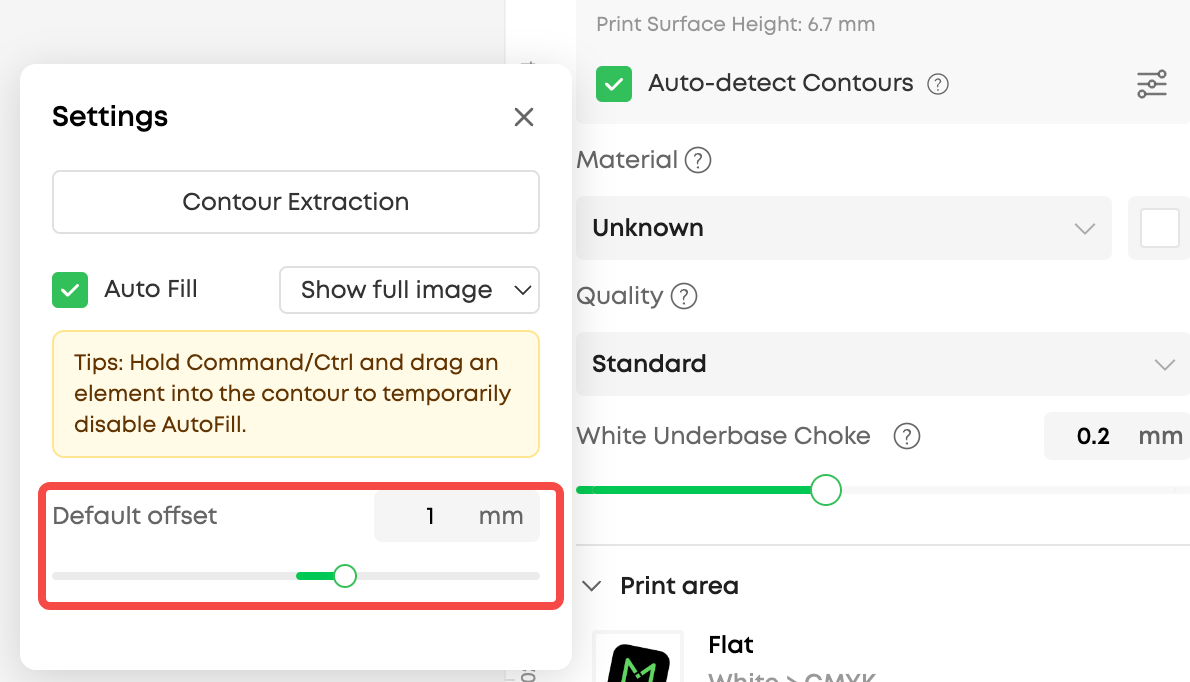
Offset Adjustment: - Range: -5mm to +5mm (default: 1mm outward)
- Positive values: expand the contour outward (slight ink overflow beyond edge)
- Negative values: shrink the contour inward (slight blank margin at edge)
When done editing, click "Finish" to import your edited contours to the canvas, or "Cancel" to discard changes.
Step 5: Auto-Fill a Design
Drag a design element from the asset panel into a contour on the canvas. The system automatically:
- Rotates the design to match the contour's orientation (using the minimum rotation angle)
- Scales the design proportionally to fit within the contour
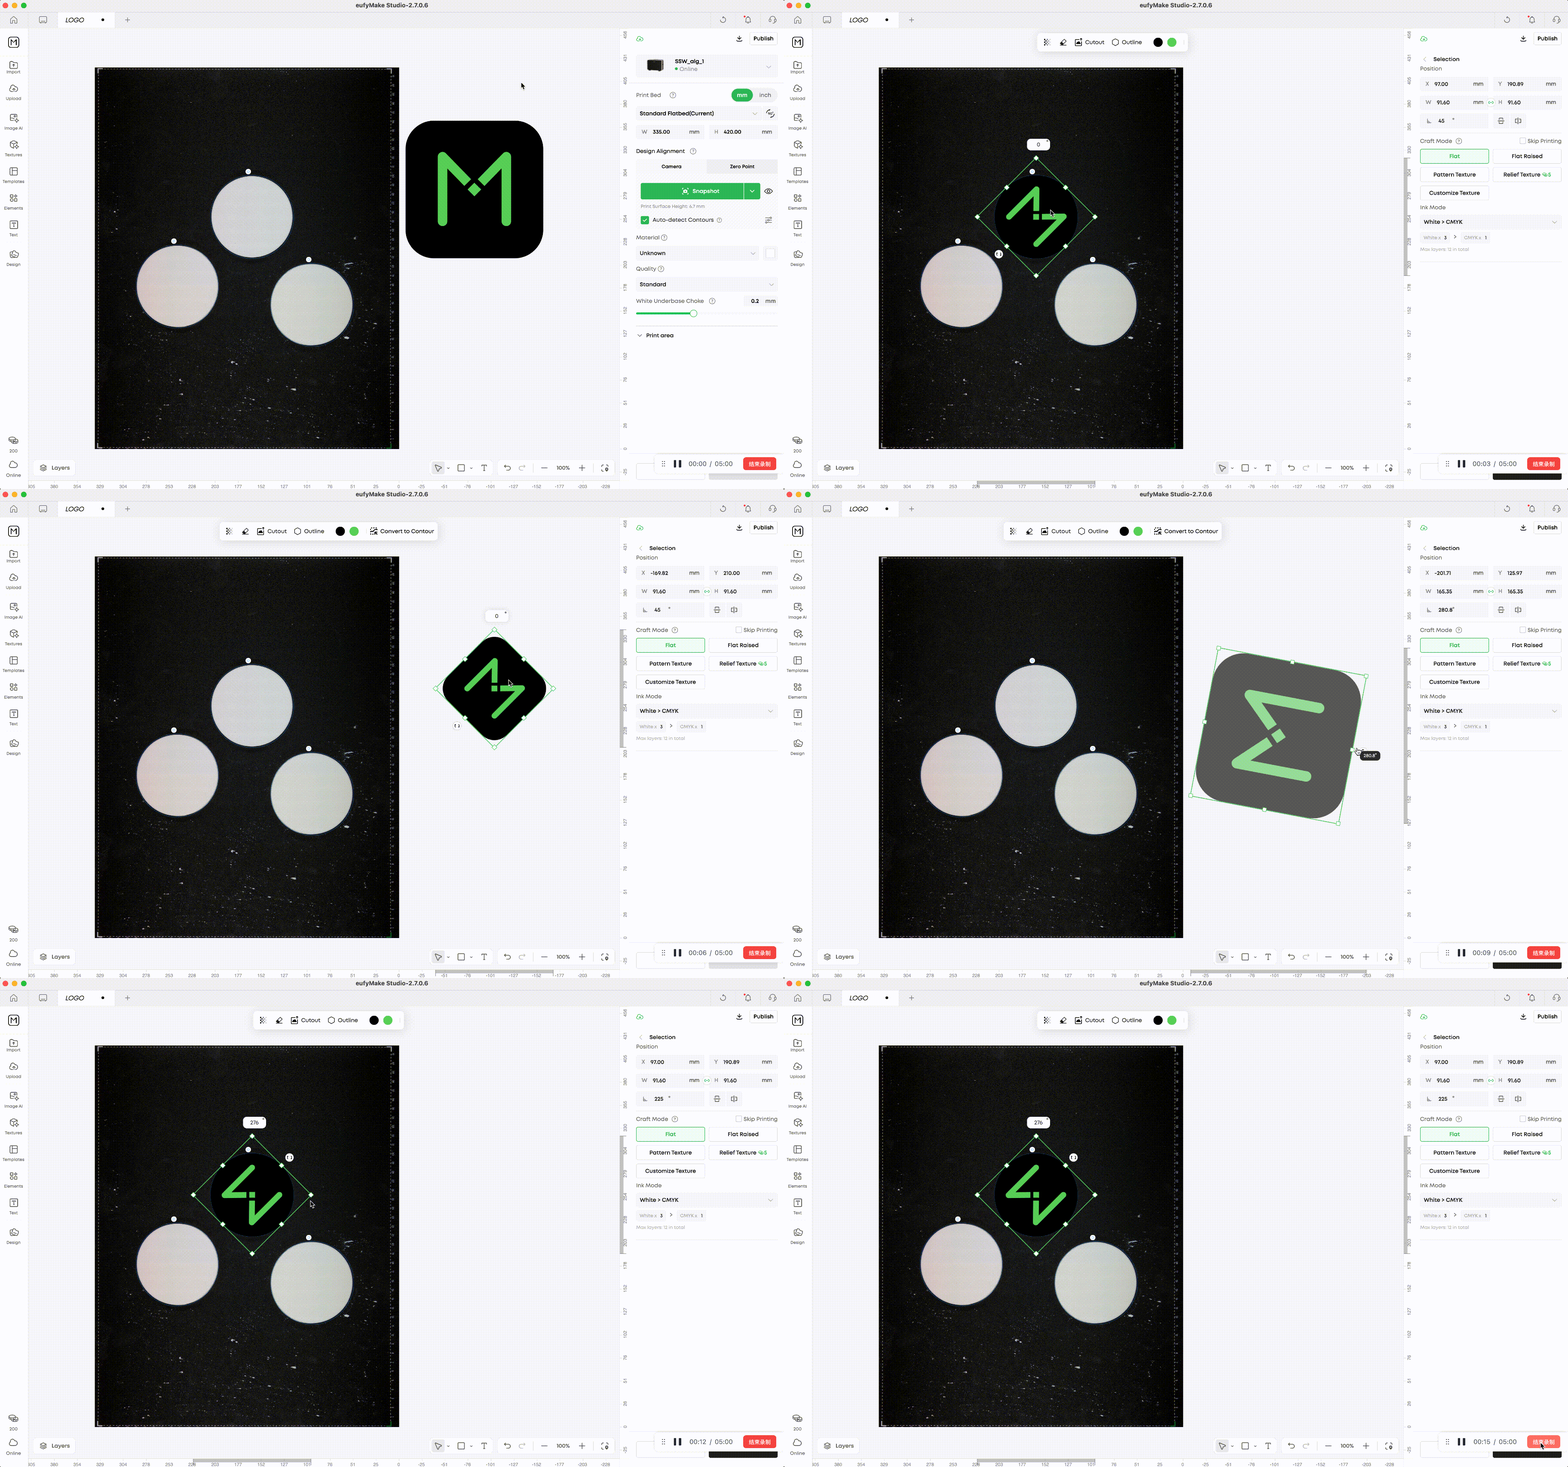
Auto-Fill Modes (accessible from the right panel):
- Show full image (default): Displays the entire design within the contour bounds.
- Fit to contour: Crops and fills the design to completely cover the contour area.
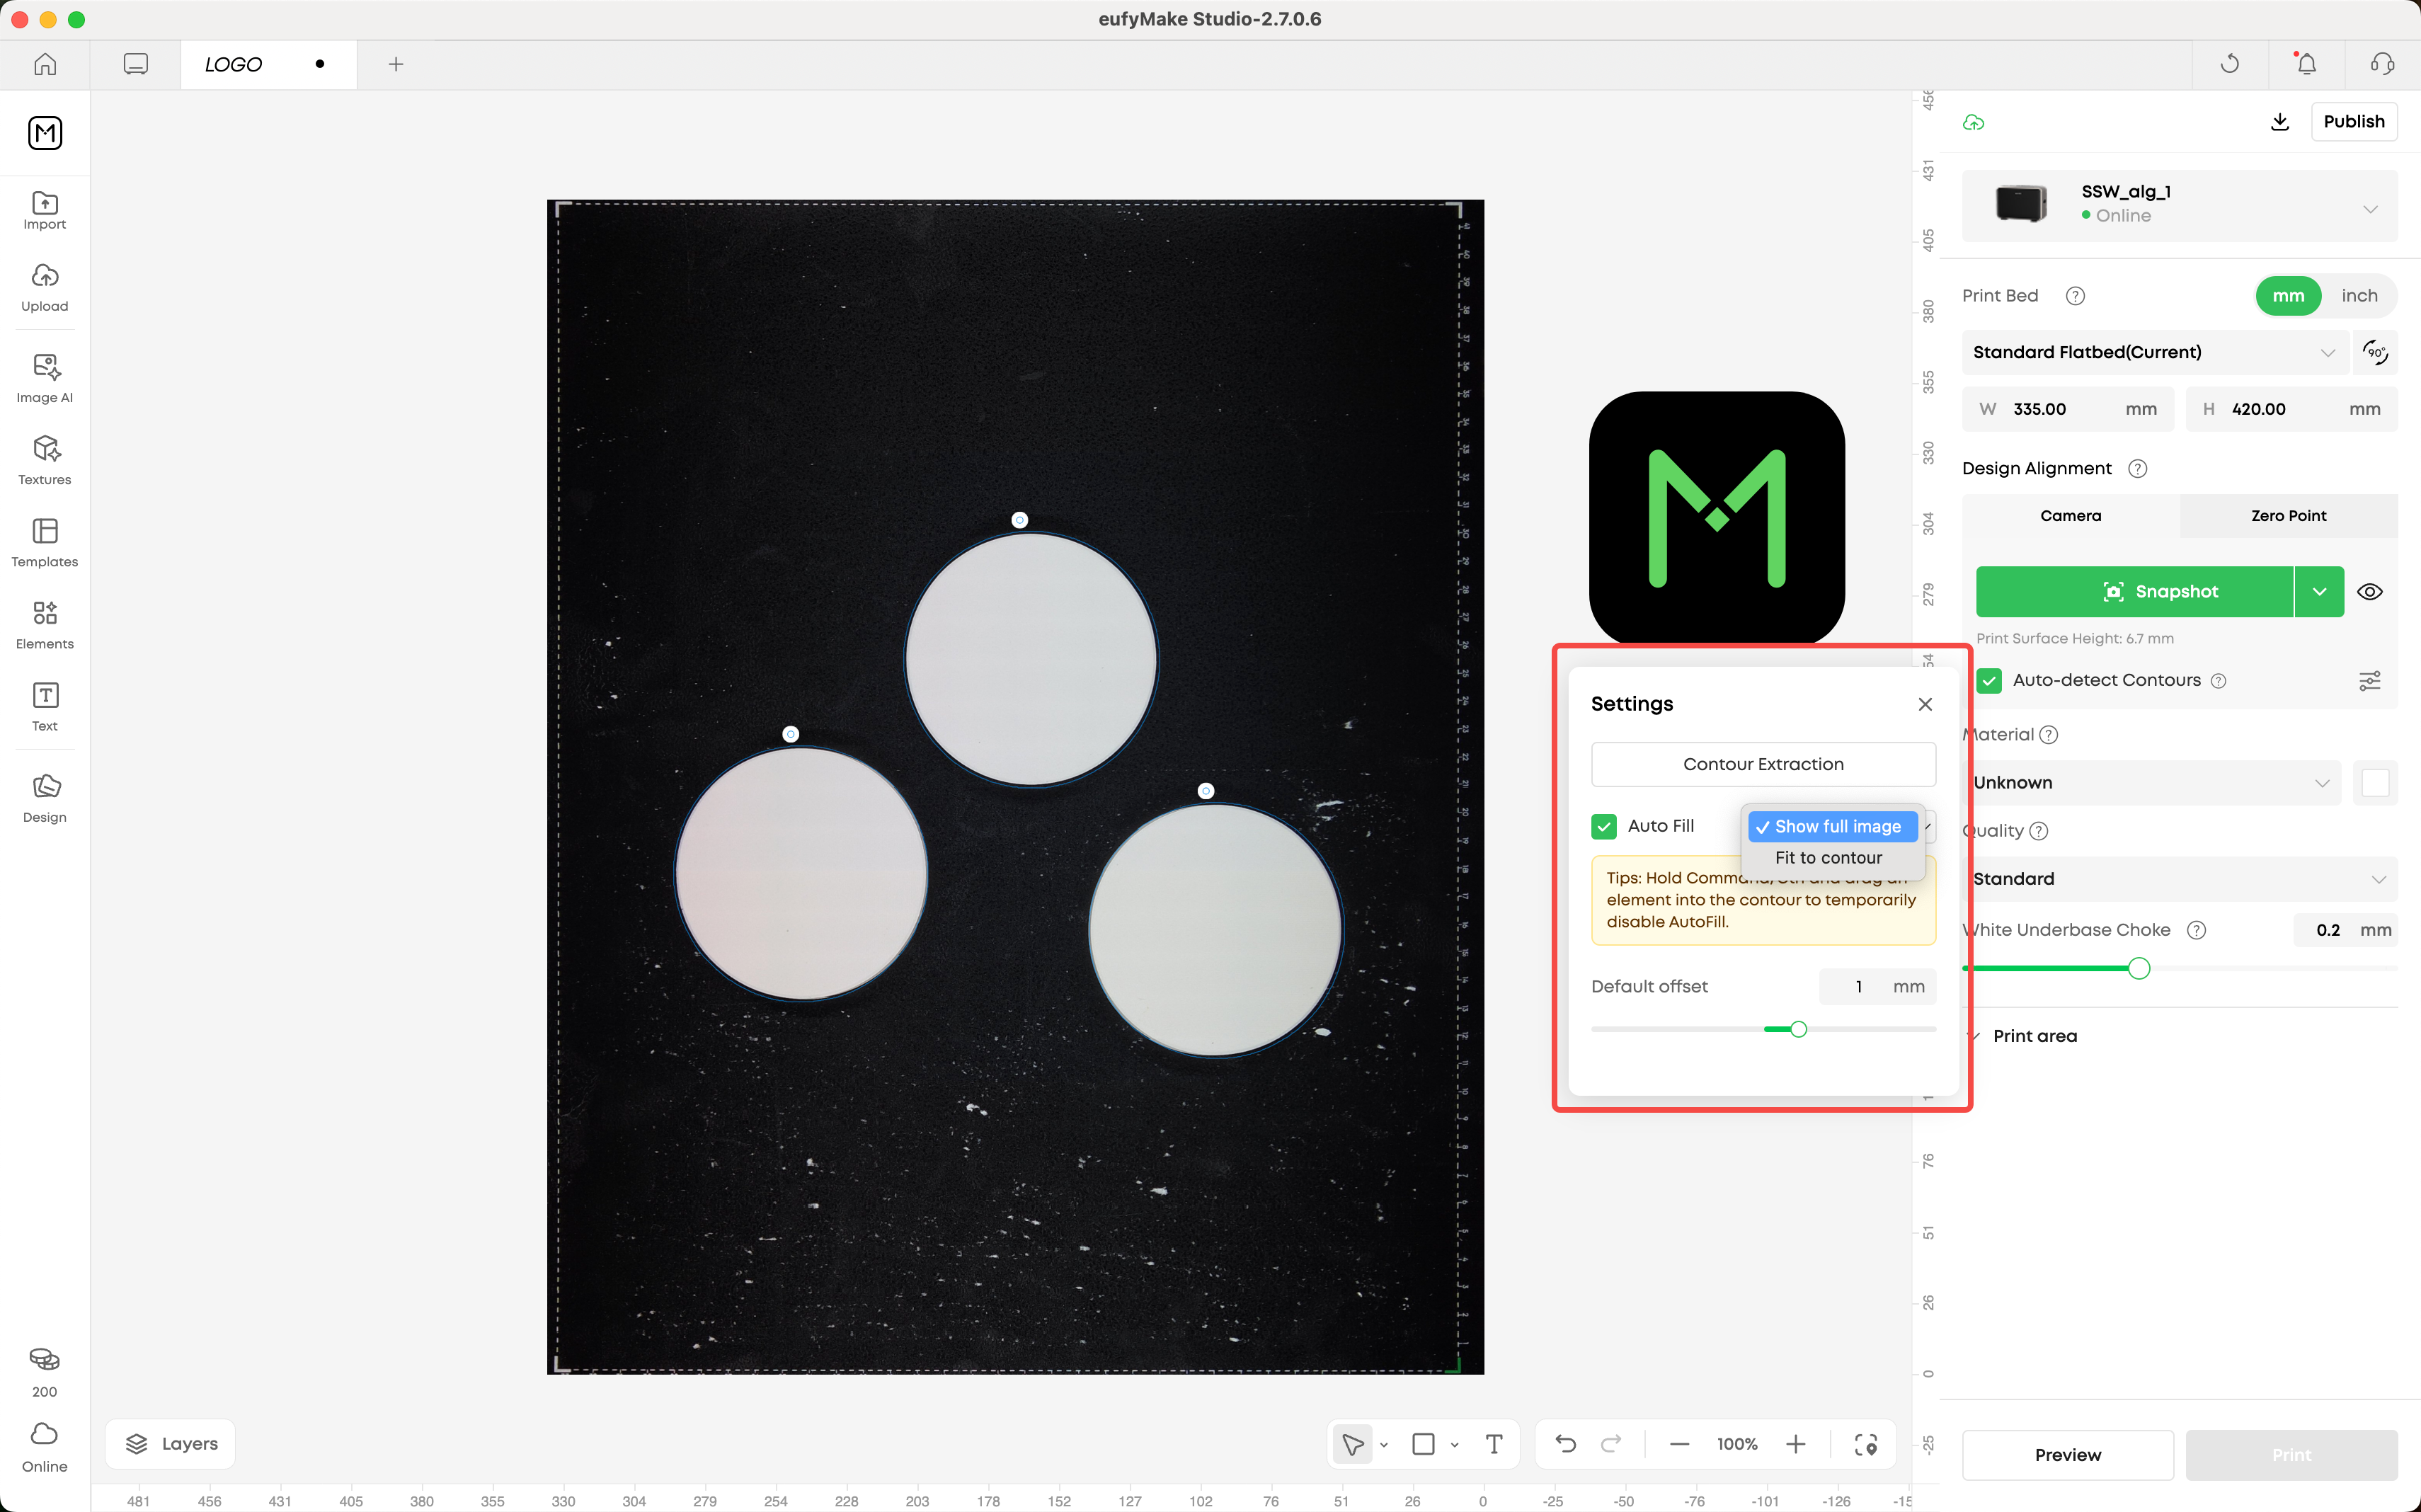
Tip: Hold Command (Mac) / Ctrl (Windows) while dragging an element into a contour to temporarily disable Auto-Fill.
Step 6: Batch Fill
Once you're happy with the design in one contour, use Batch Fill to apply it to all matching contours:
- Select the contour containing your design
- Click the "Batch Fill" button in the contour toolbar
- The system finds all contours with a similar shape and fills them with the same design — automatically adjusting rotation and scale for each
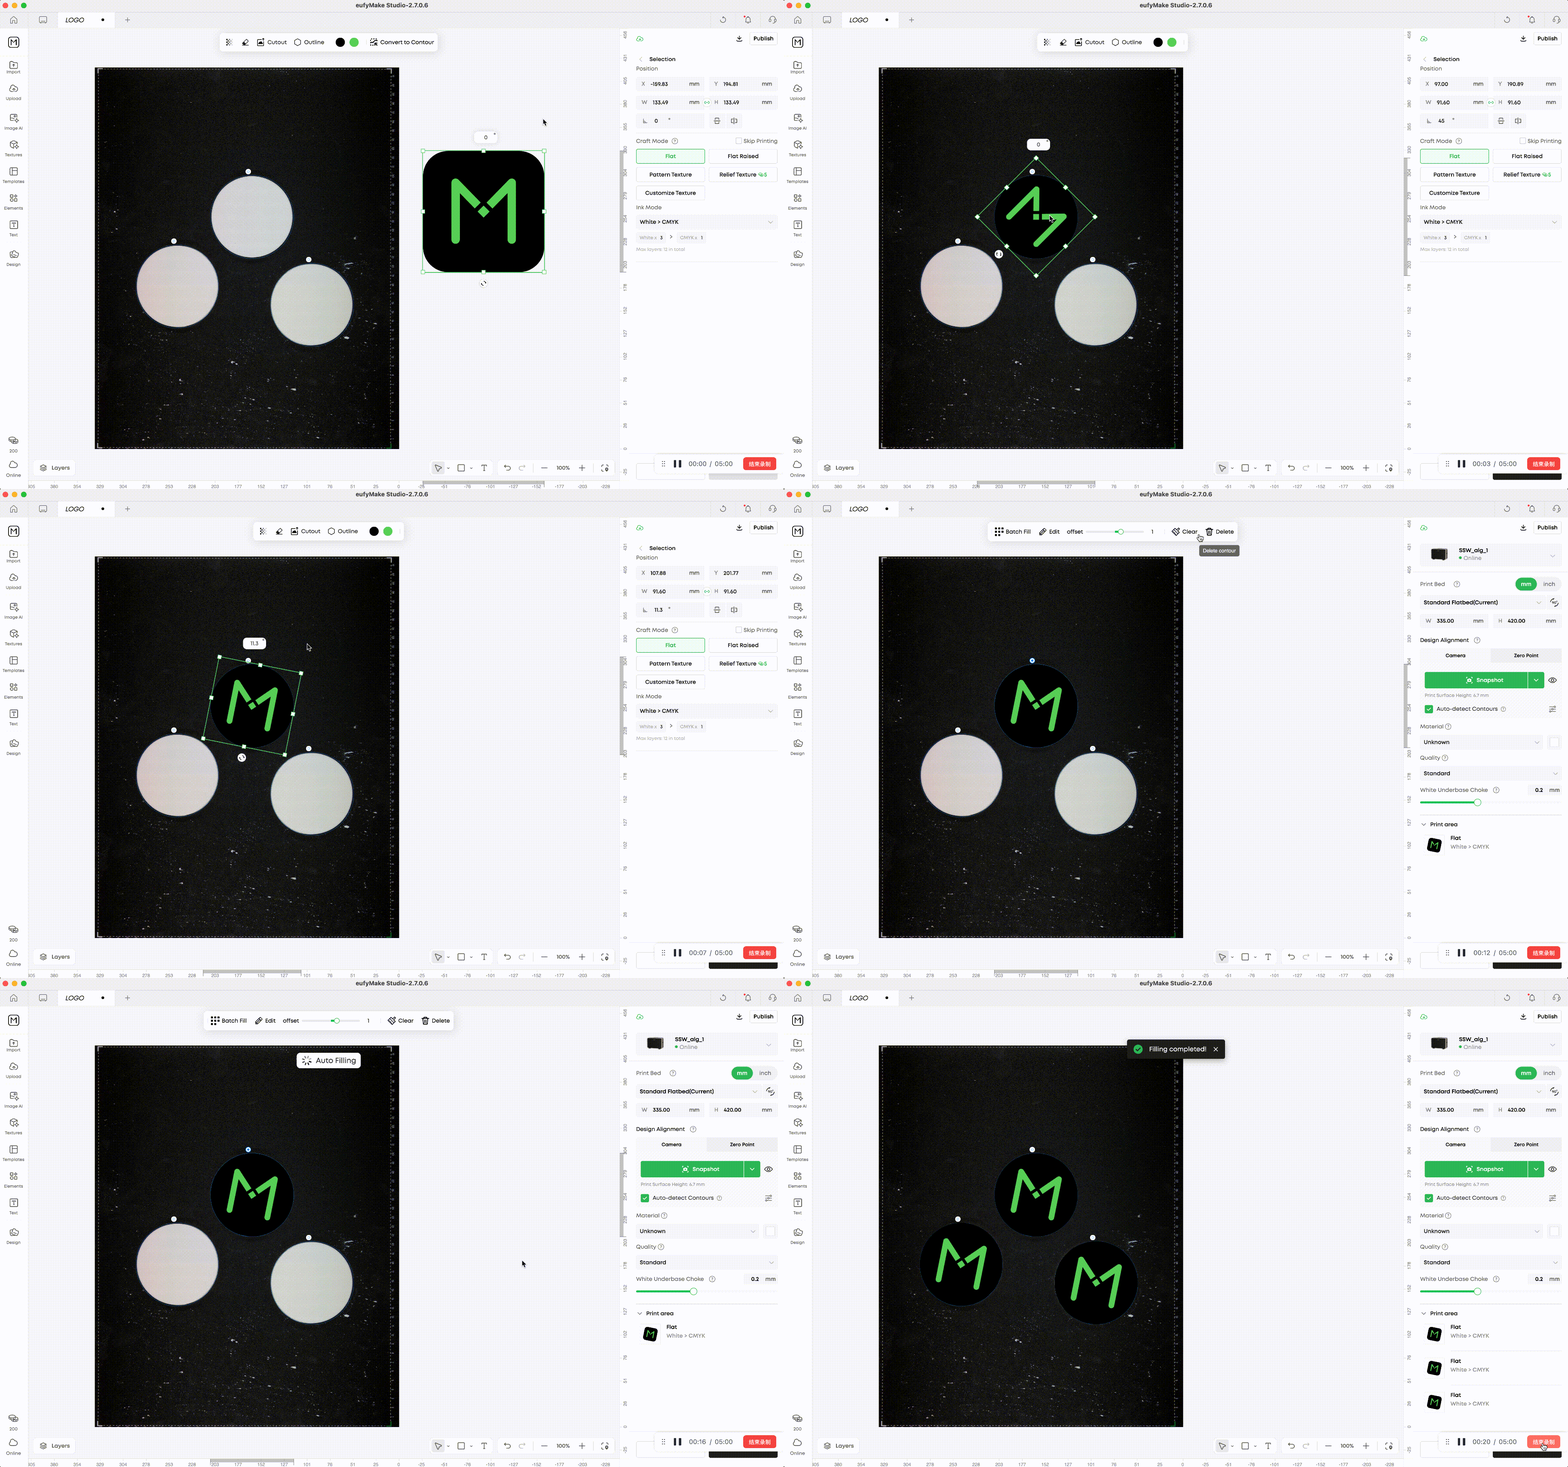
Note: If matching contours already contain designs, you'll be prompted before replacing them.
¶ Contour Toolbar
| Icon | Action | Description | Batch Fill | Batch Fill | Fill all matching contours with the current design | Edit | Edit contour | Open the contour editing panel | Offset | Offset | Adjust contour offset (-5mm to +5mm) | Clear | Clear inner design | Remove all design elements inside the contour | Delete | Delete contour | Remove the contour from the canvas |
|---|

Tip: You can also use the standard Delete key shortcut to delete a selected contour.
¶ Editing Designs Inside a Contour
- Click the contour to select it (look for the small dot indicator)
- Click on the design element inside to directly select and edit it
- Press Esc or click a blank area to exit the editing mode
Behavior notes:
- Elements inside the contour display normally; elements extending beyond the contour edge show at 50% opacity
- If you drag an element completely outside the contour (no overlap), it will detach from the contour when you release the mouse
¶ Settings
Auto-detect Contours: Toggle in the right panel. When enabled, contours are automatically recognized after each photo. This preference carries over to new projects.
Auto-Fill: Toggle in the right panel next to "Contour Recognition". Two modes available: Show full image / Fit to contour.
Default Offset: Set a default offset value for all newly recognized contours. Range: -5mm to +5mm (default: 1mm).
¶ FAQ
Q: Why does the contour not perfectly match the object edge?
A: A slight visual offset may occur due to the object's height above the printing platform. This is a normal optical effect — the system automatically corrects for this during printing, so your print result will be accurate.
Q: Can I re-run contour recognition without retaking the photo?
A: Yes. Simply click the Contour Recognition button again. If contours already exist on the canvas, you'll be prompted whether to clear existing contours and re-recognize.
Q: What if Batch Fill doesn't match some contours?
A: Batch Fill only matches contours with similar shapes above a confidence threshold. You can manually fill unmatched contours by dragging designs into them individually.
Q: Is this feature available on the mobile app?
A: Yes. The app supports most contour features, including contour recognition, auto-fill, batch fill, and offset adjustment. The only exception is the contour editing panel (smart selection, brush tool, and other fine-editing features), which is currently available only on the PC client.