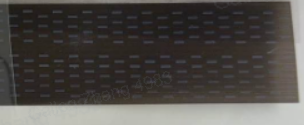
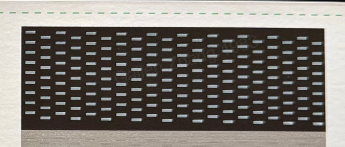
Refer to this:
¶ Pattern color missing or color abnormal
Fault Description
Improper operations - such as failing to clean the print head for a long period, scratching the print head surface due to frequent failures or incorrect handling, or using uncertified third-party inks - may cause damage to the print head.
If you have confirmed with the support team that the print head is damaged and have received a replacement, follow the steps below to replace it.
¶ Print Head Overview
The print head module, including the ink print head, ink storage components (ink cartridges), and ink path control components, is the key assembly that enables multi-color printing and switching between cleaning/moisturizing functions.
¶ Required Tools:
Disposable Nitrile Gloves
2.5mm Hex Key
Lint free cloth
¶ Safety Precautions
Wear gloves before starting. Residual ink may remain on the print head; avoid skin contact.
Work in a well-ventilated area.
When instructed to work directly on the print head, turn off the power. A brief shutdown will not affect the ink-path system.
When removing or installing the carriage flip cover, apply steady, moderate force to avoid damaging the clips.
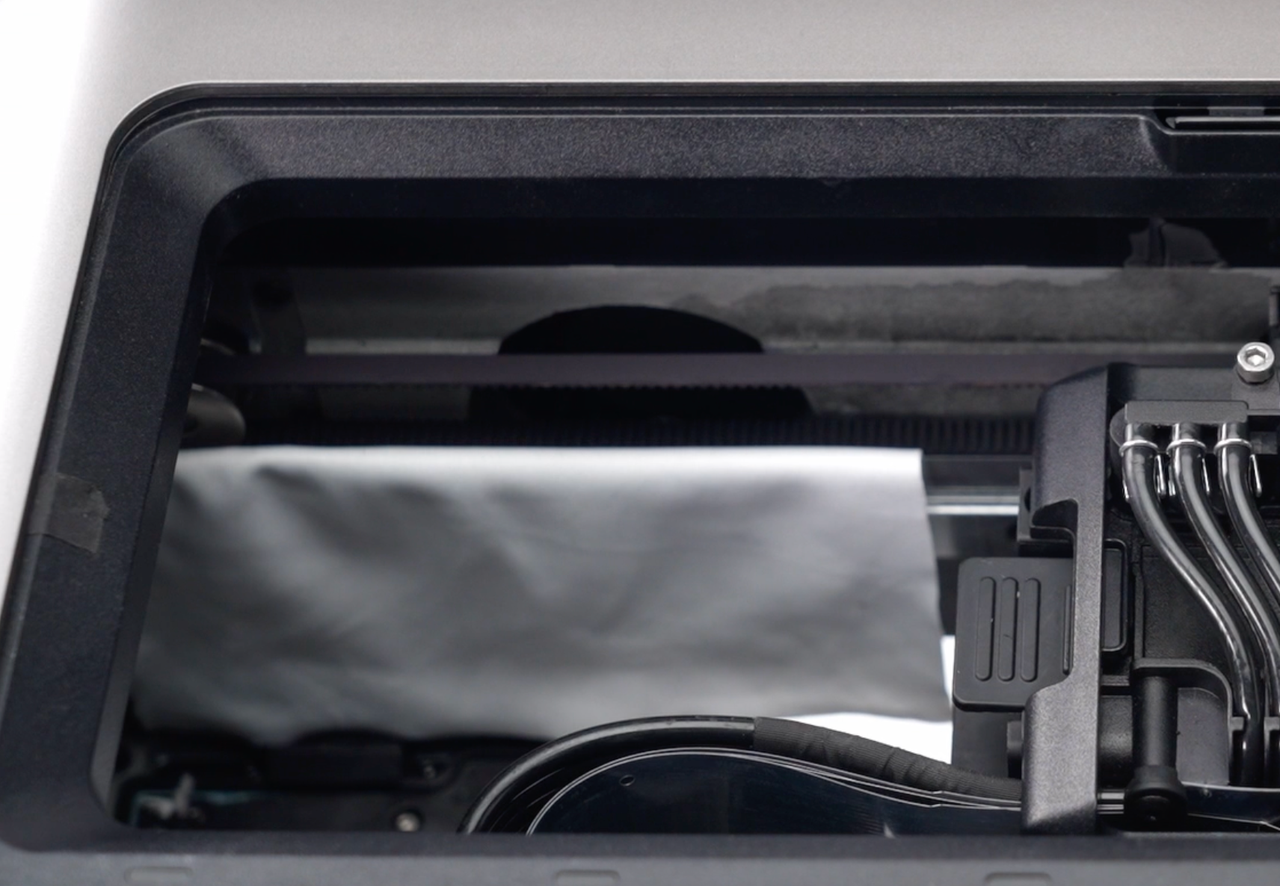
When removing the print head, immediately protect the encoder strip to prevent UV ink contamination, which can affect print accuracy.
Do not touch or press against the printing surface at the bottom of the print head module.
Before removing or installing the print head, lift the ink-tube docking assembly fully to its highest position; otherwise, the print head may jam.
Before installing the new print head, ensure the mounting area is clear of debris and verify that the ink-tube docking assembly remains fully raised.
¶ Replacement Steps
Please refer to: https://www.youtube.com/watch?v=ldrCY0wU97M&list=PL_aDMkCH-68yWfXs3bCObg95QSWqcr1Y3&index=11
¶ Update the App and Firmware
Before beginning, update the eufyMake App and the printer firmware to the latest versions.
Please refer to: https://support.eufymake.com/s/article/Introduction-to-Firmware-Upgrade
¶ Enter Print Head Replacement Mode
Open the eufyMake App.
Go to Device → Component Lifespan → Print Head.
Tap Replace, then Start to Replace.
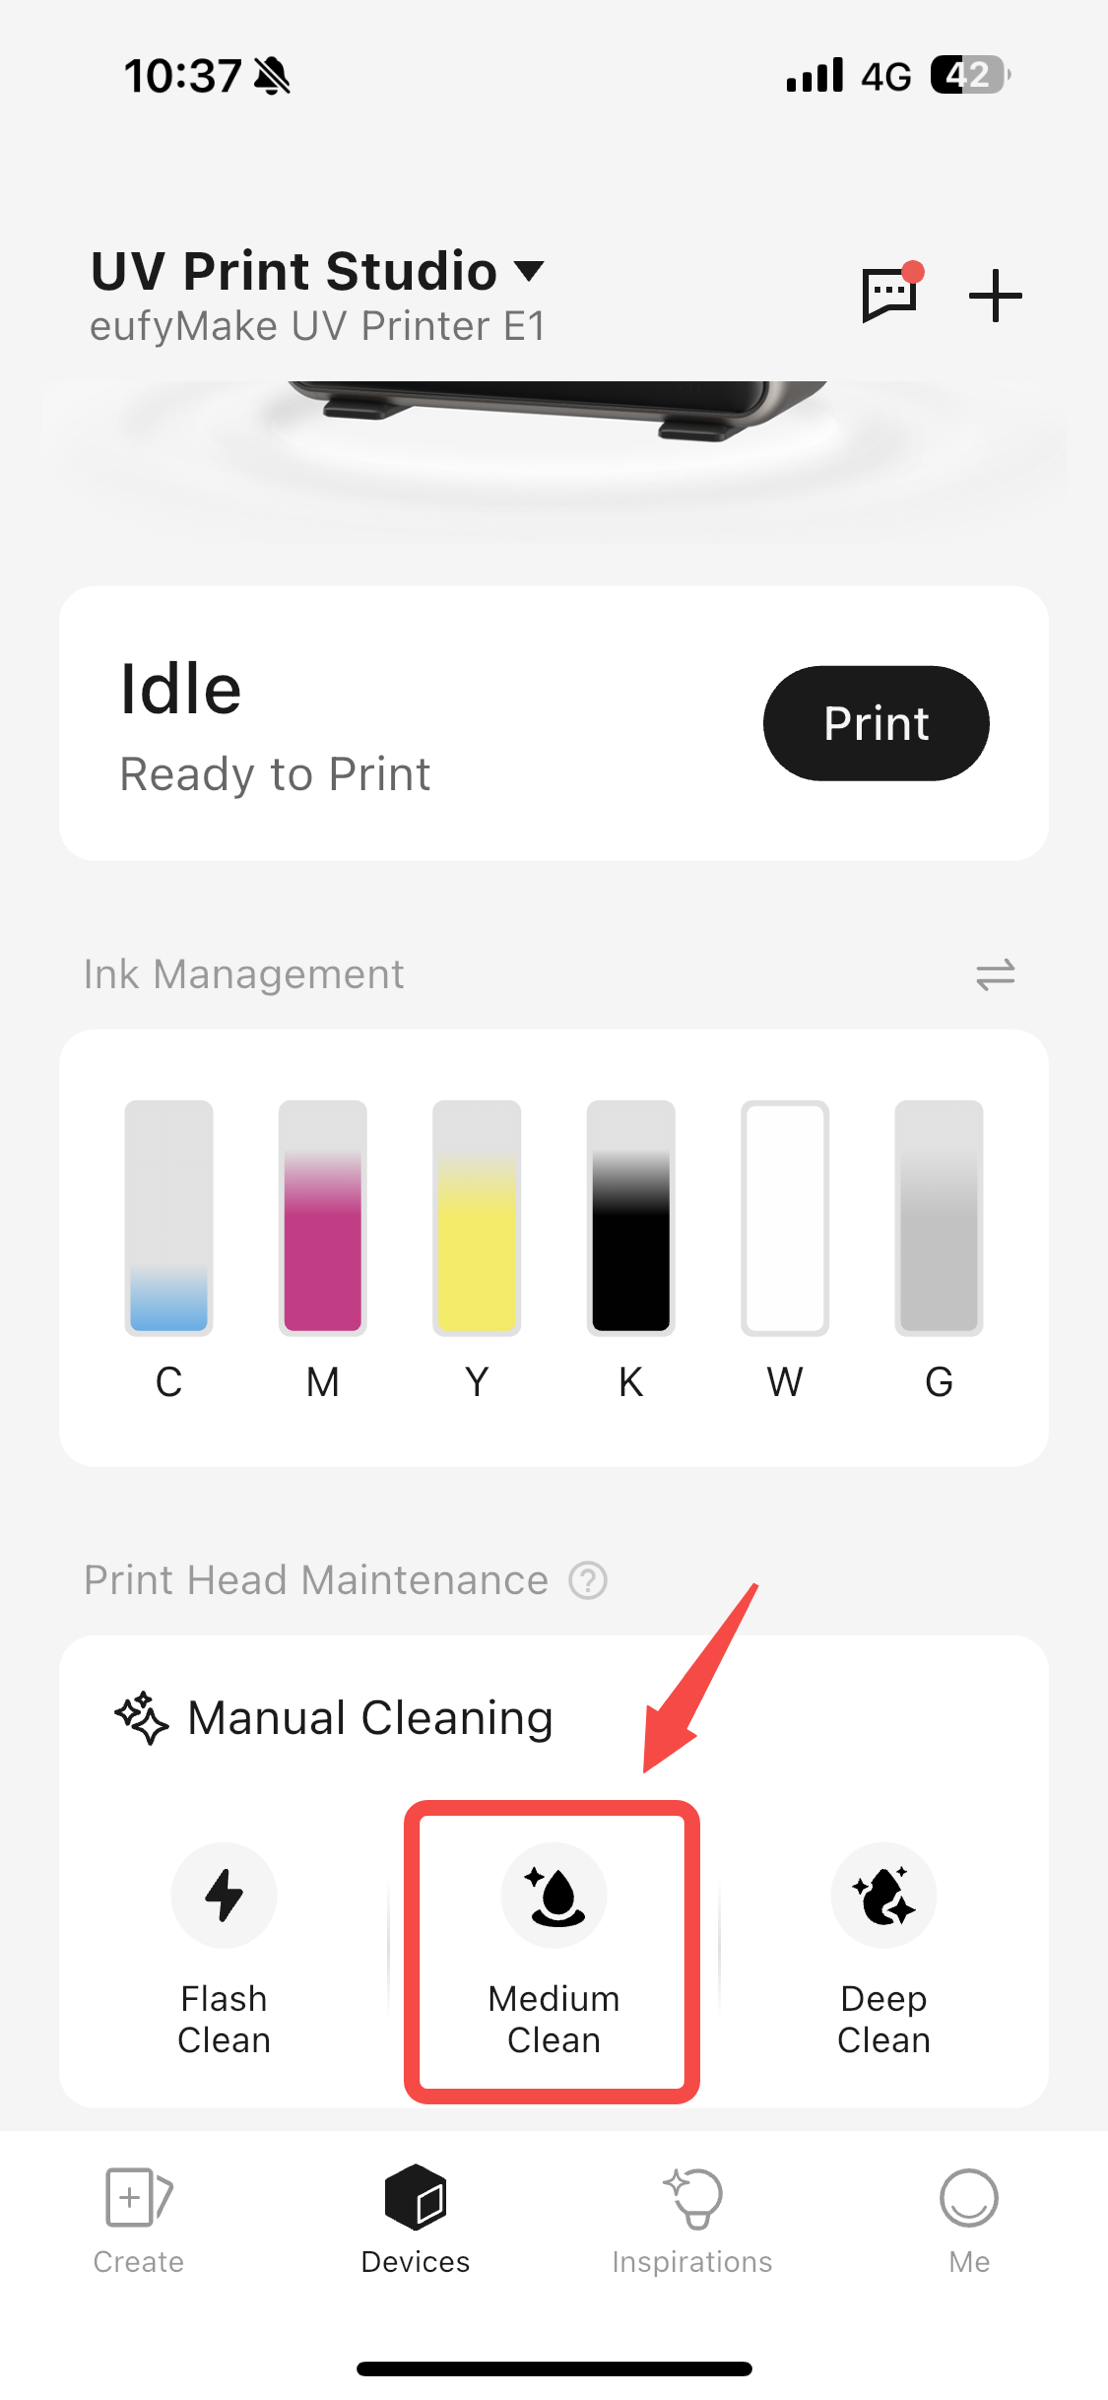
Follow the on-screen prompts throughout the process.
¶ Place the Printer Into Moisturizing Mode
Before replacing the print head, the print head should be in moisturizing status.
Tap Got It, Start Moisturizing.
Do not turn off the printer or remove any ink or cleaning cartridges during this step.
¶ Wait for the Print Head to Move, Then Remove the Top Panel
After moisturizing completes, tap Continue.
The printer will move the print head to the center.
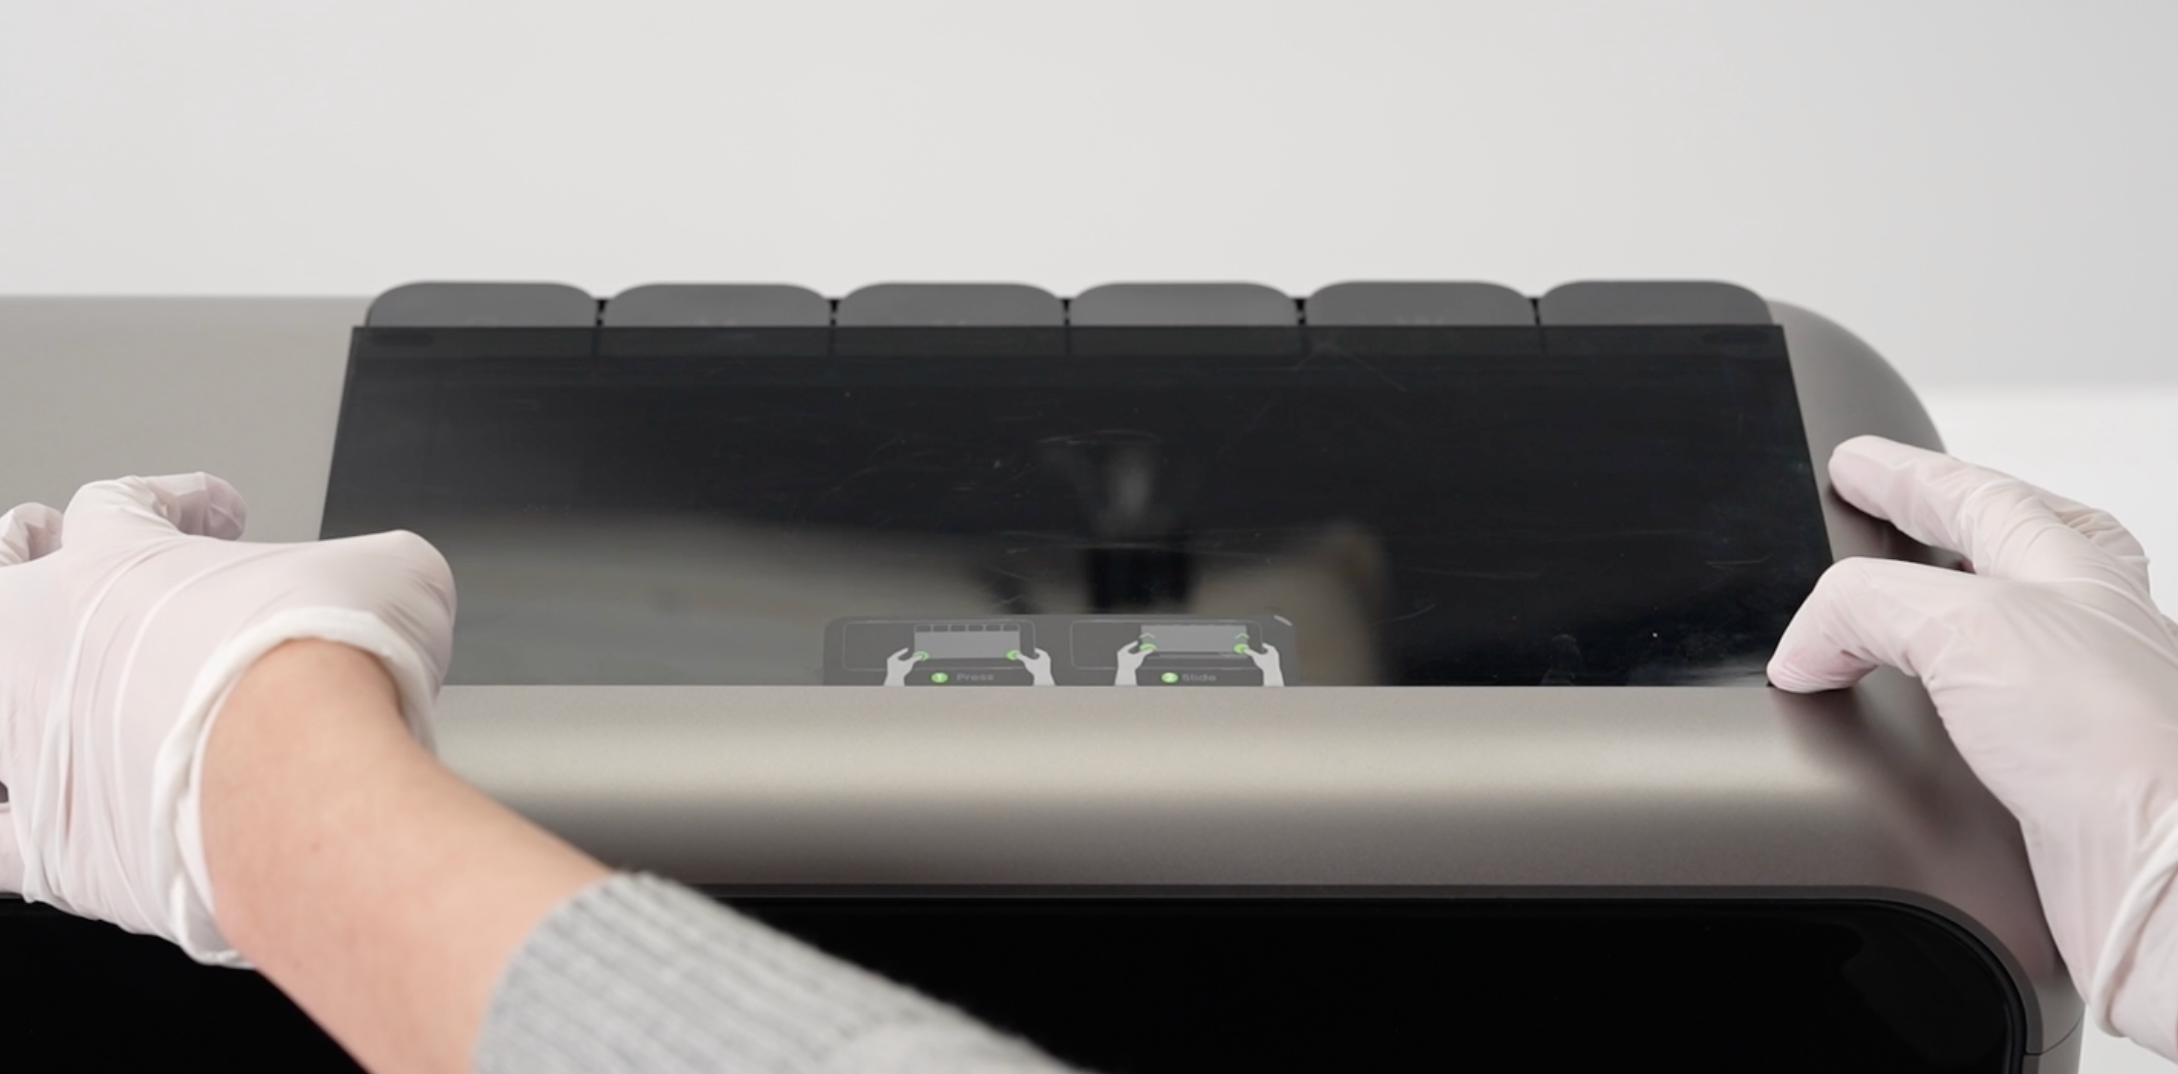
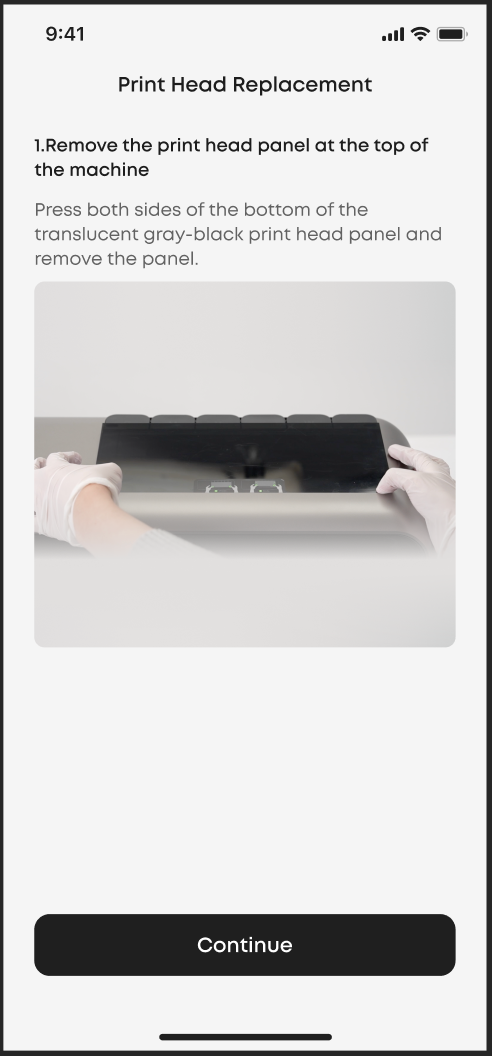
To remove the top print-head panel:
Press firmly on both lower sides of the translucent cover.
Lift the panel off.
Tap Continue.
¶ Open the Carriage Flip Cover
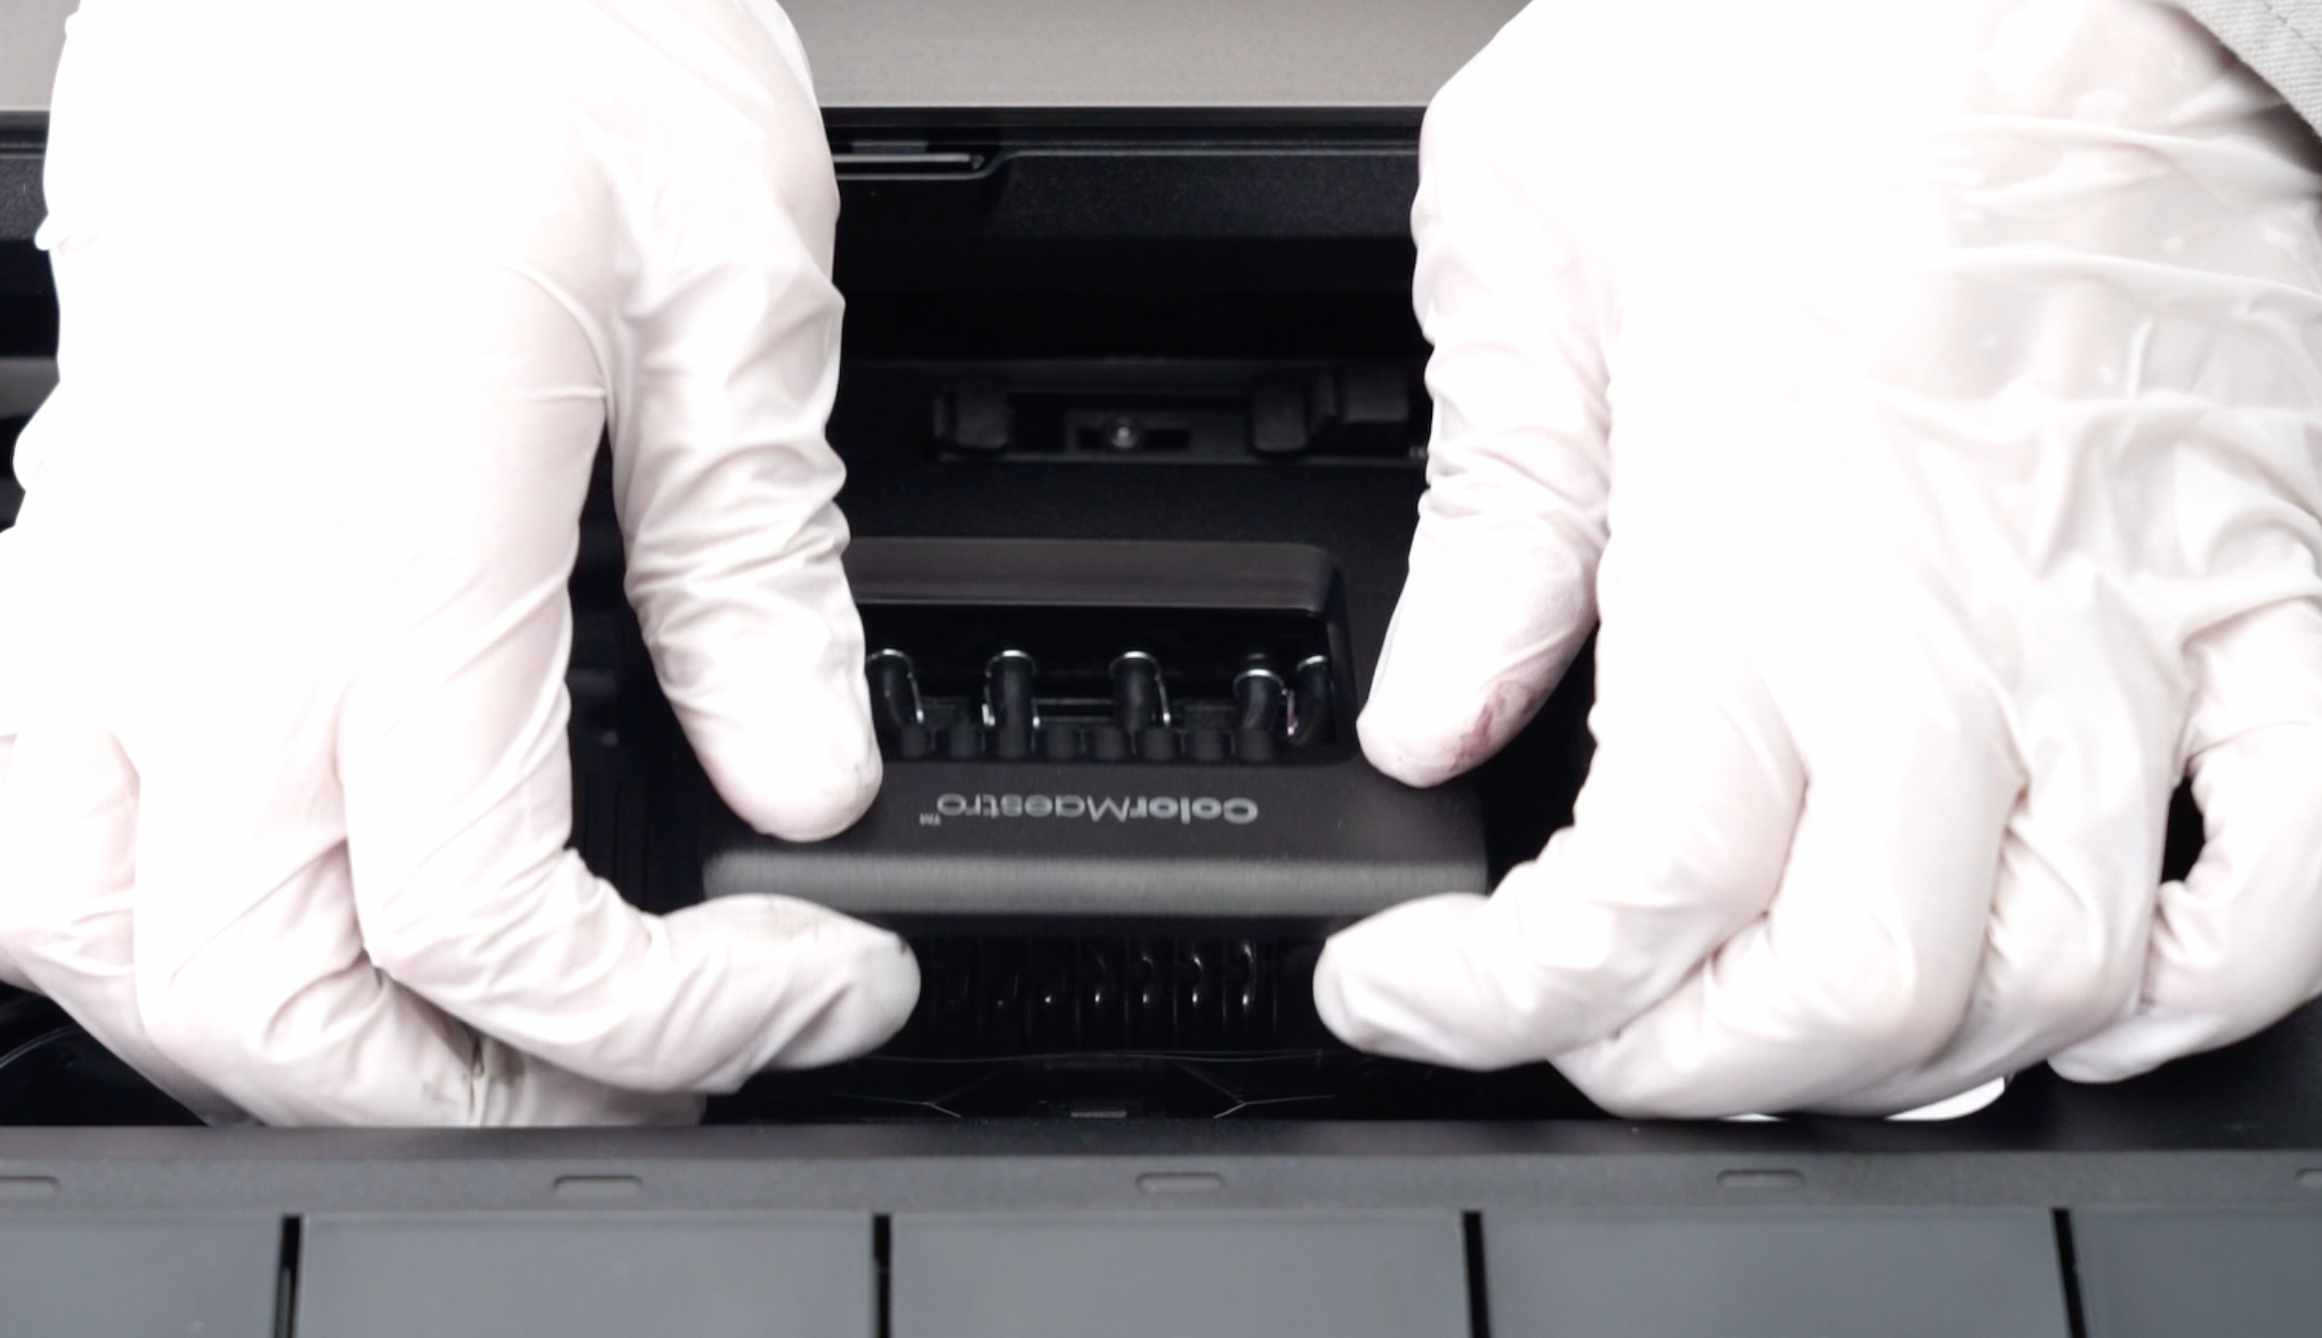
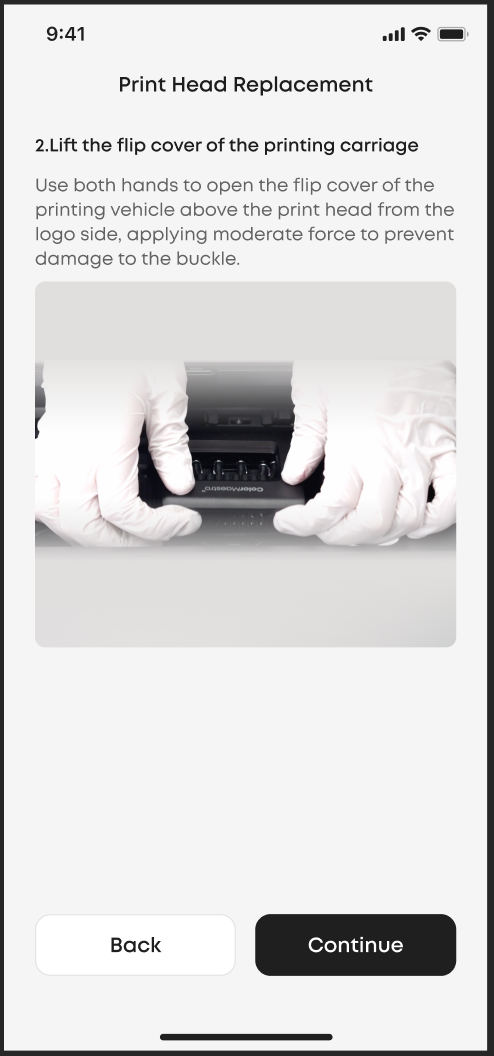
Open the flip cover above the print head from the logo side, using both hands and applying moderate force to avoid damaging the clips.
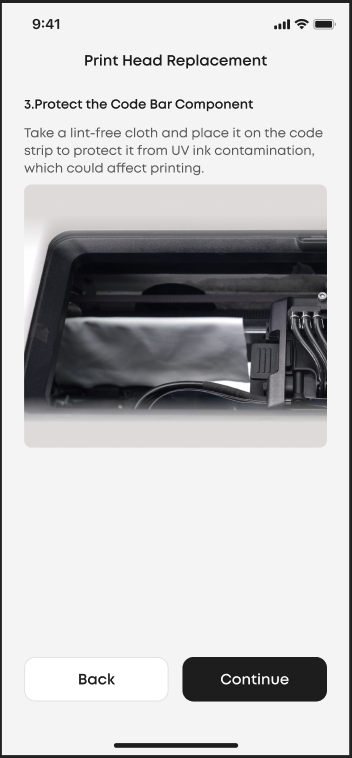
¶ Protect the Encoder Strip
Place a lint-free cloth over the encoder strip to protect it from UV ink contamination.
¶ Raise the Ink-Tube Docking Assembly
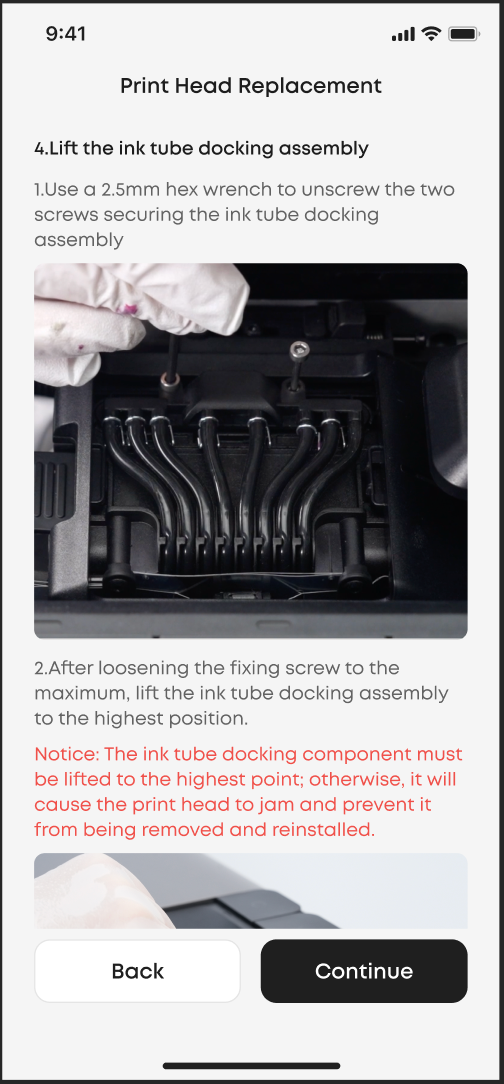
A. Loosen the two screws securing the docking assembly with the 2.5 mm hex key.
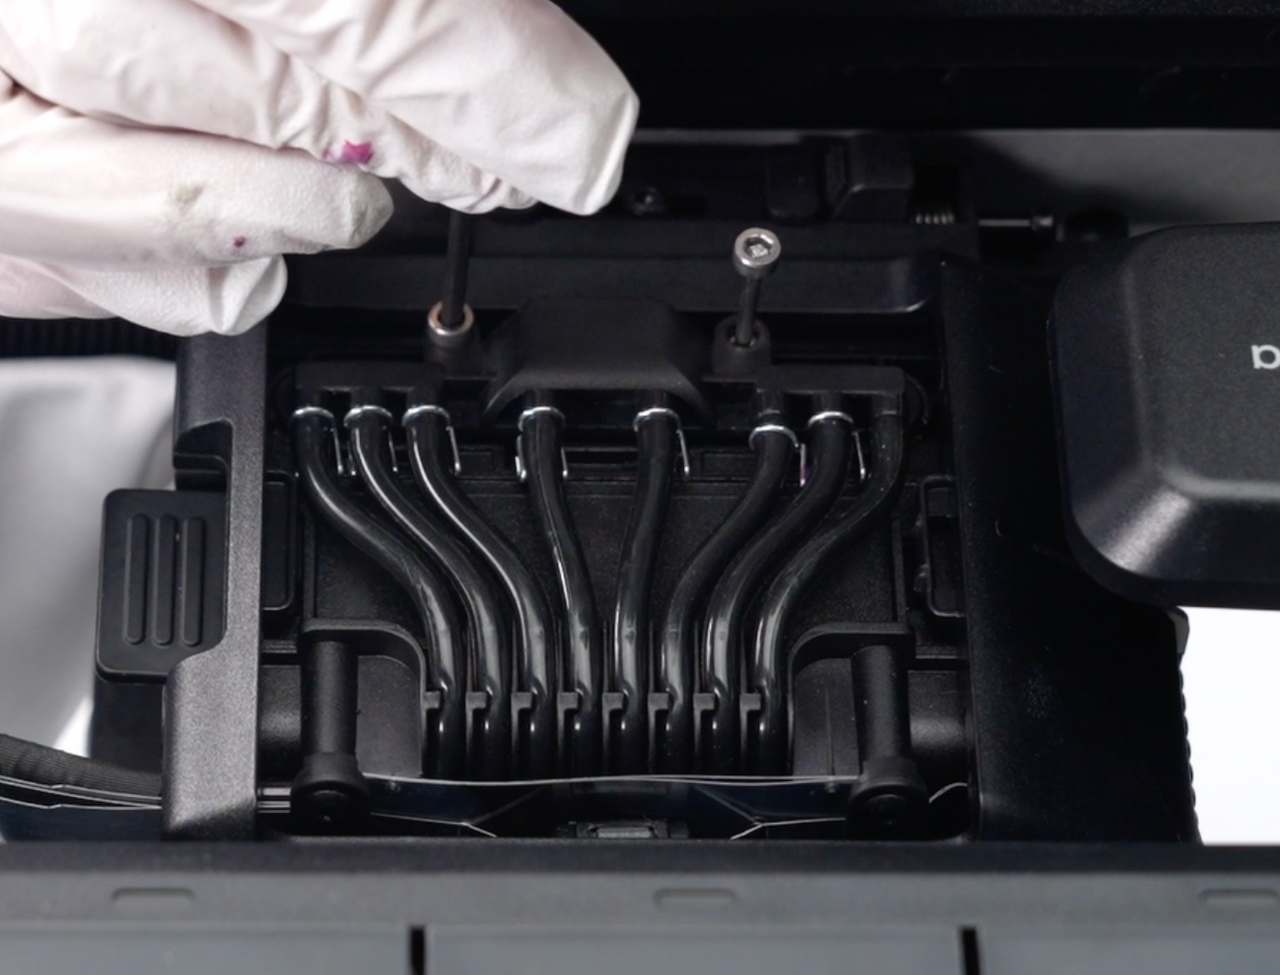
B. Lift the entire assembly upward until it reaches its maximum height.
⚠️ Important:
The docking assembly must be fully lifted. If not, the print head cannot be removed or reinstalled.
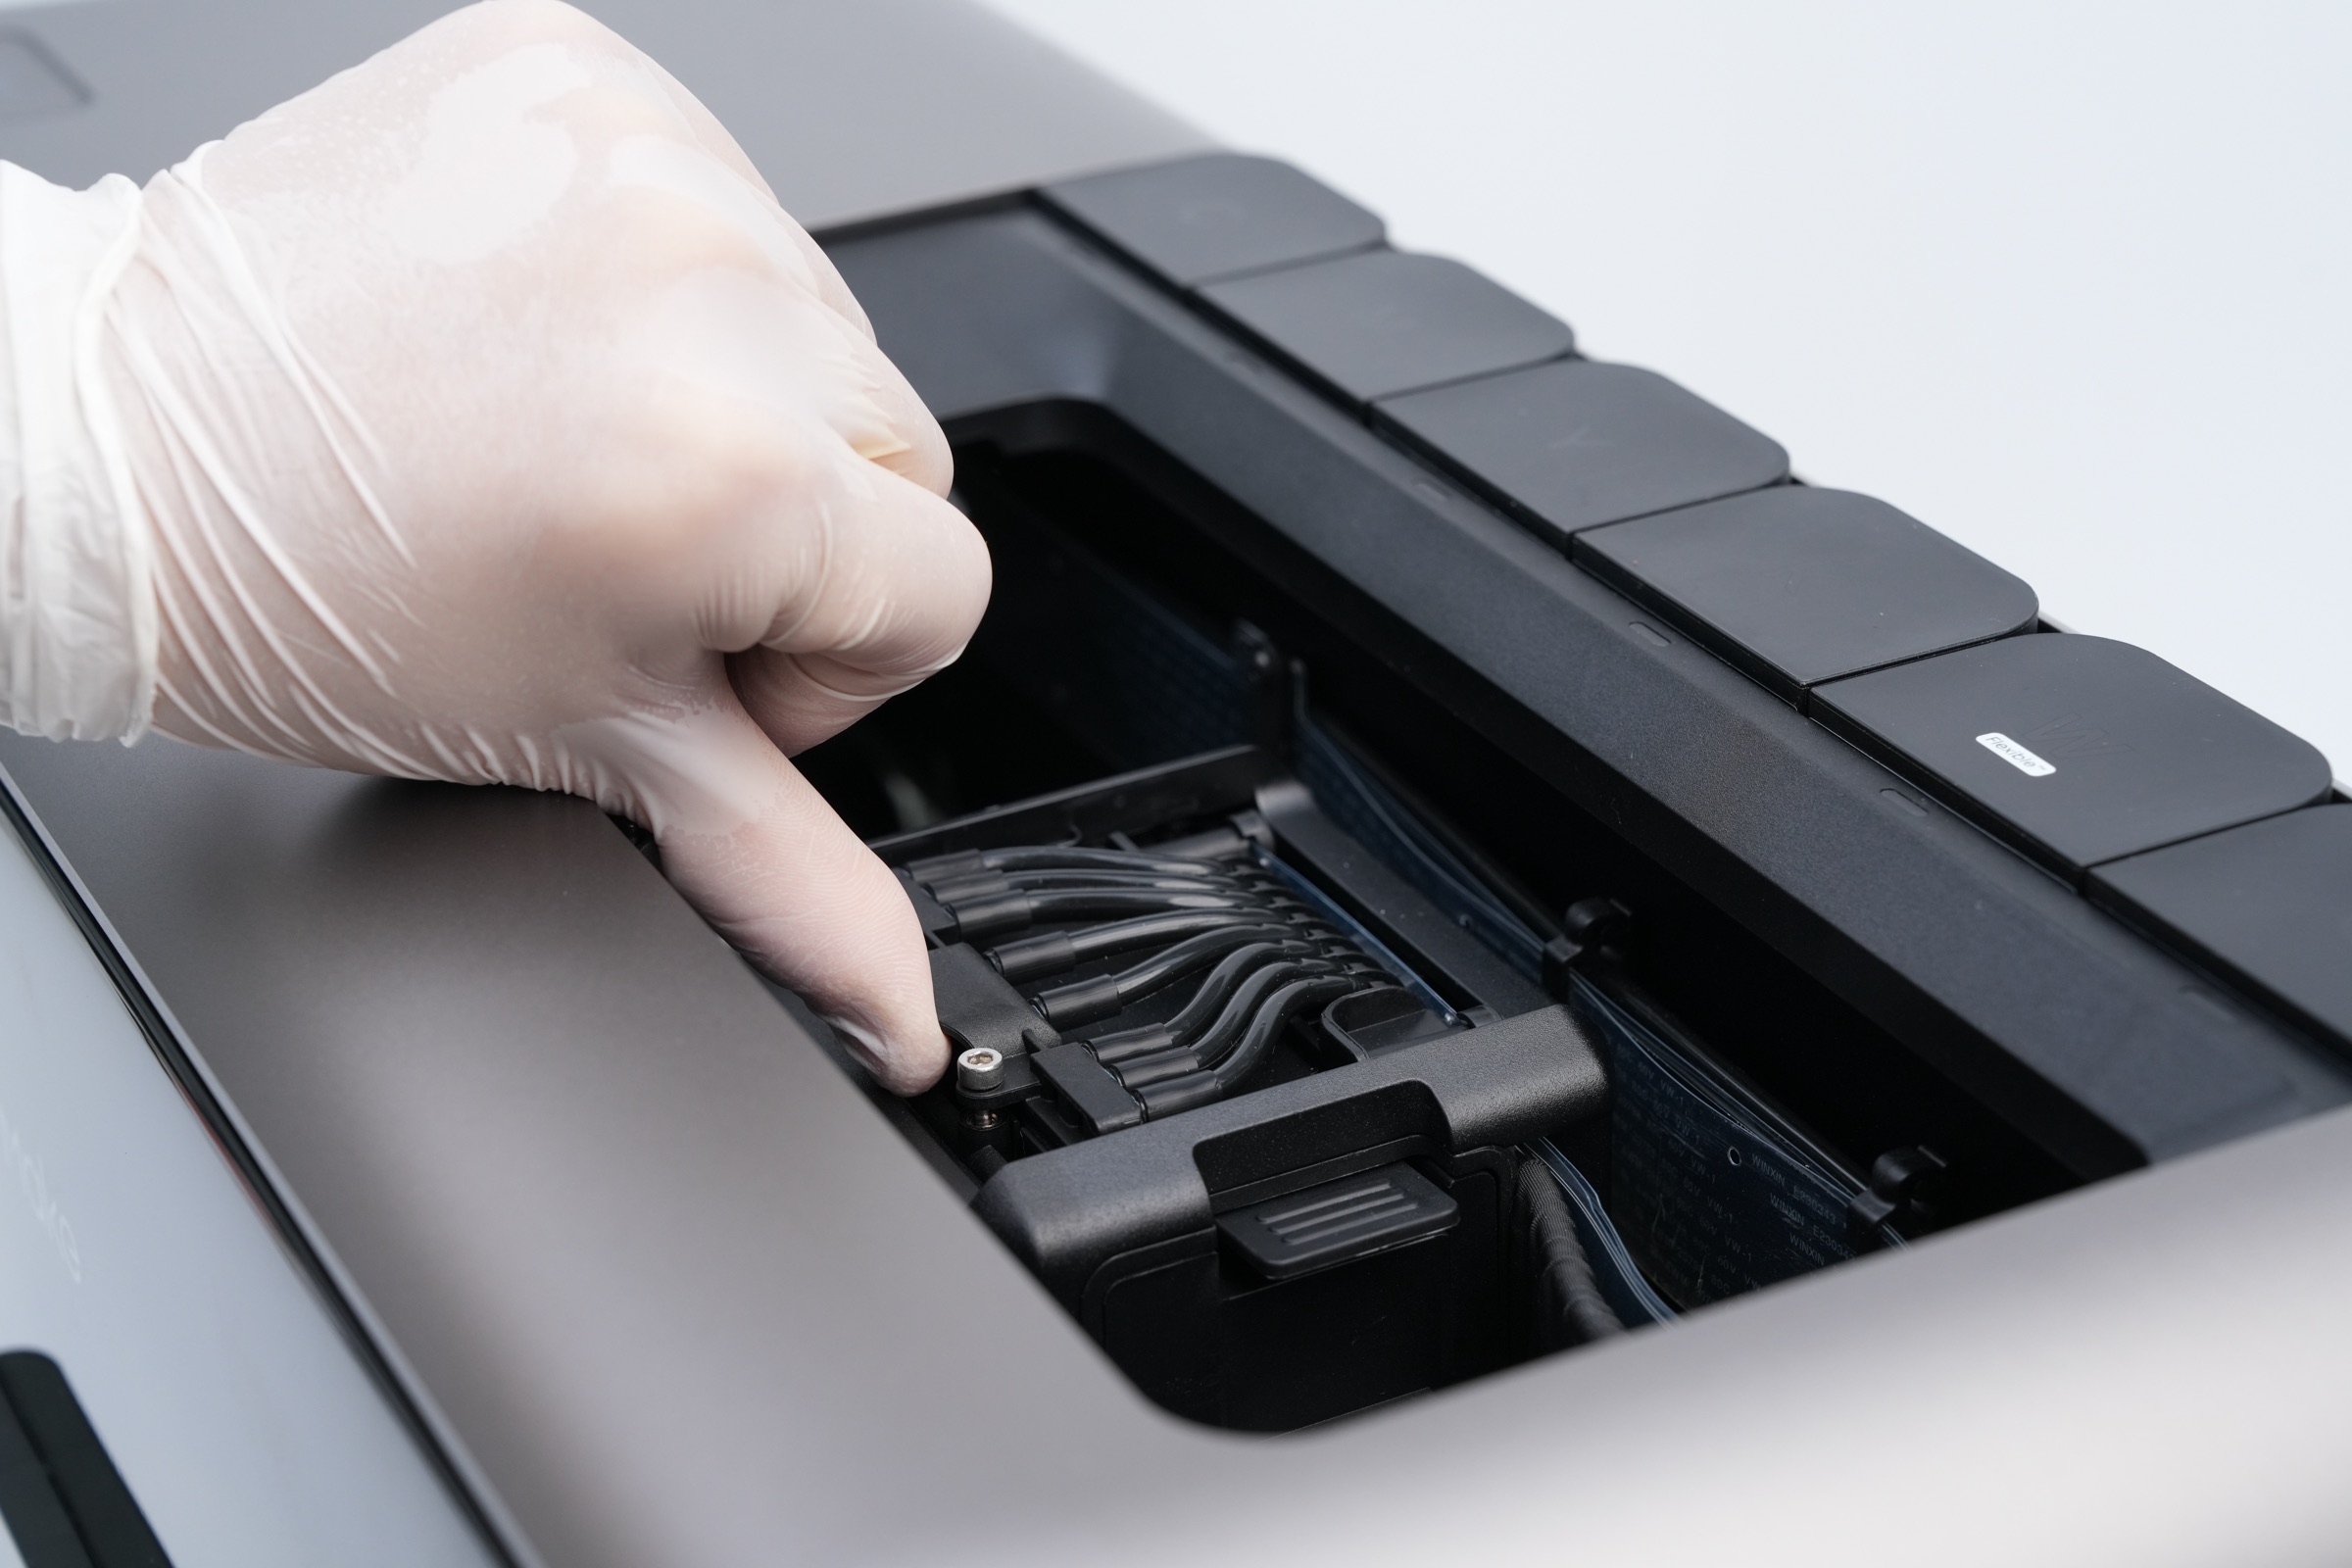
Lift the ink tube docking assembly
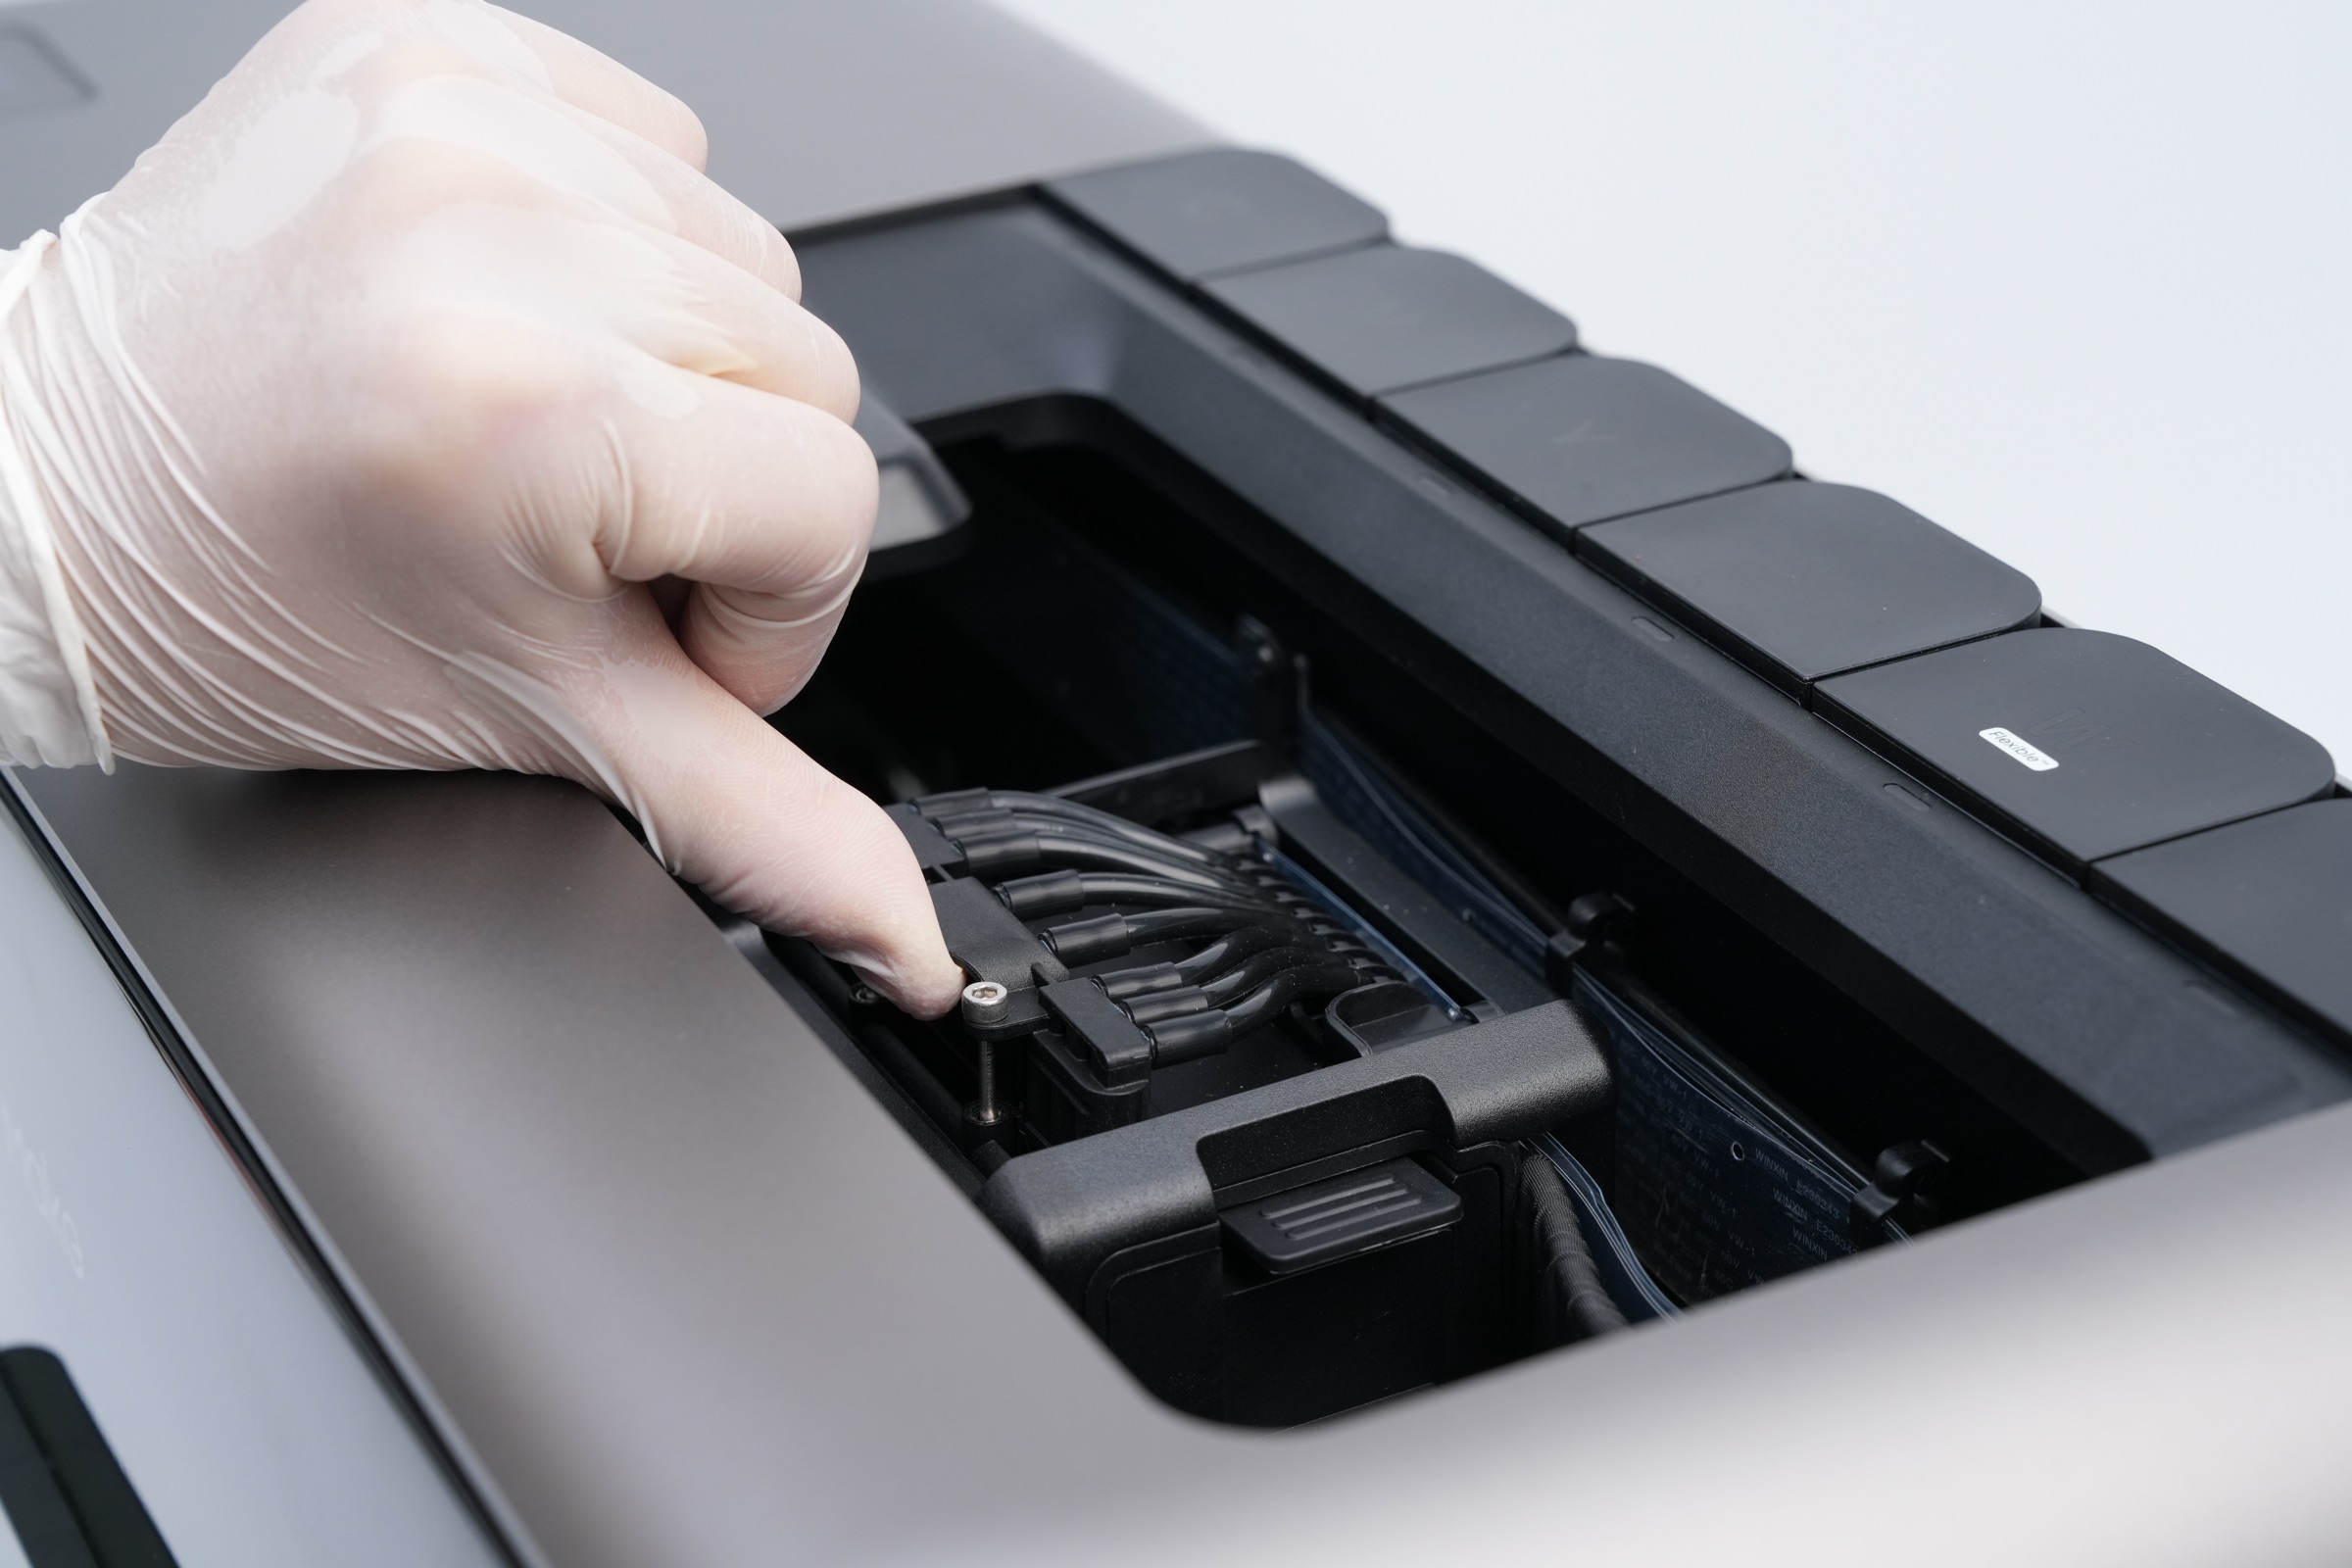
Lift the ink tube docking assembly to the highest position
After lifting the assembly, tap Continue.

¶ Prepare the New Print Head
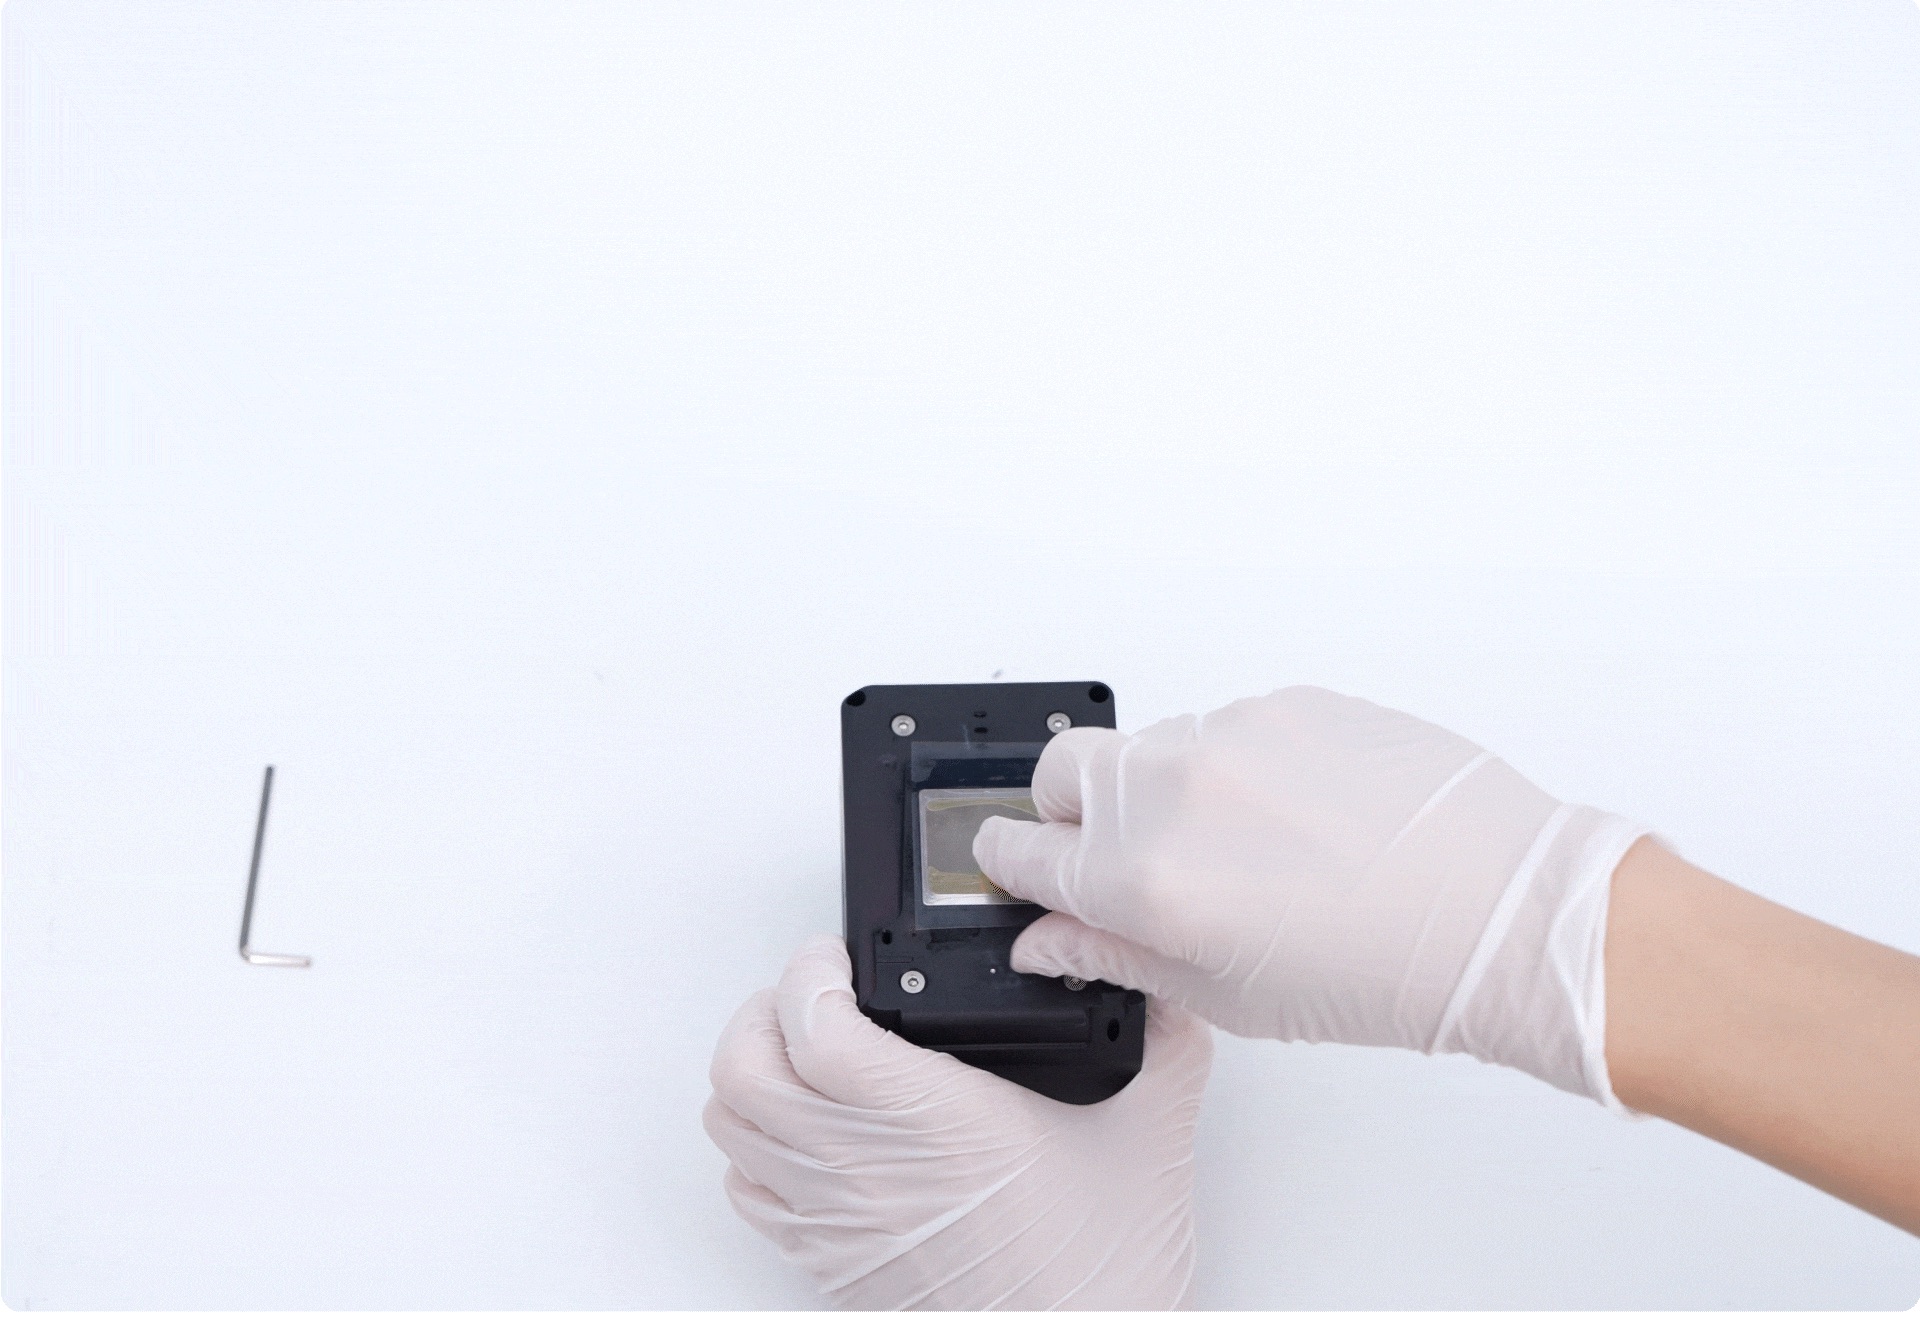
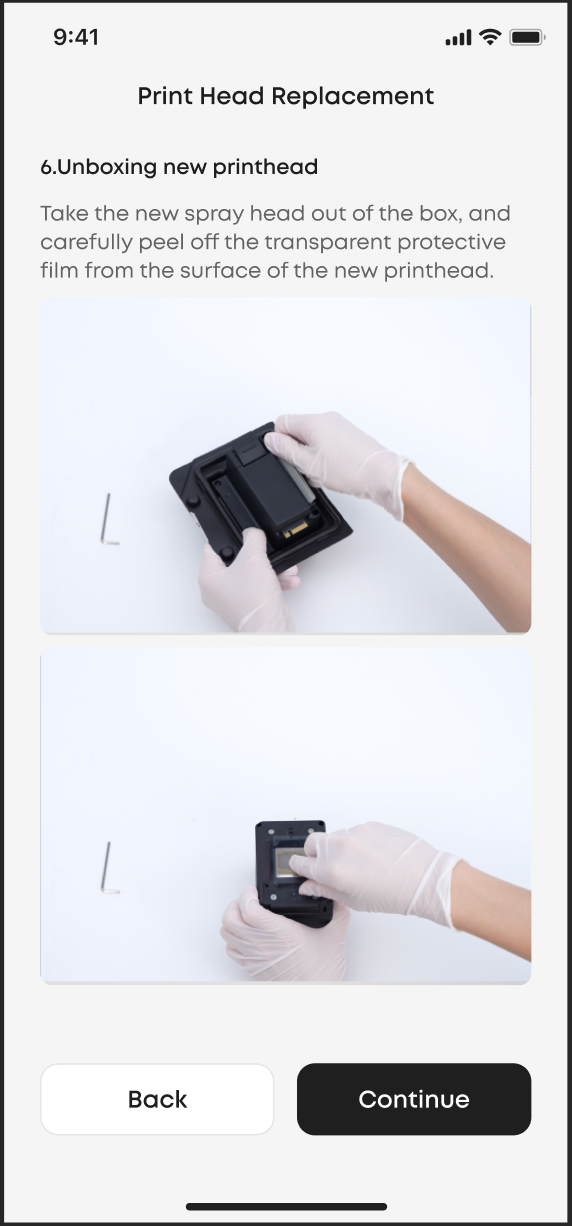
Remove the new print head from its packaging.
Remove the silicone plug from the ink inlet.
Carefully peel away the protective film from the print surface.
Tap Continue when ready.
Animated Image 1
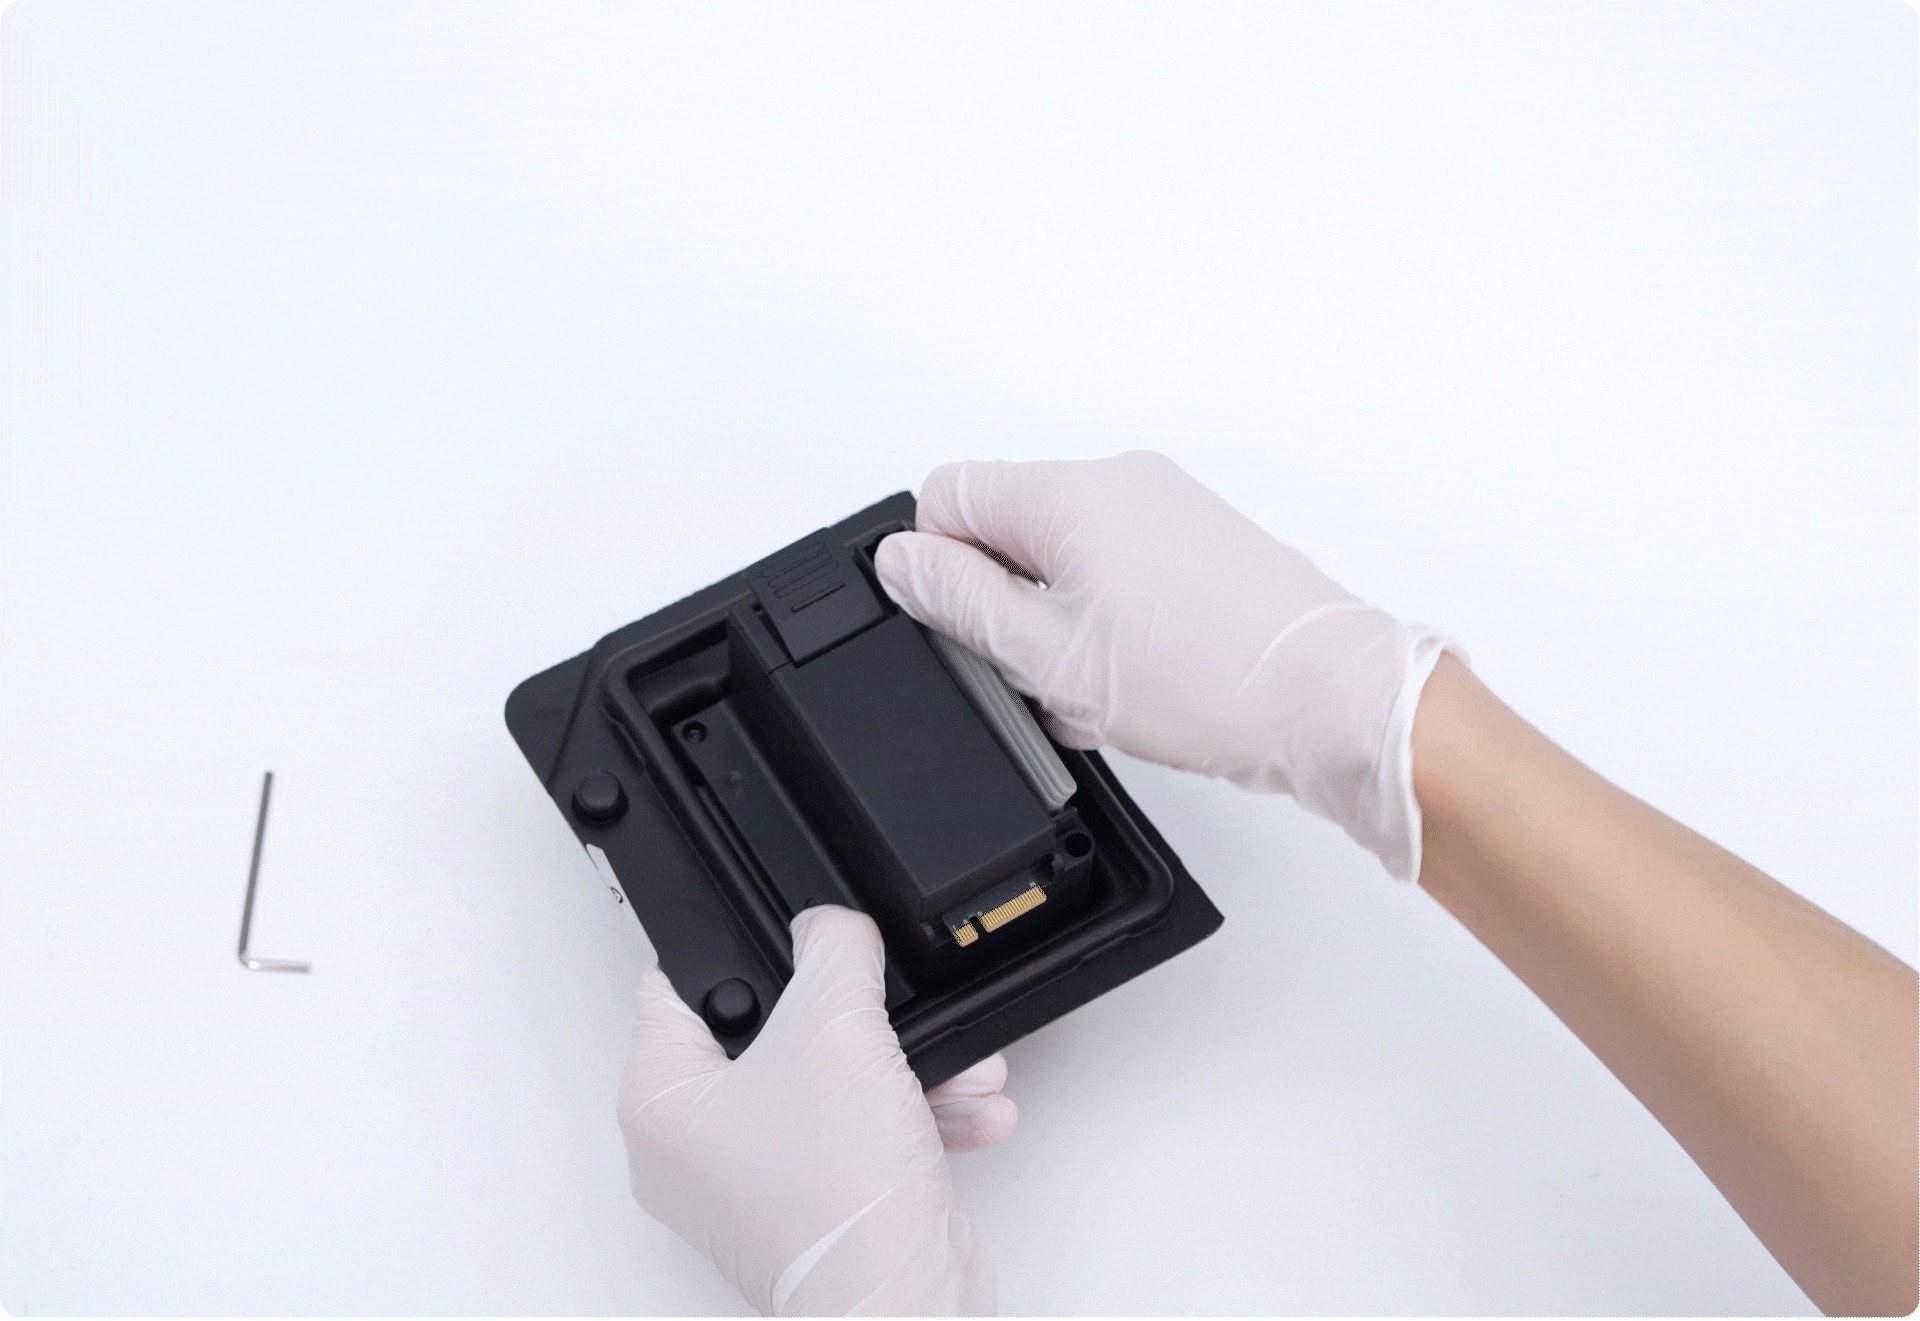
Animated Image 2
¶ Wait for the Print Head to Move, Remove the Old Print Head
After tapping Continue, the printer will shift the carriage to create more workspace.
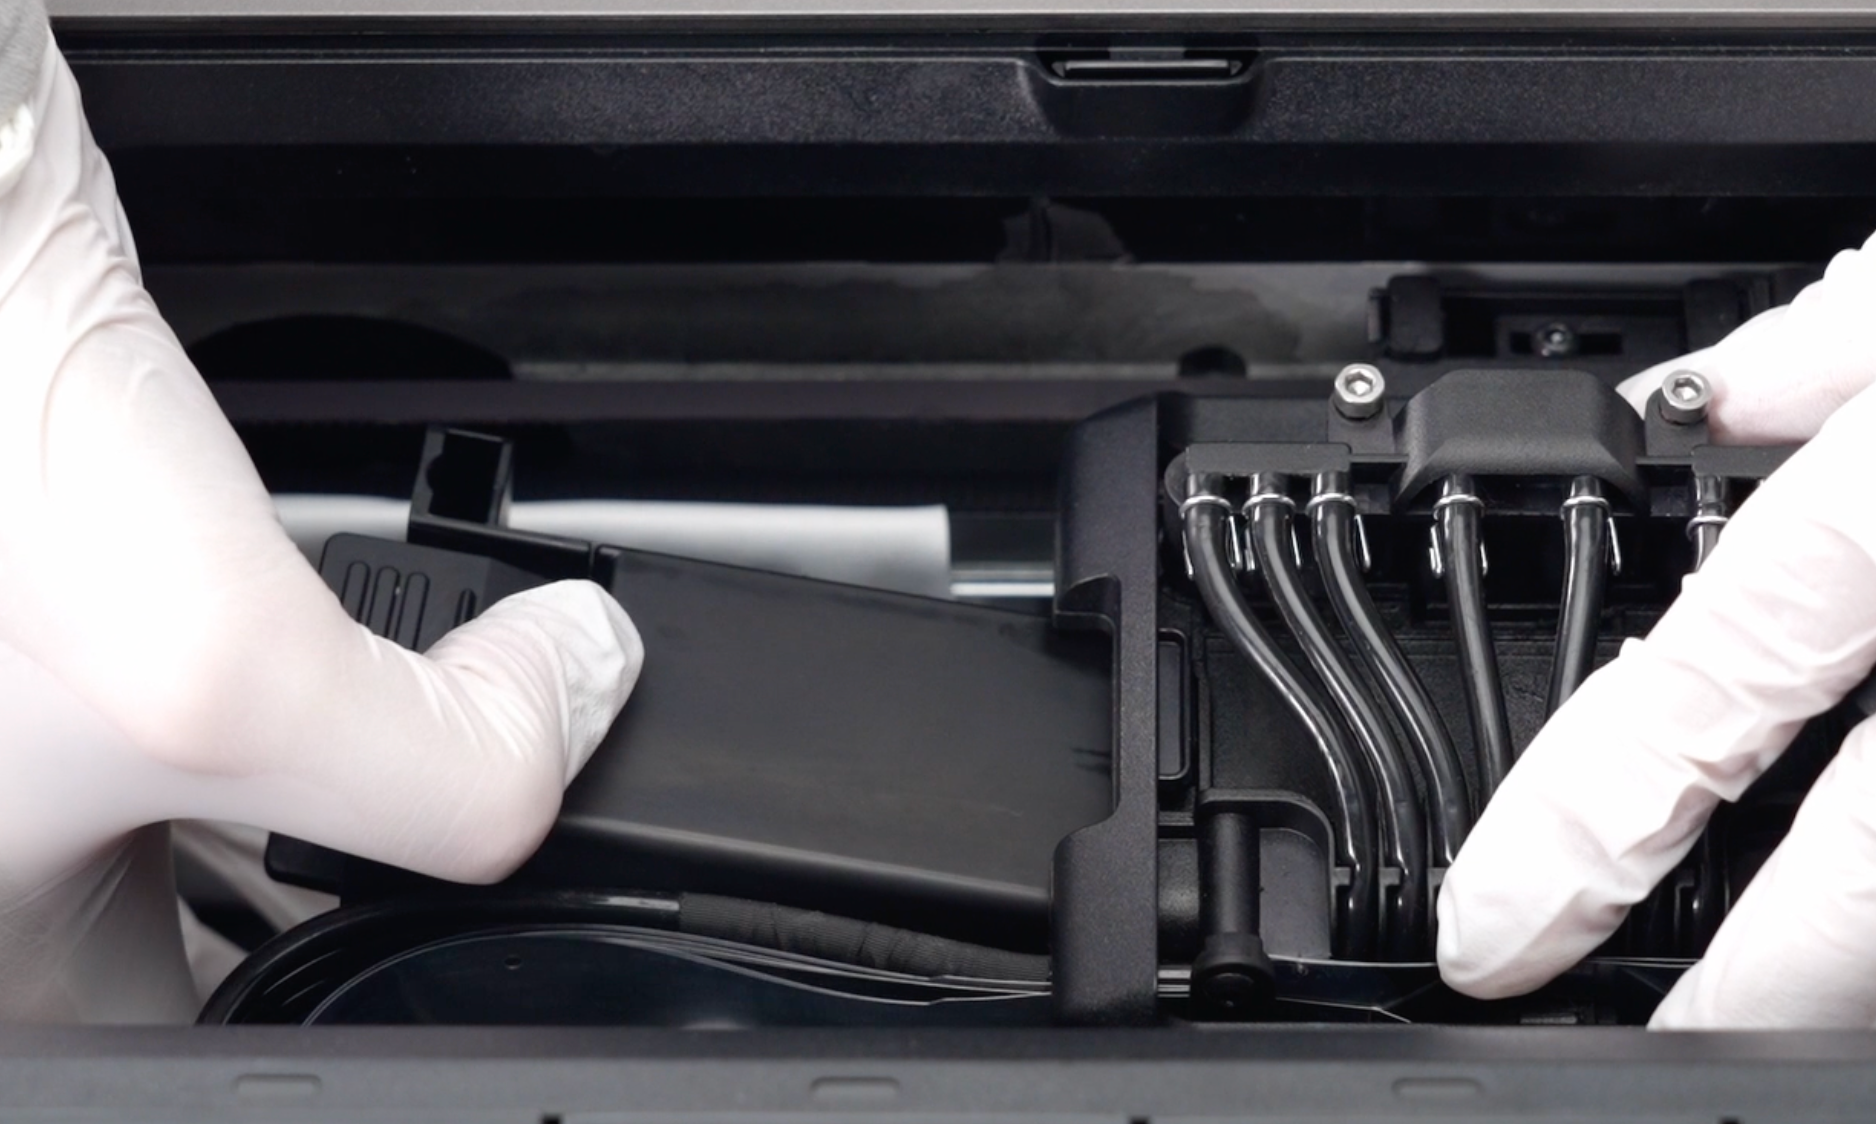
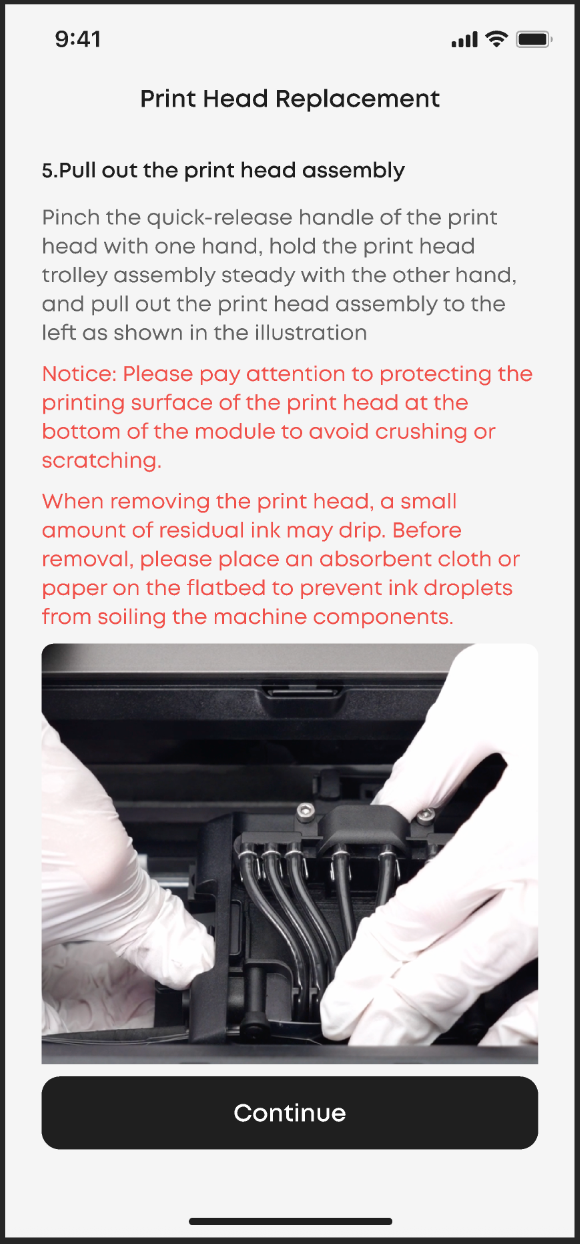
To remove the print head:
Hold the quick-release handle with one hand.
Support the carriage with your other hand.
Pull the print head straight outward.
Tap Continue once removed.
⚠️Caution:
Do not bump or scratch the bottom print surface.

¶ Install the New Print Head
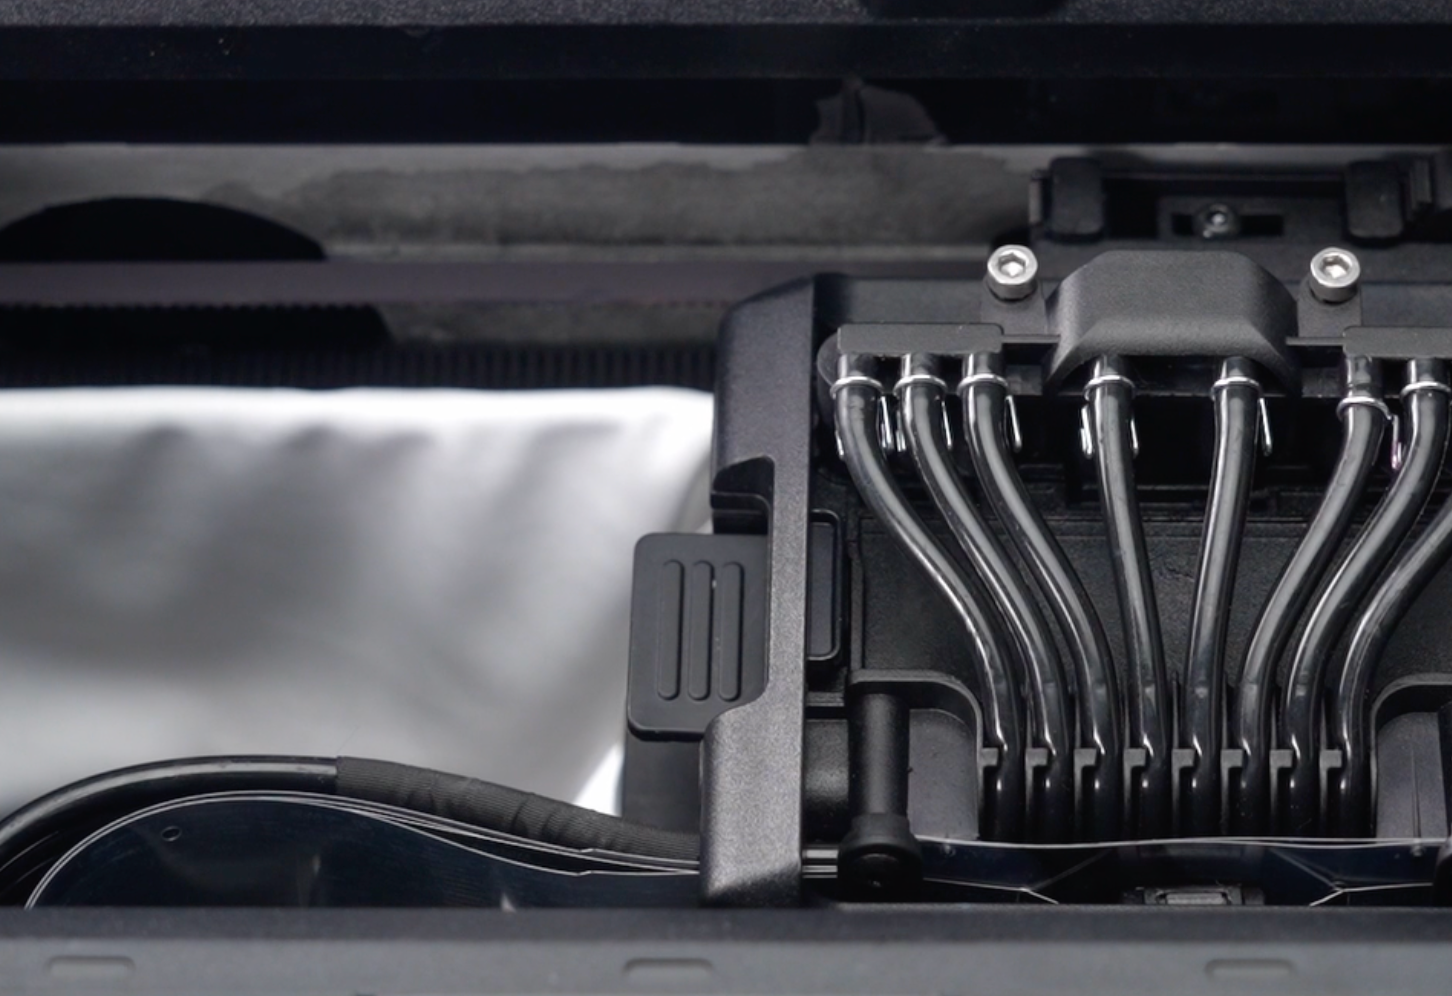
Hold the textured grip area of the quick-release module.
Insert the new print head into the carriage mount.
Push until you hear or feel a click, confirming that the print head is seated.
Tap Continue once installed.
⚠️Confirm that the docking assembly is still fully lifted and that nothing obstructs the mount.
¶ Wait for the Print Head to Move, Lower and Secure the Ink-Tube Docking Assembly
After tapping Continue, the print head will move to the center.
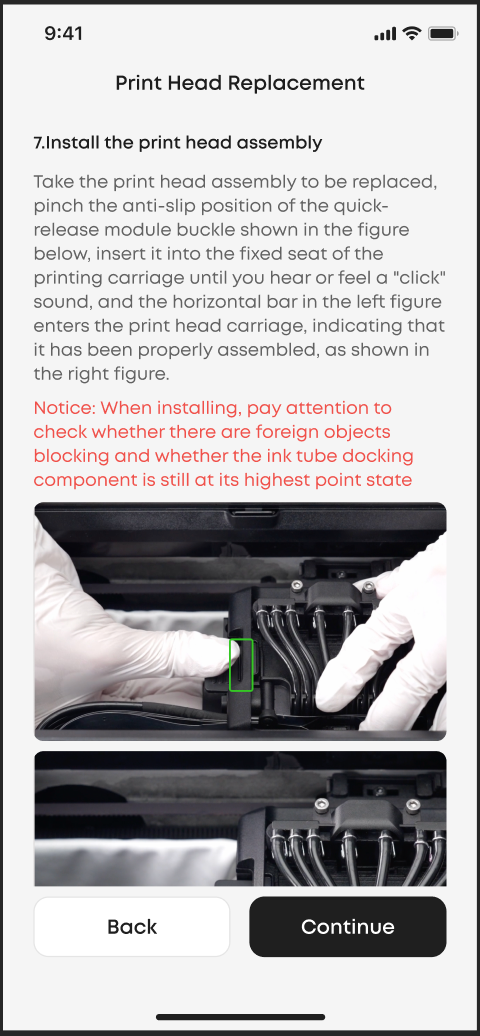
- Press both sides of the docking assembly down firmly until fully seated.
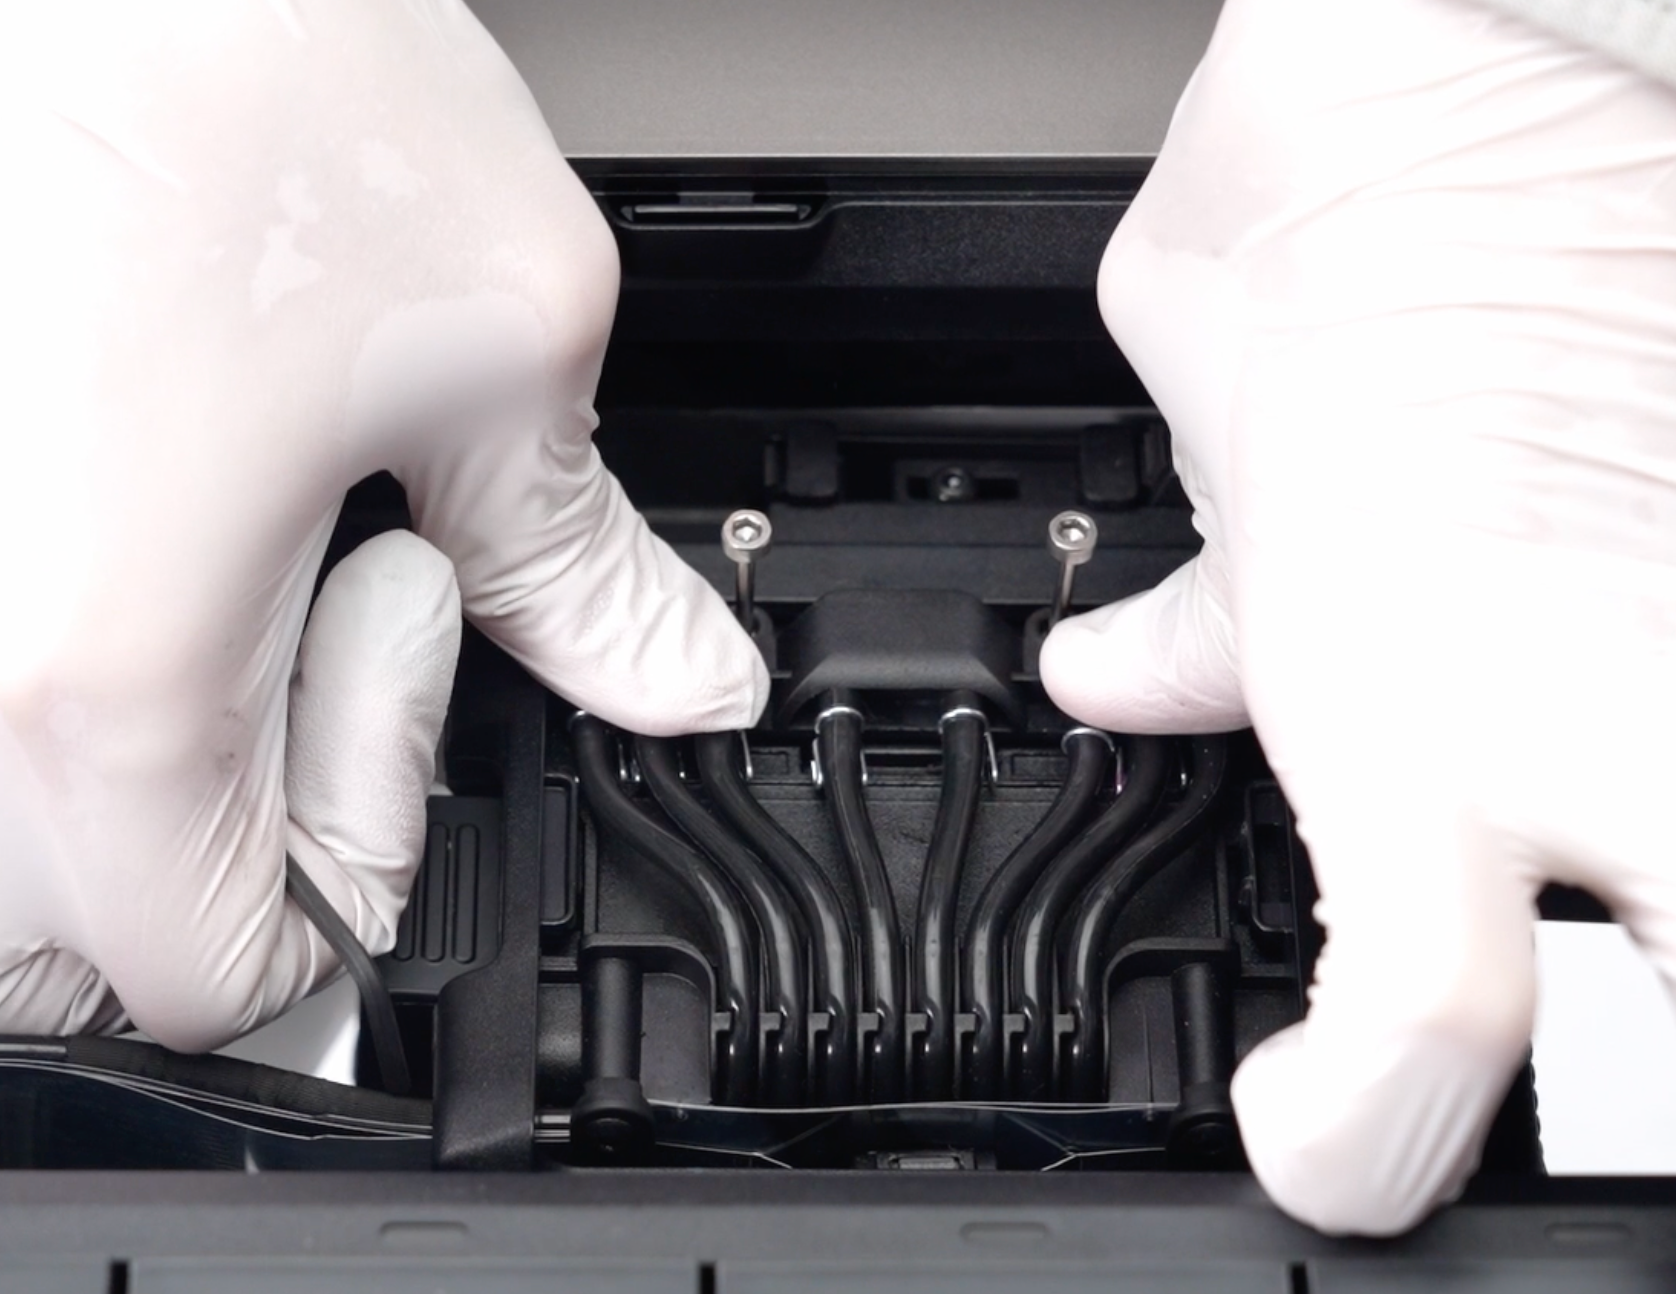
- Tighten the two screws using the 2.5 mm hex key.
Tap Continue.

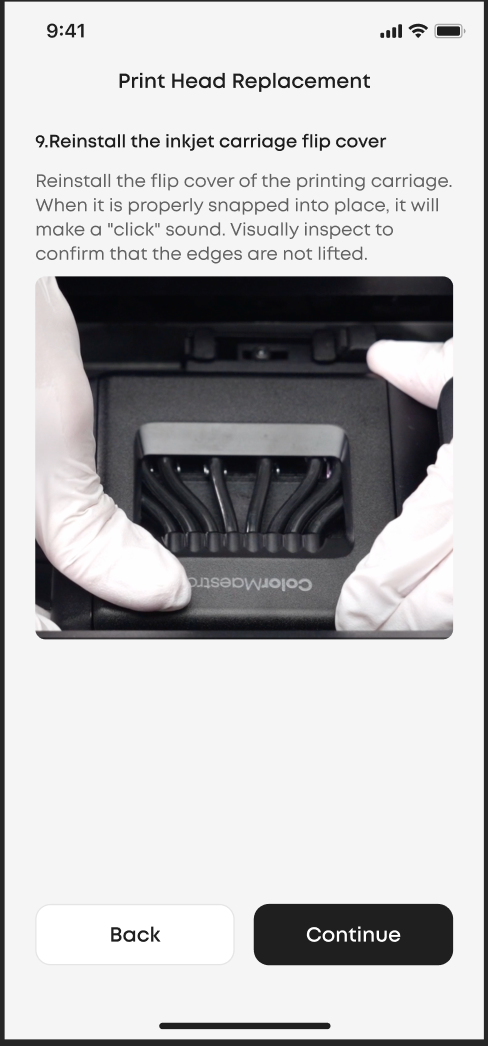
¶ Reinstall the Carriage Flip Cover
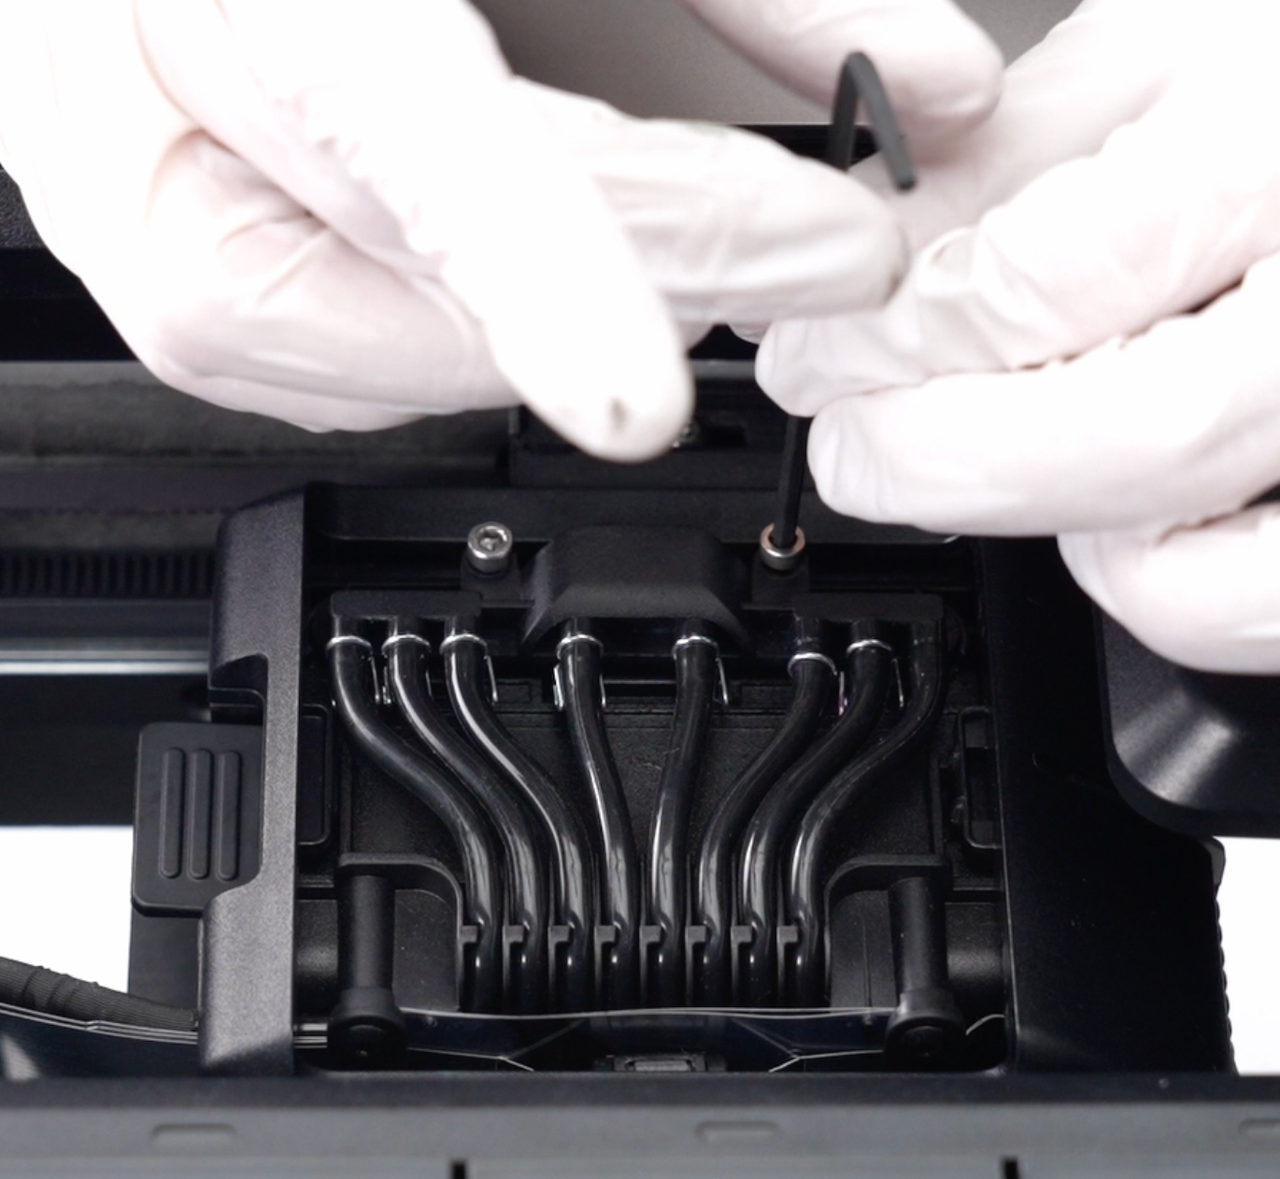
Reattach the flip cover. It should snap into place with a clear click.
Check that all corners are fully seated.
Tap Continue.
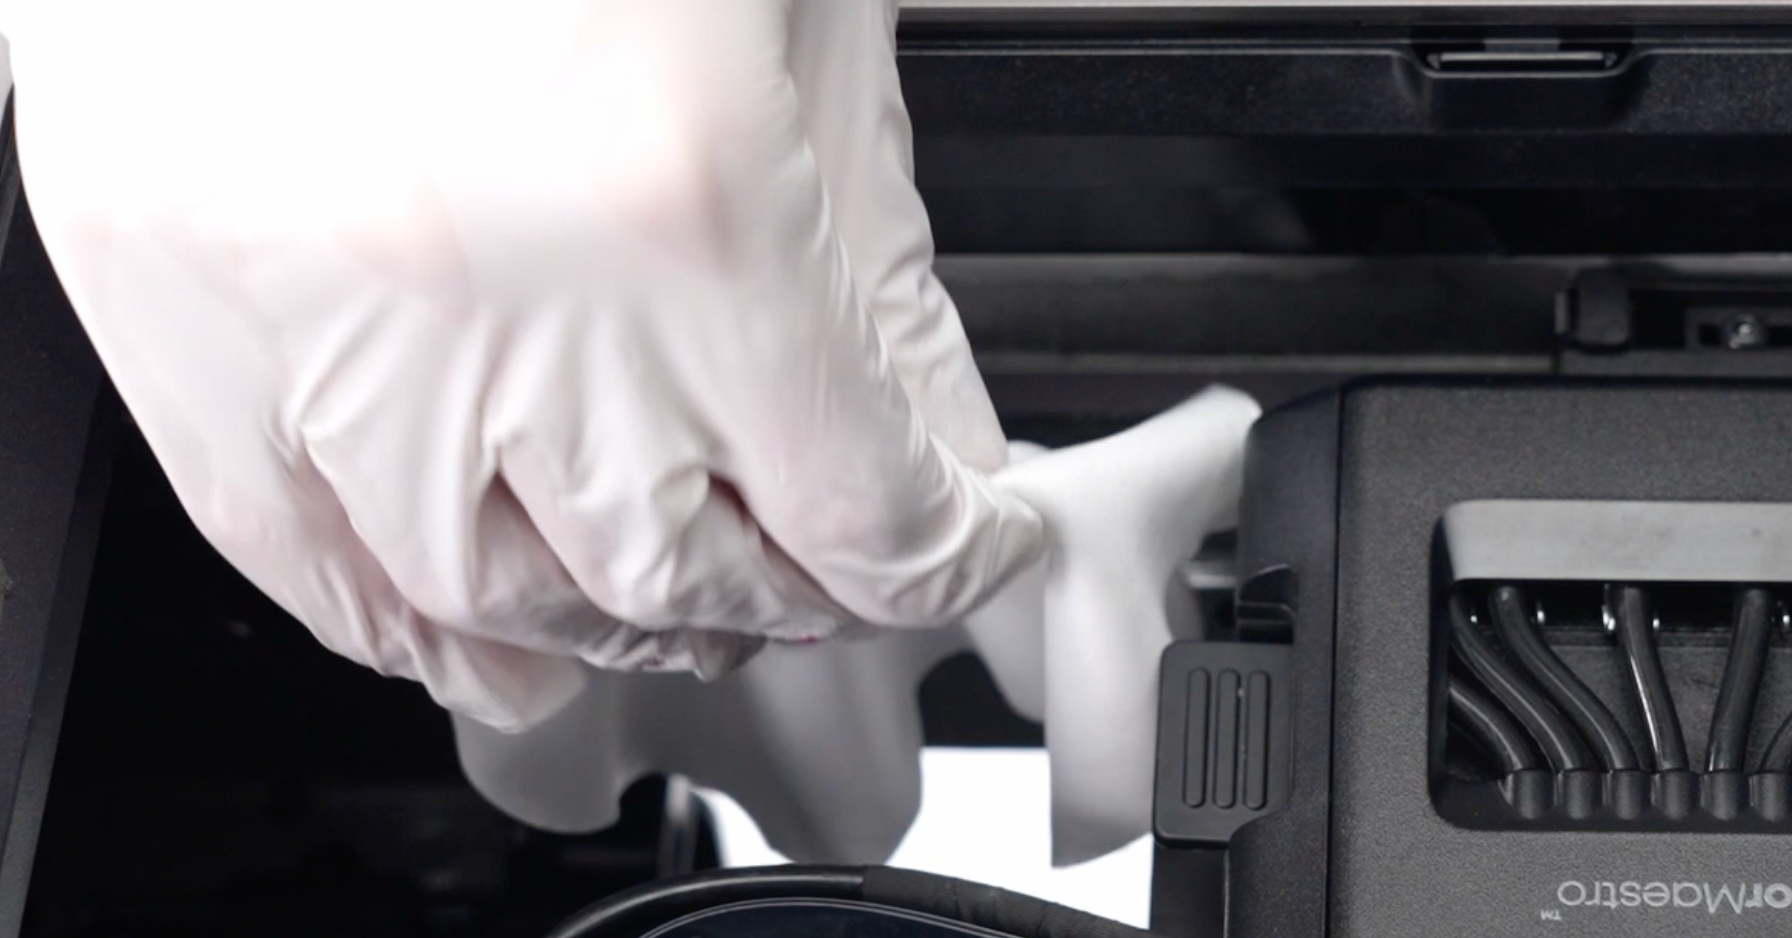
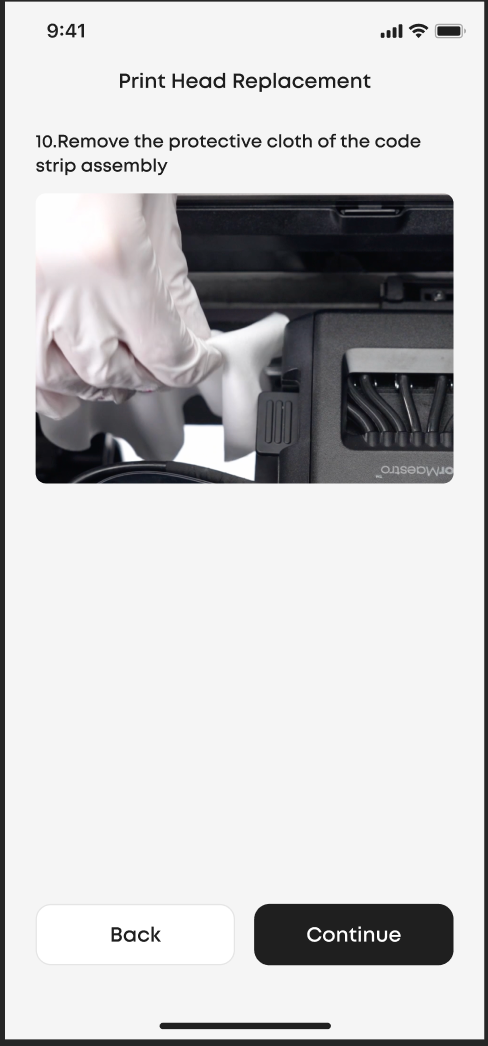
¶ Remove the Encoder Strip Protection
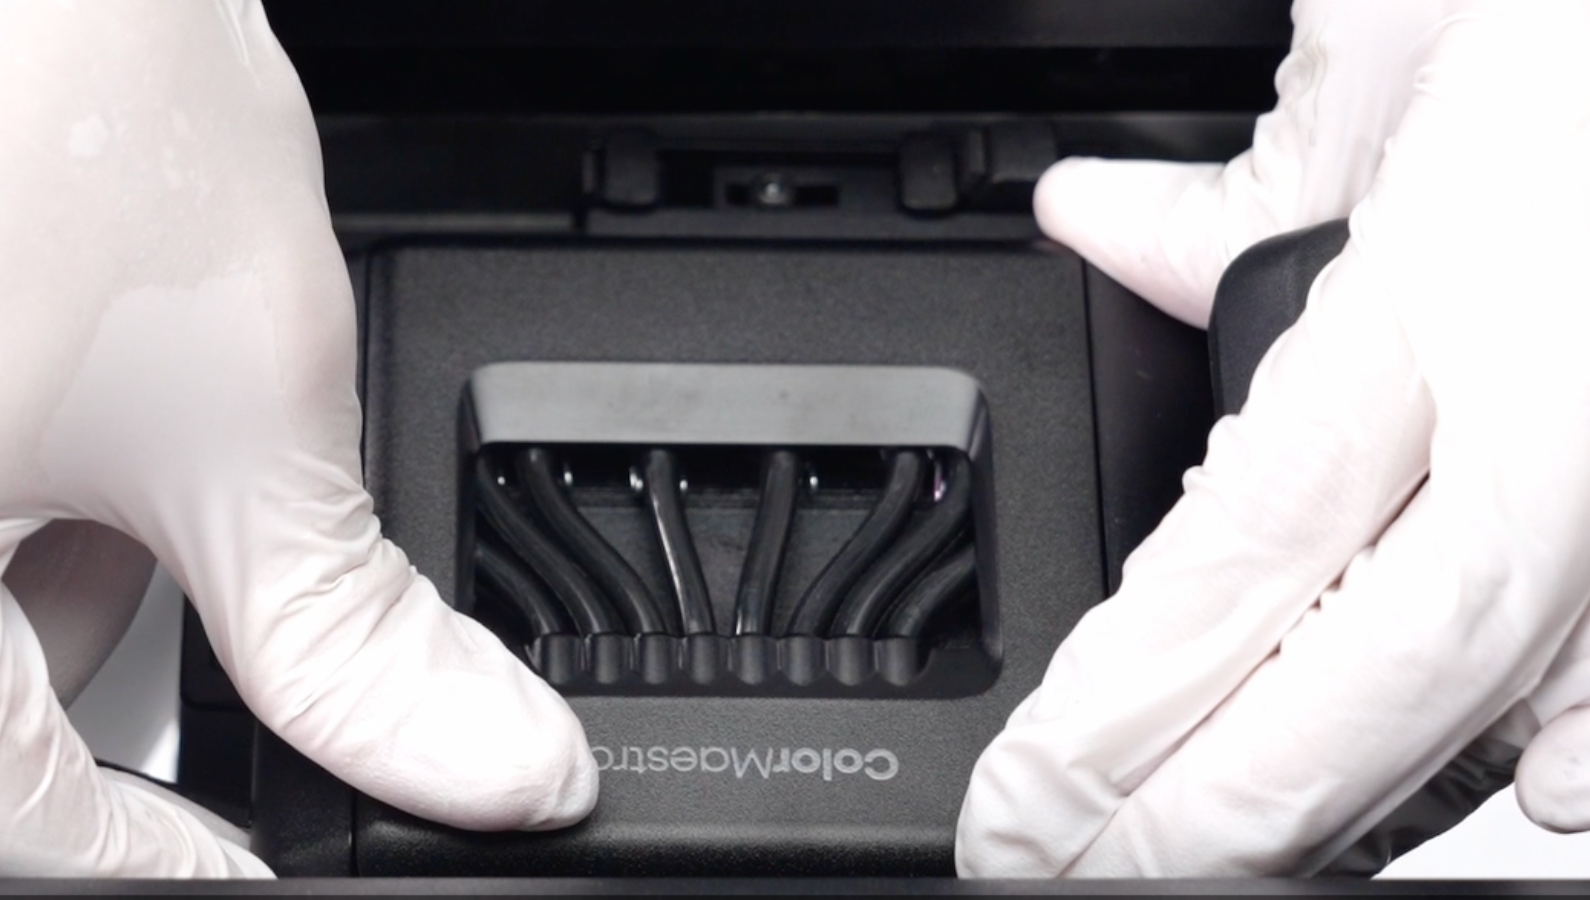
Remove the lint-free cloth and tap Continue.
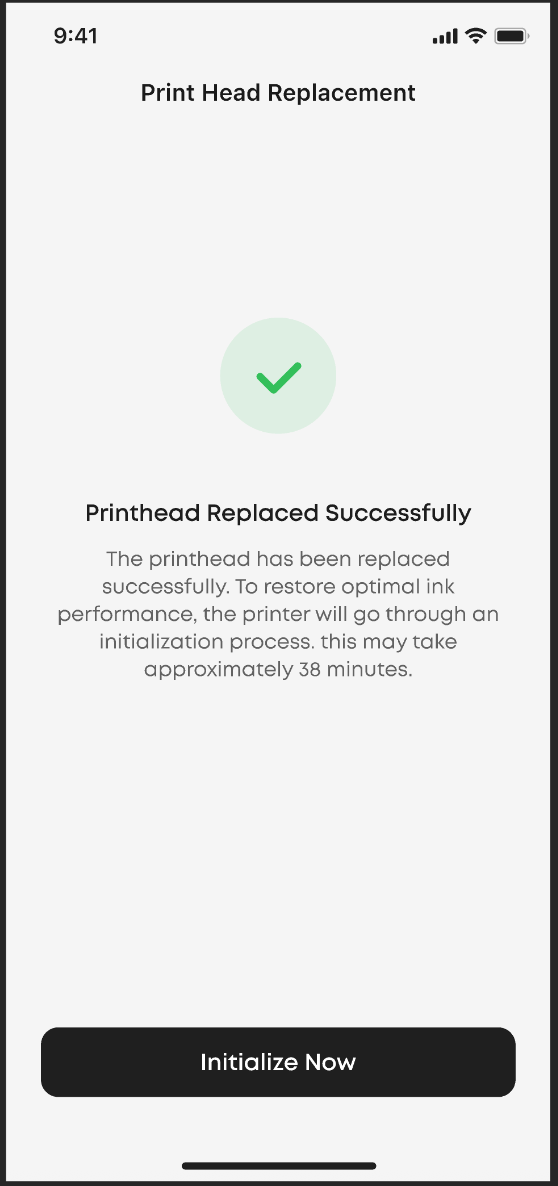
¶ Complete Replacement and Initialize
Tap Initialize Now to run the initialization process.
Once completed, the printer is ready for normal operation.