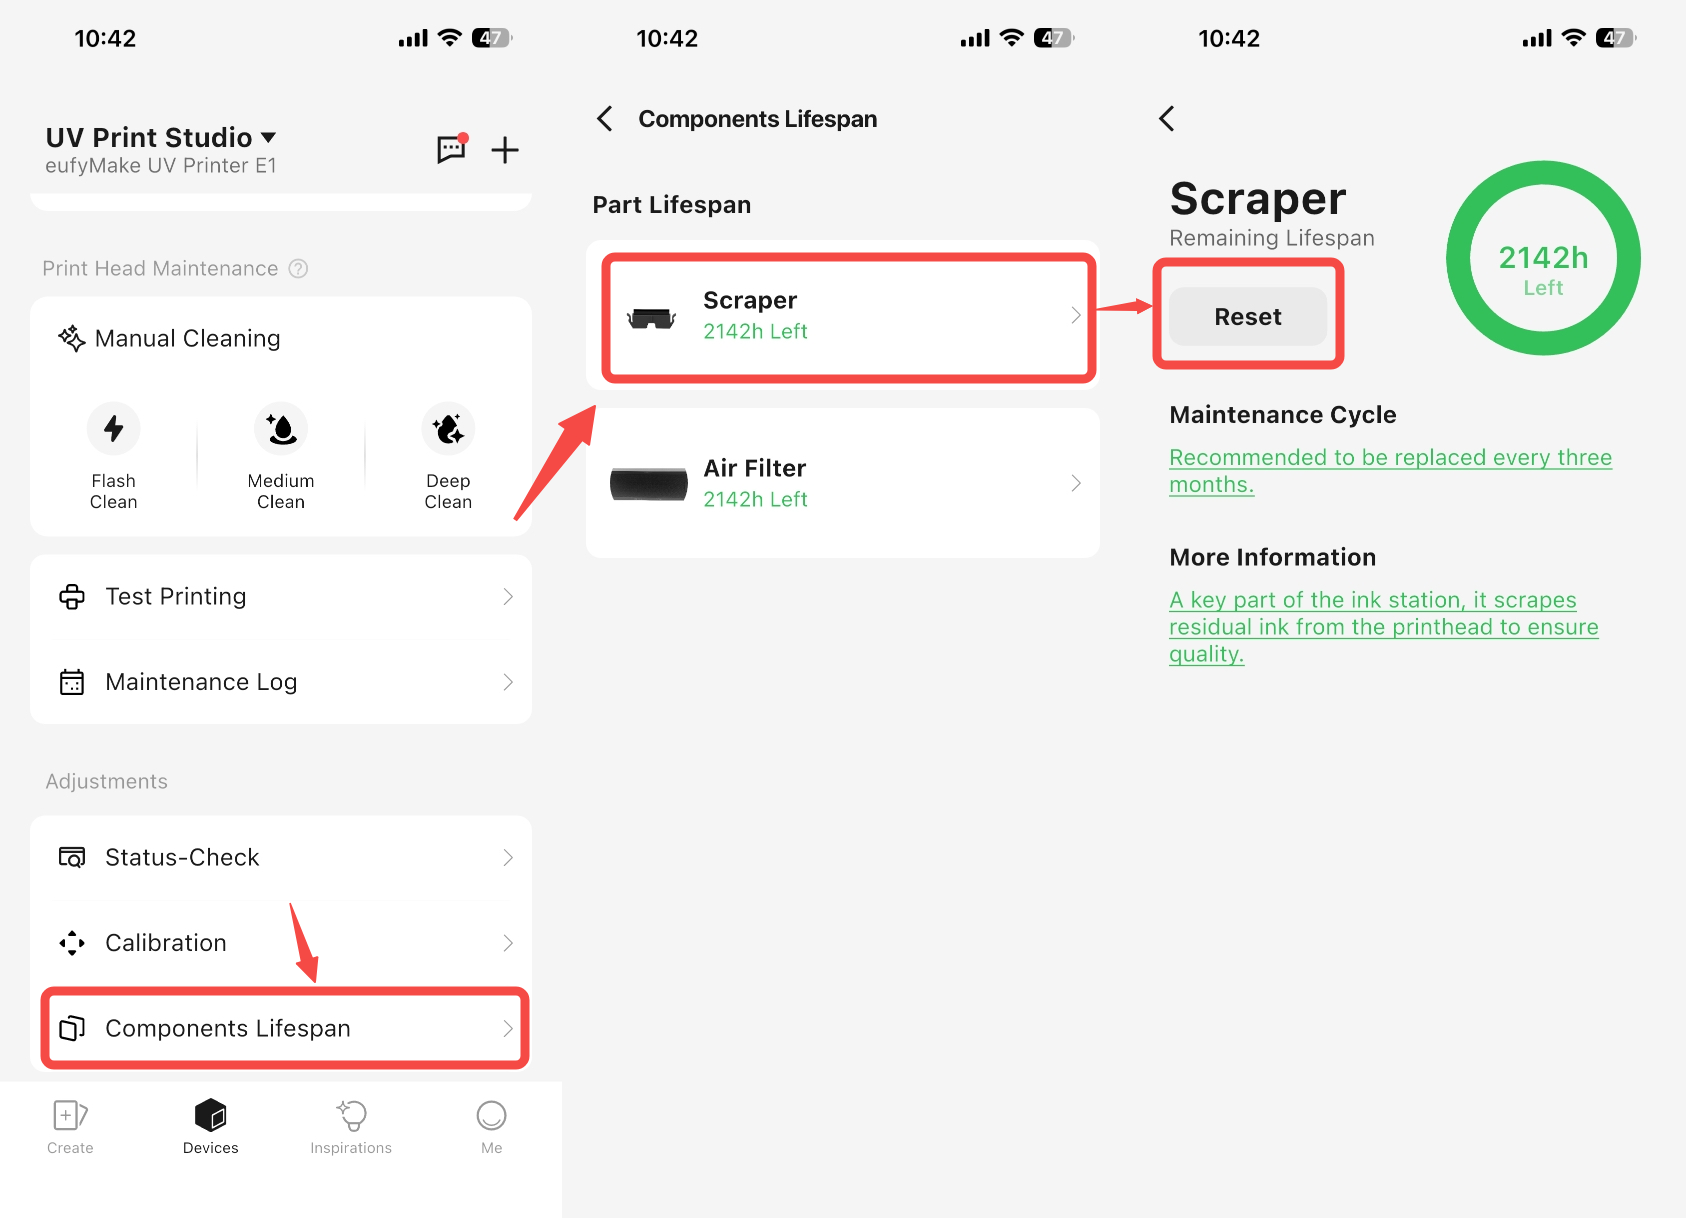
¶ Introduction to Print Head Station Replacement Kit
The Print Head Station Replacement Kit includes an ink pad, a scraper, ink tank pads, and related replacement tools (gloves and tweezers). It is used for replacing and maintaining the ink stack and ink cartridge components, ensuring the cleanliness and anti-fouling performance of the print head and ink cartridge.
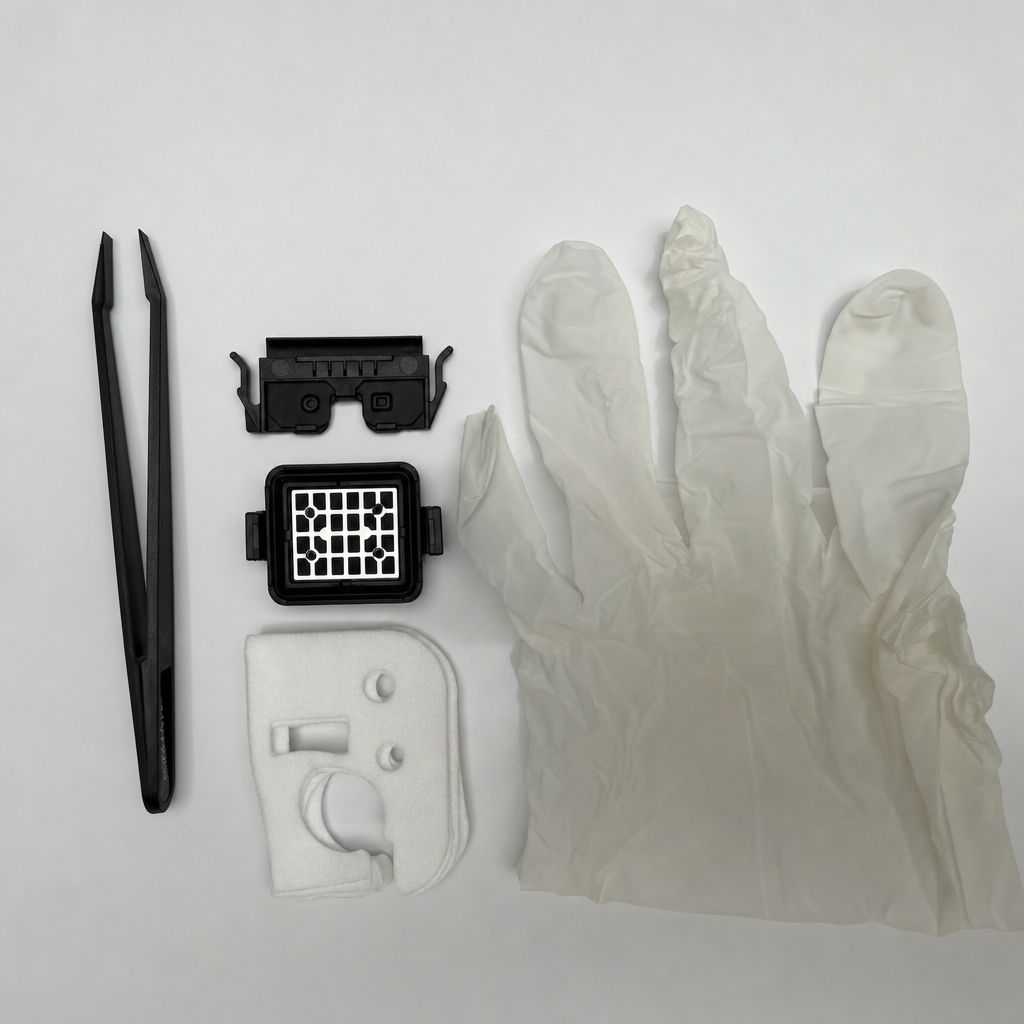
¶ Ink Pad
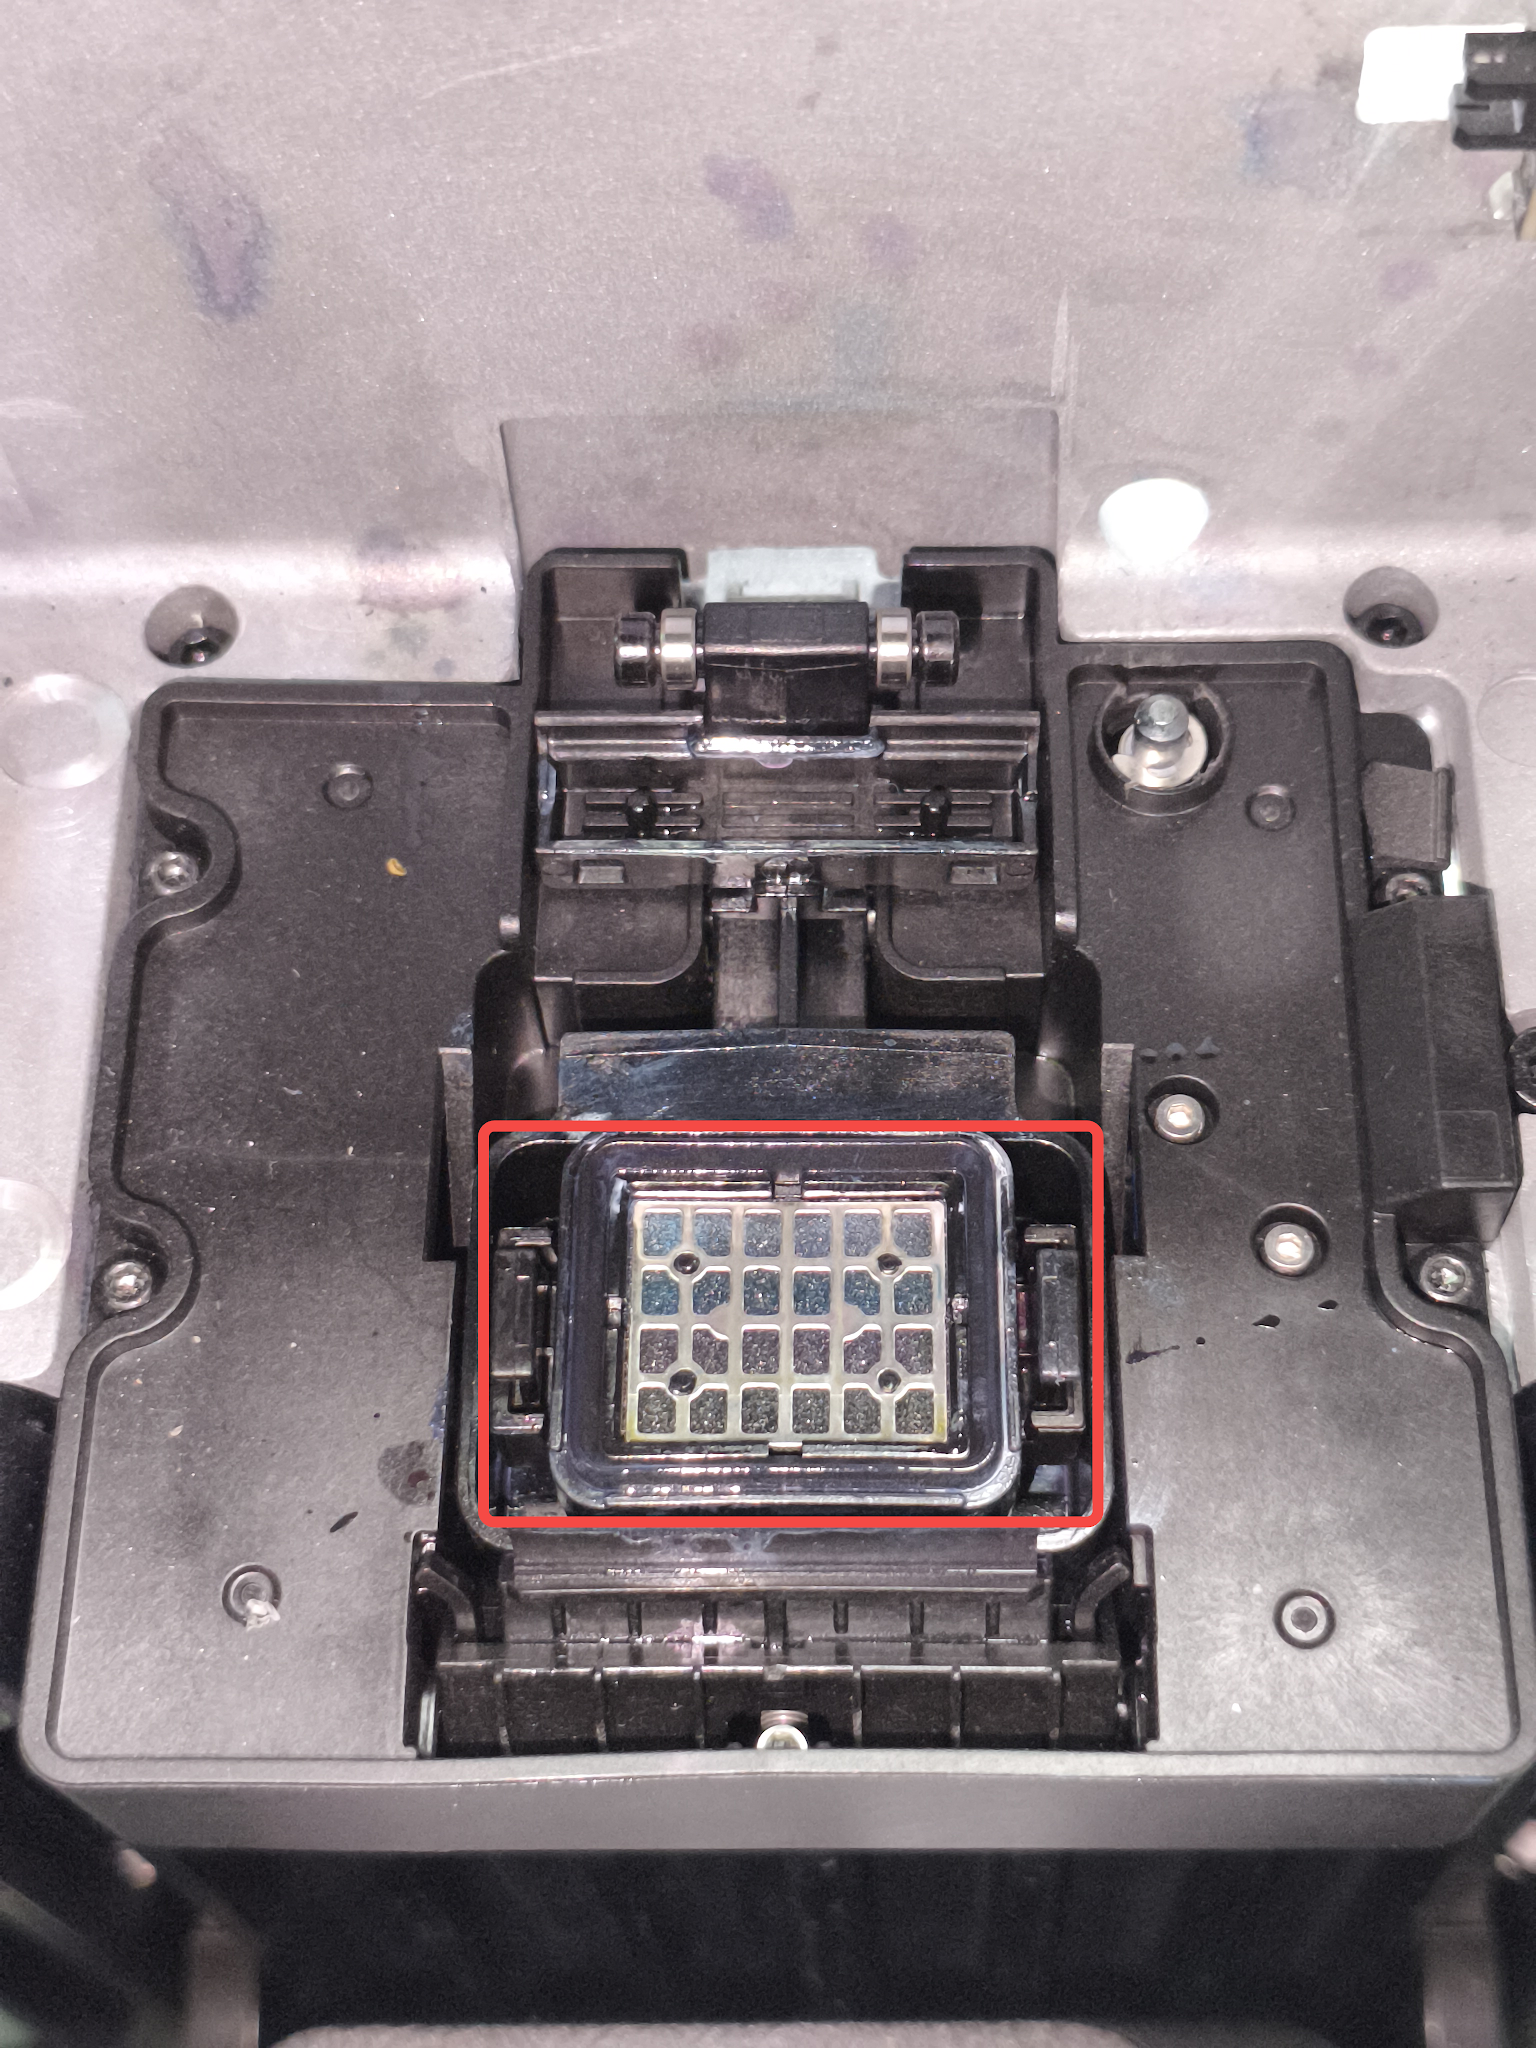
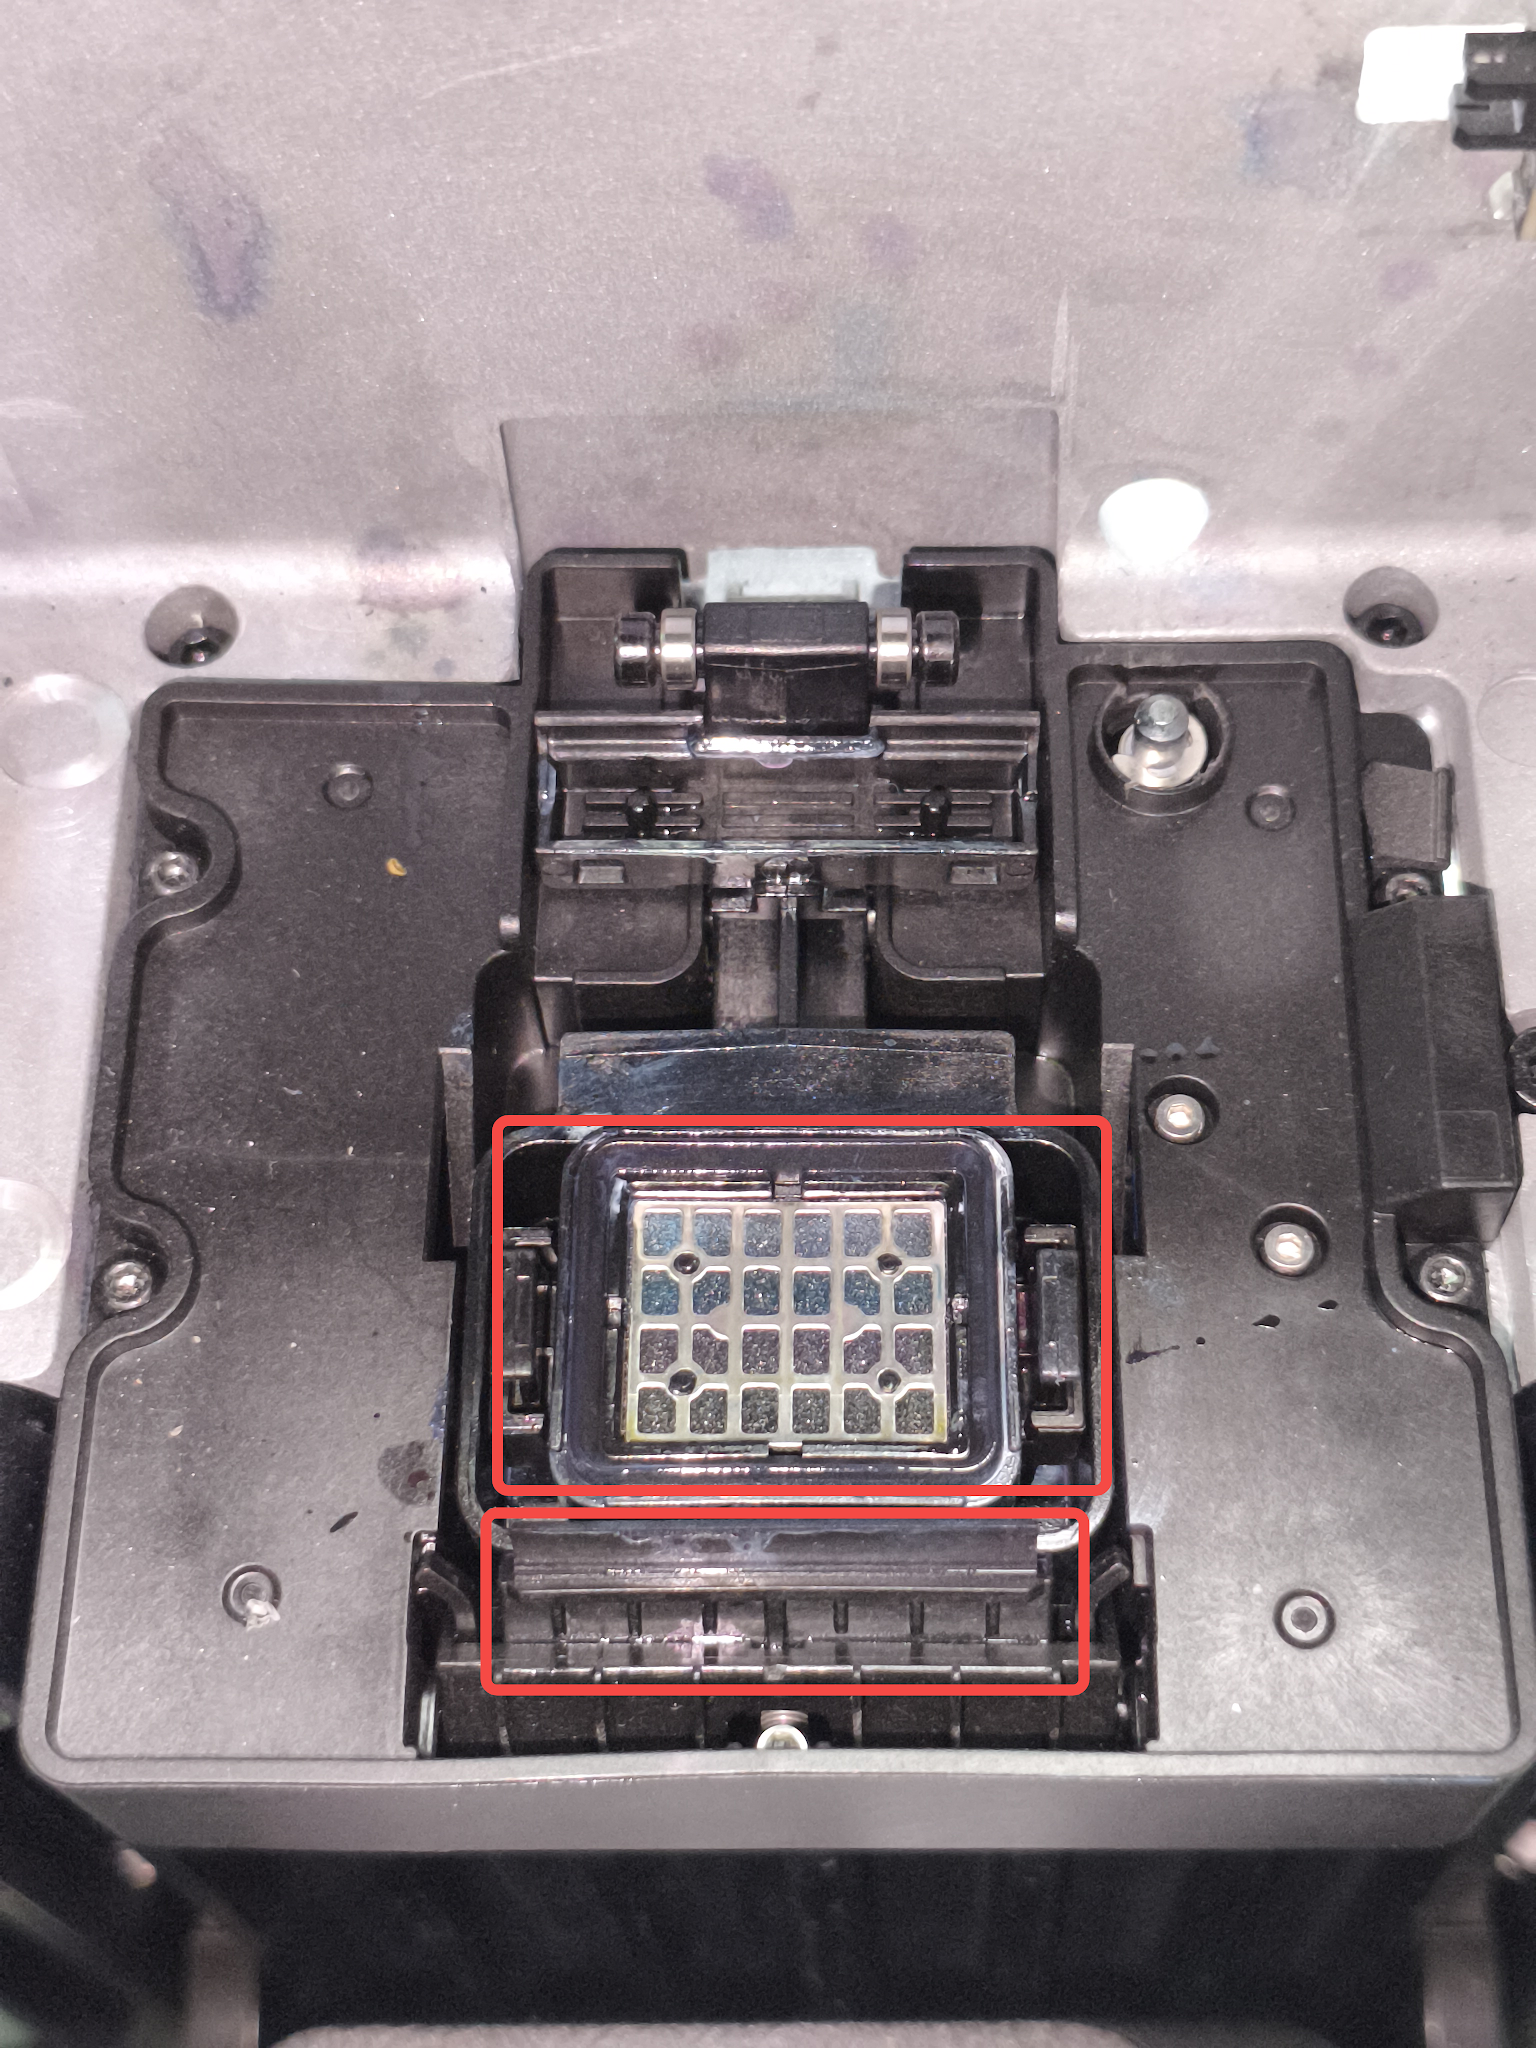
Function: Stores and filters waste ink and cleaning fluid generated during the print head’s automatic maintenance processes in the ink stack, such as Flash Clean, Medium Clean and Deep Clean.
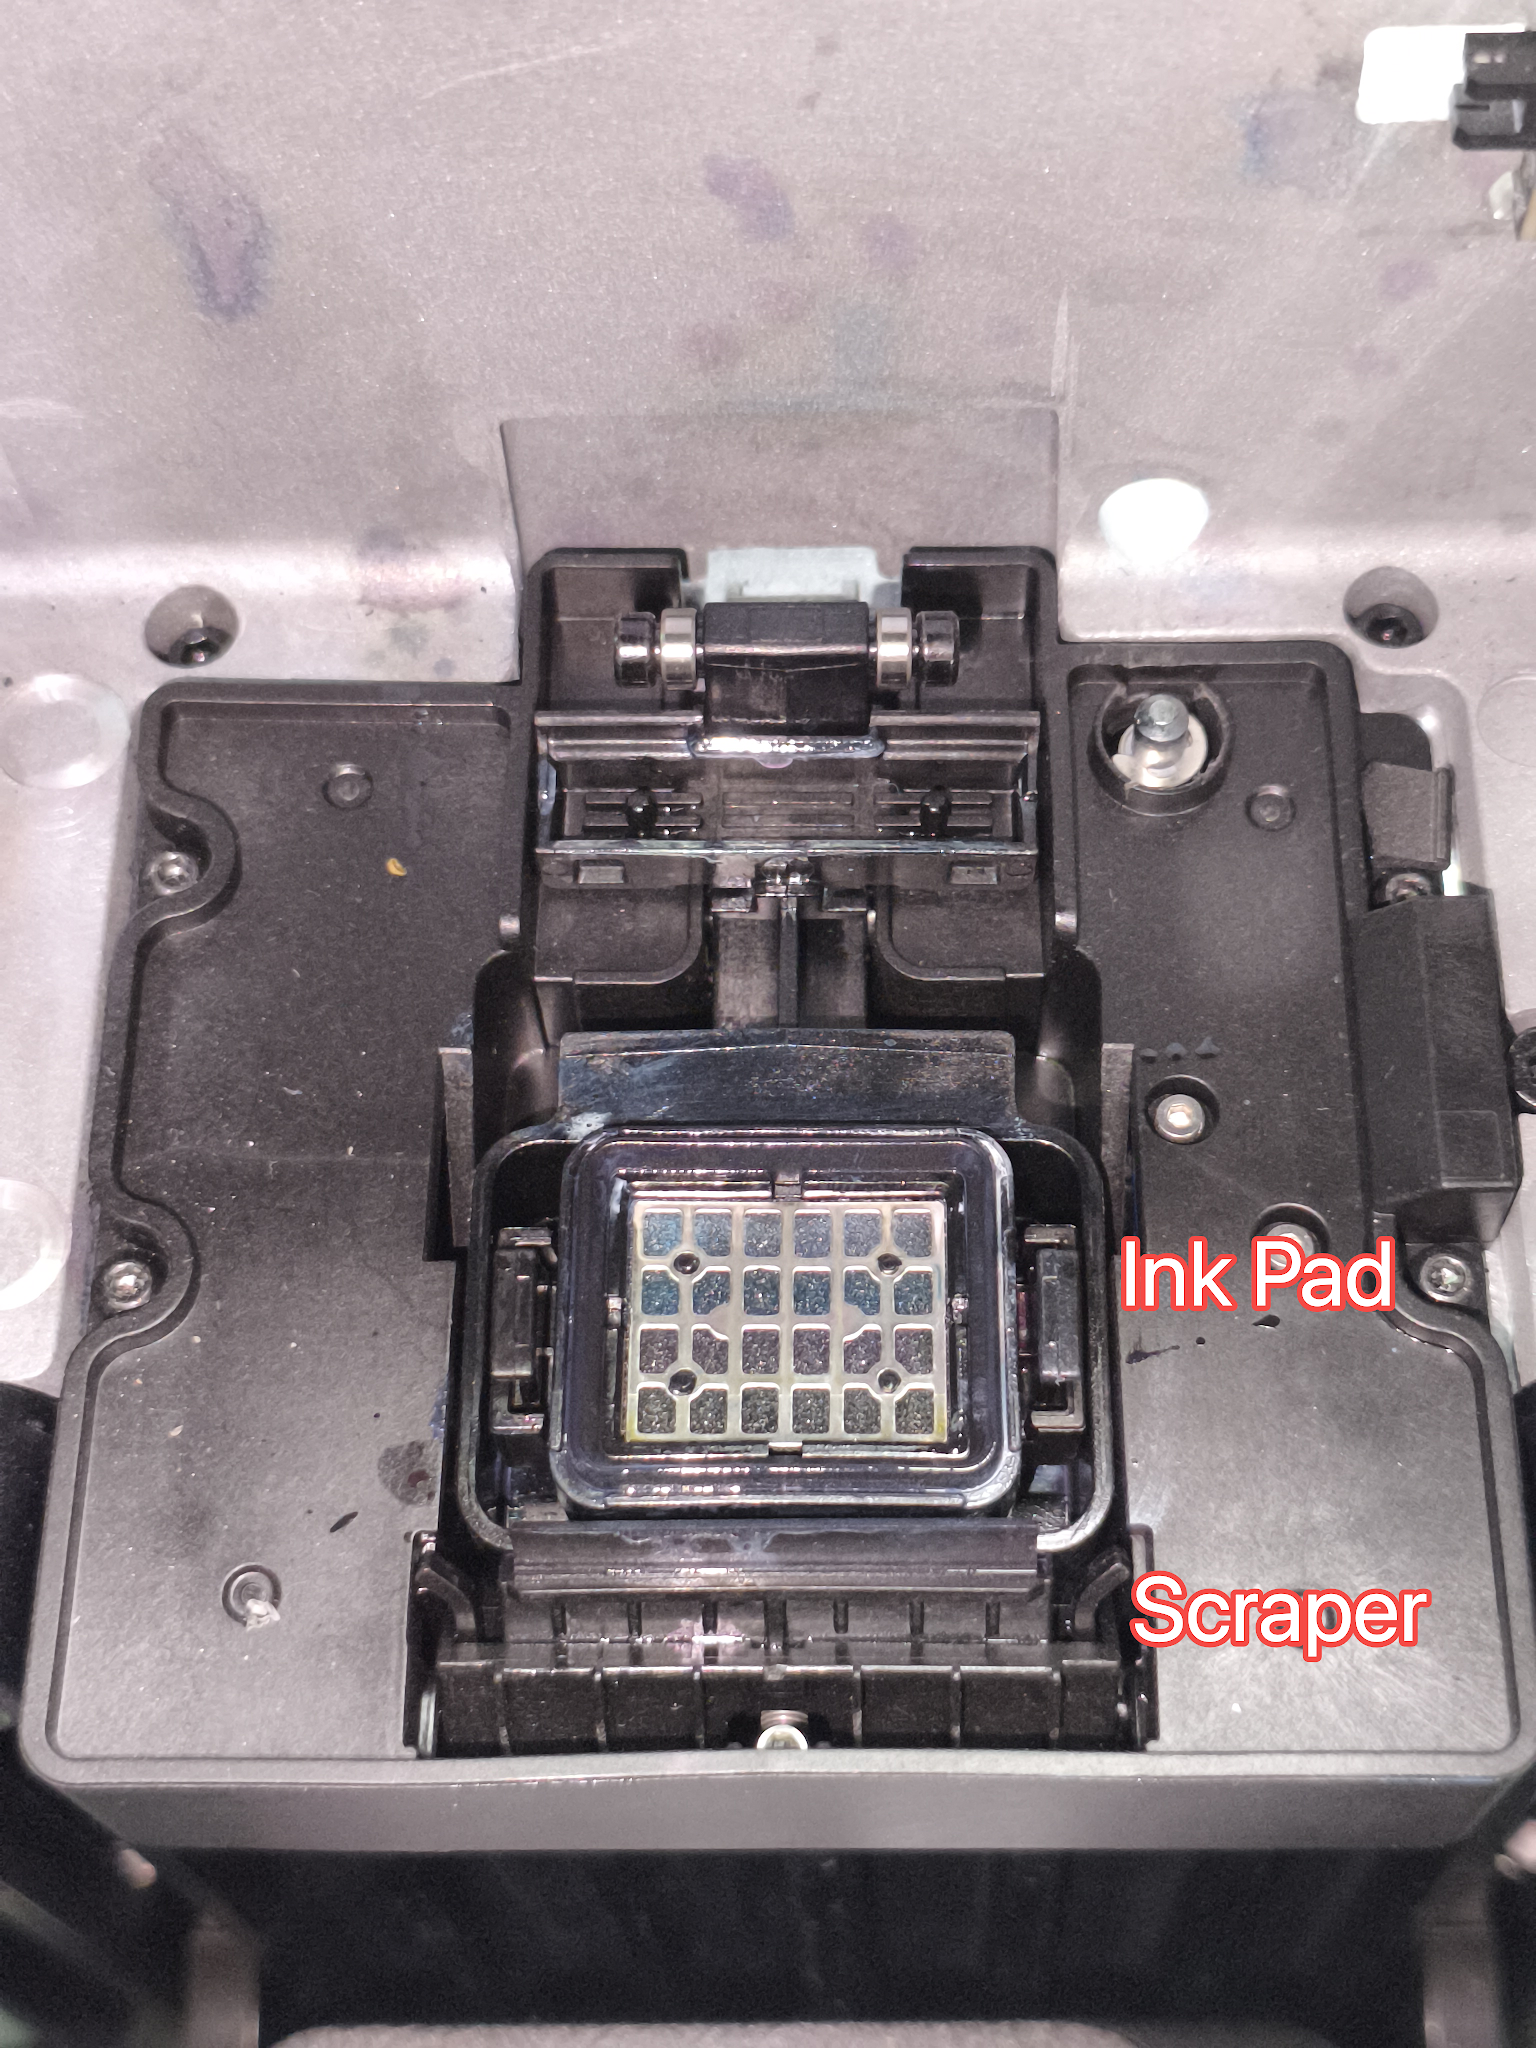
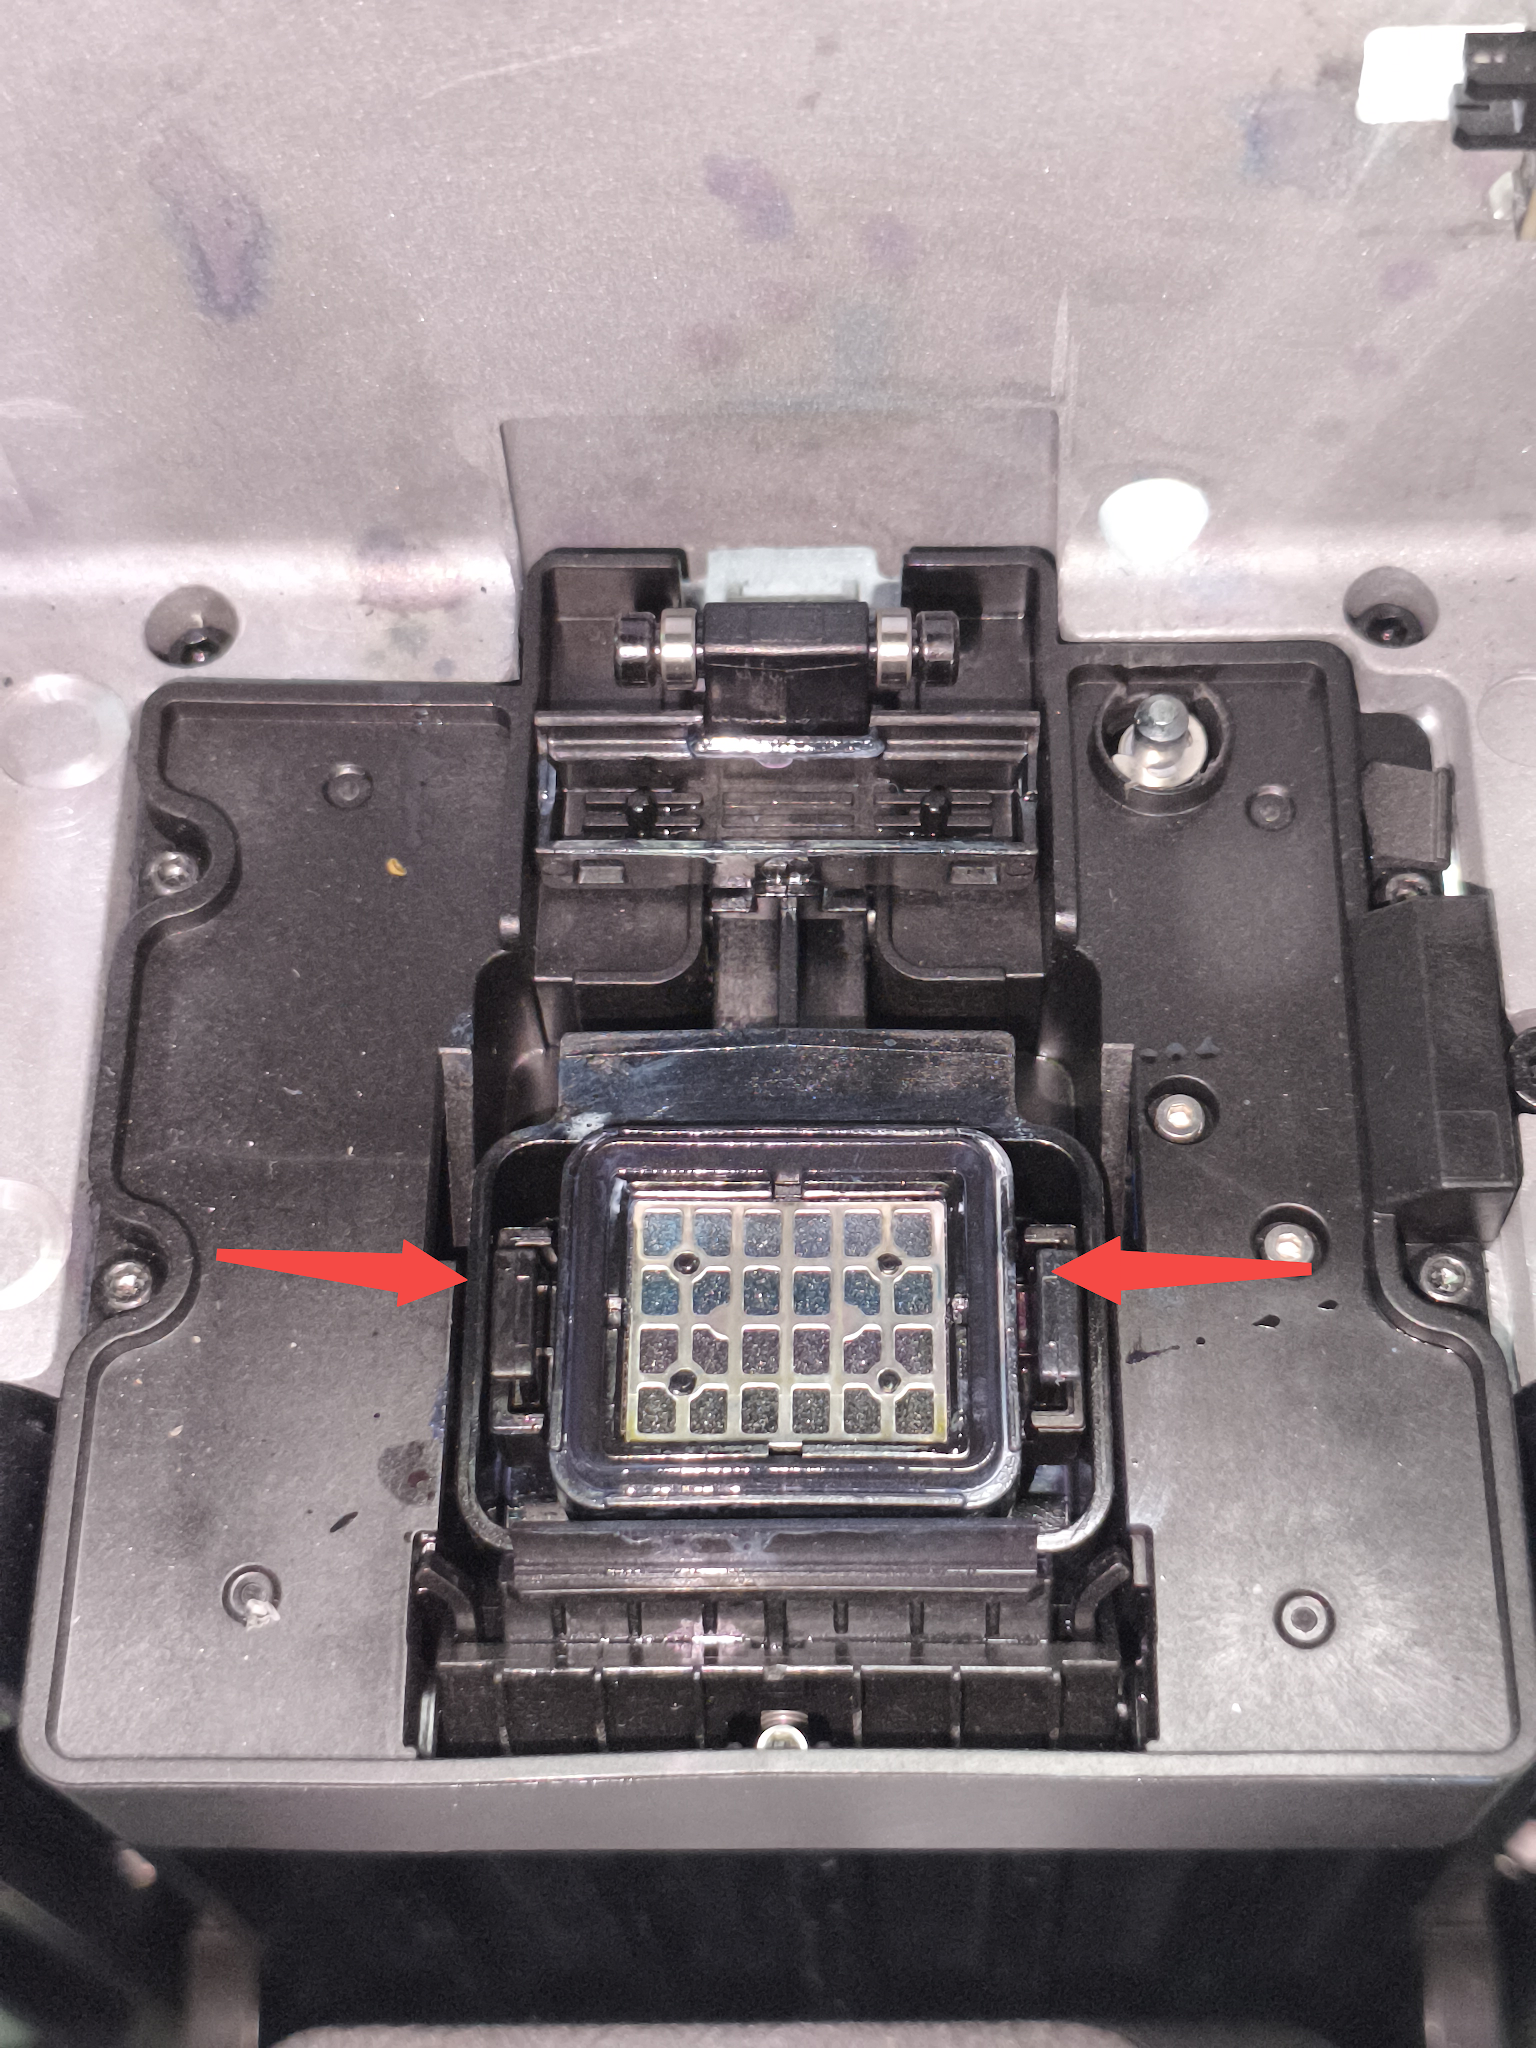
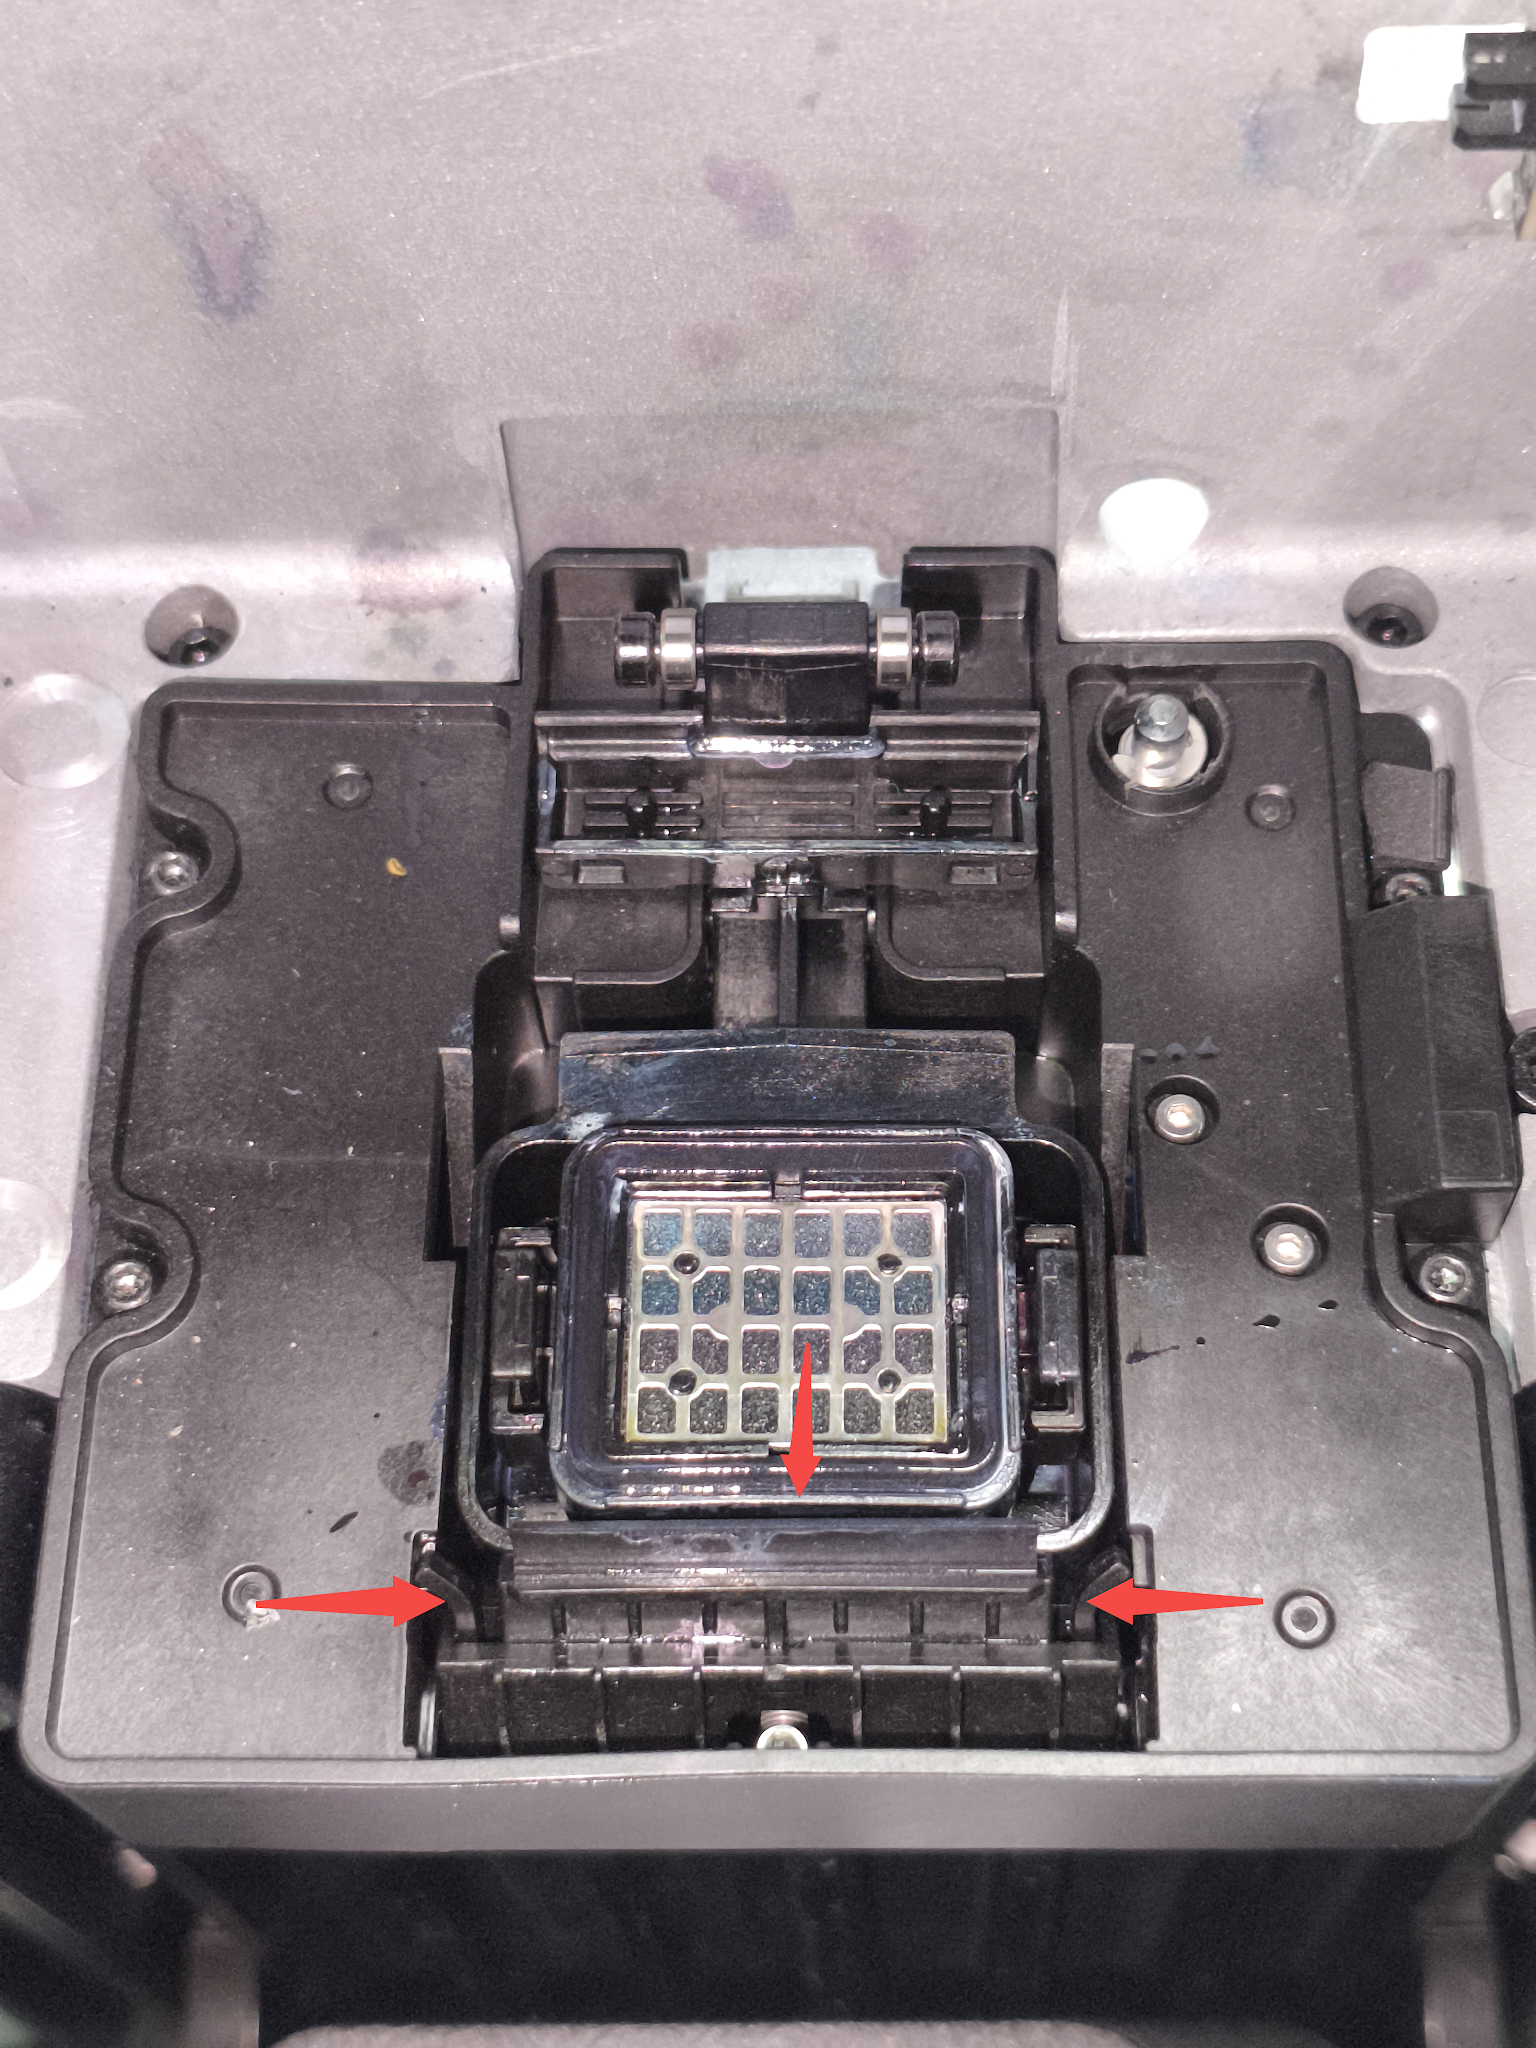
Component Location: Located on the ink stack module at the position shown in the right image, sealing with the print head during automatic maintenance.
¶ Scraper
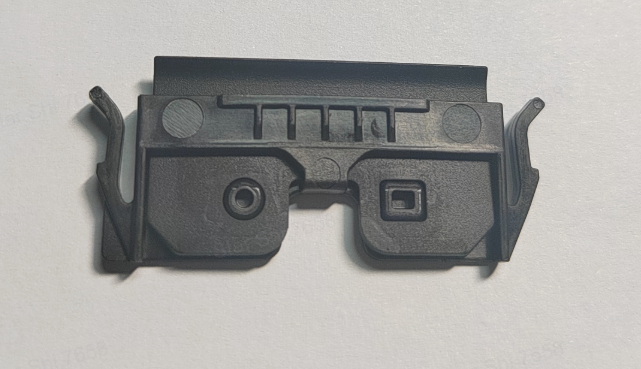
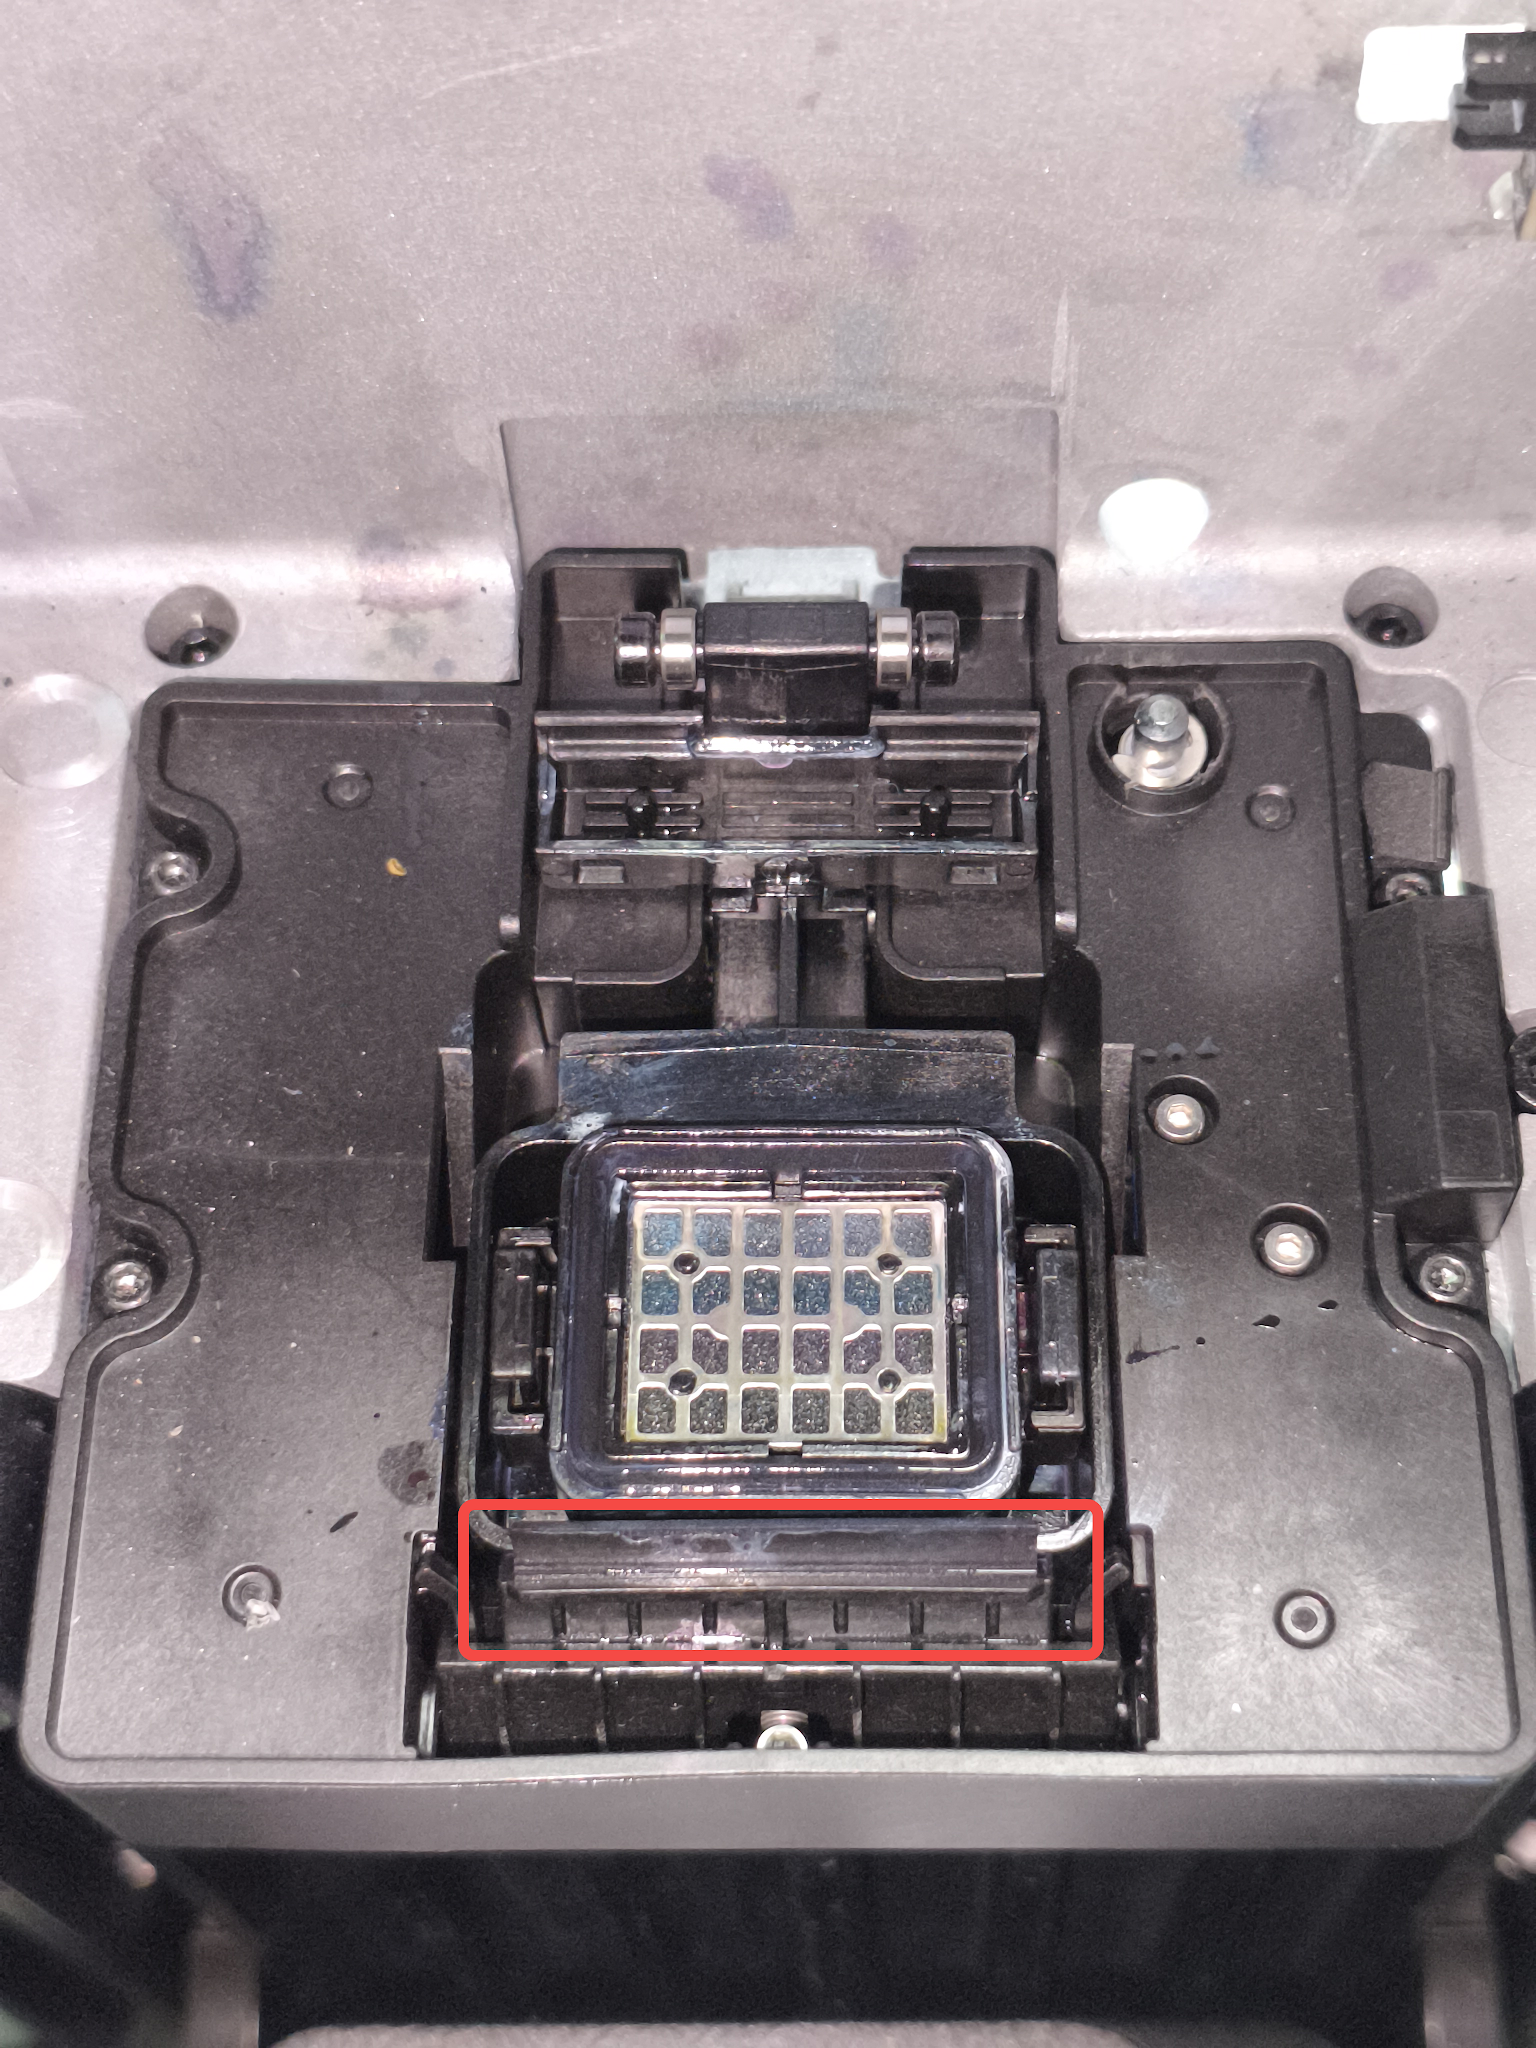
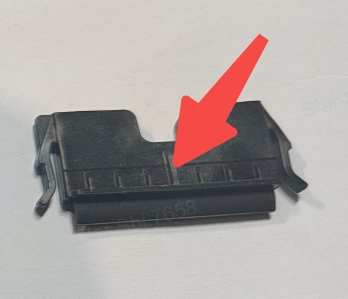
Function: Used during automatic print head maintenance to scrape residual ink from the surface of the print head, keeping it clean and preventing color mixing during printing (shown in the left image).
Component Location: Installed on the ink stack module at the position indicated in the right image.
¶ Ink Tank Pad
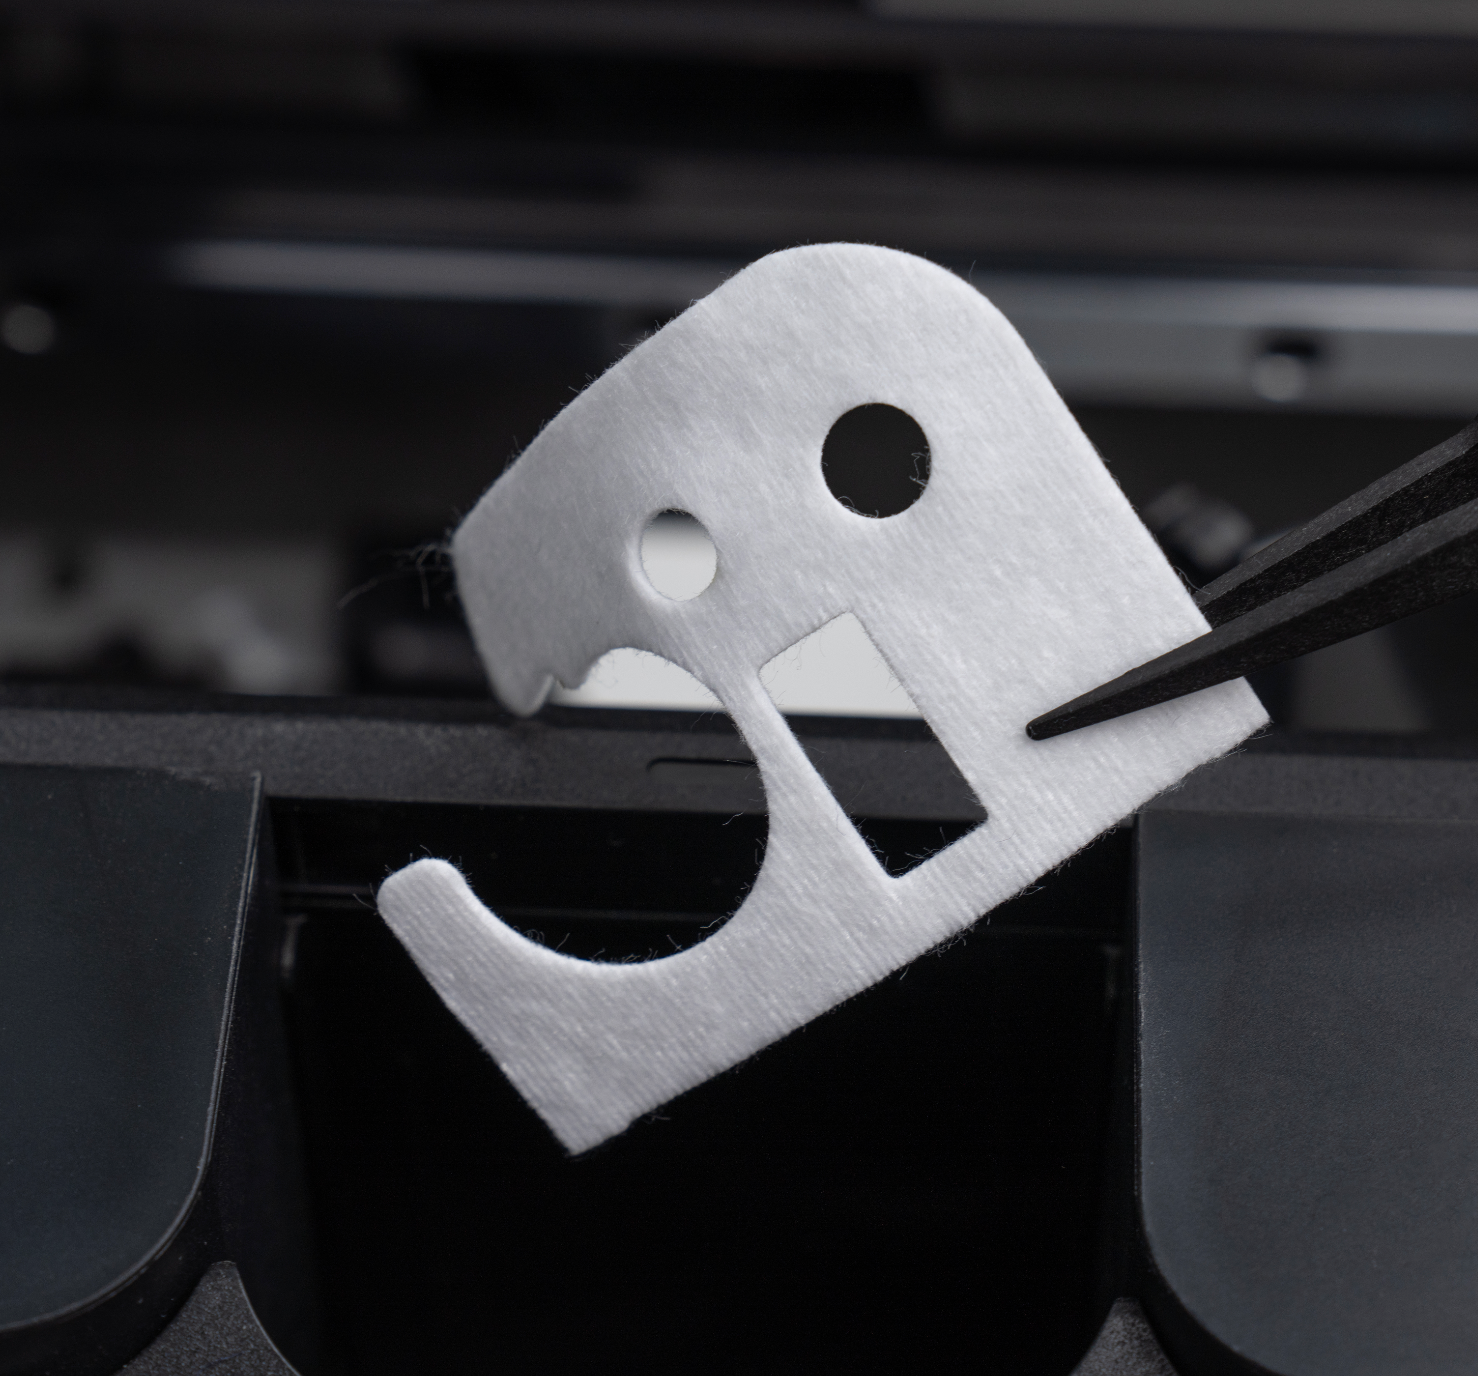
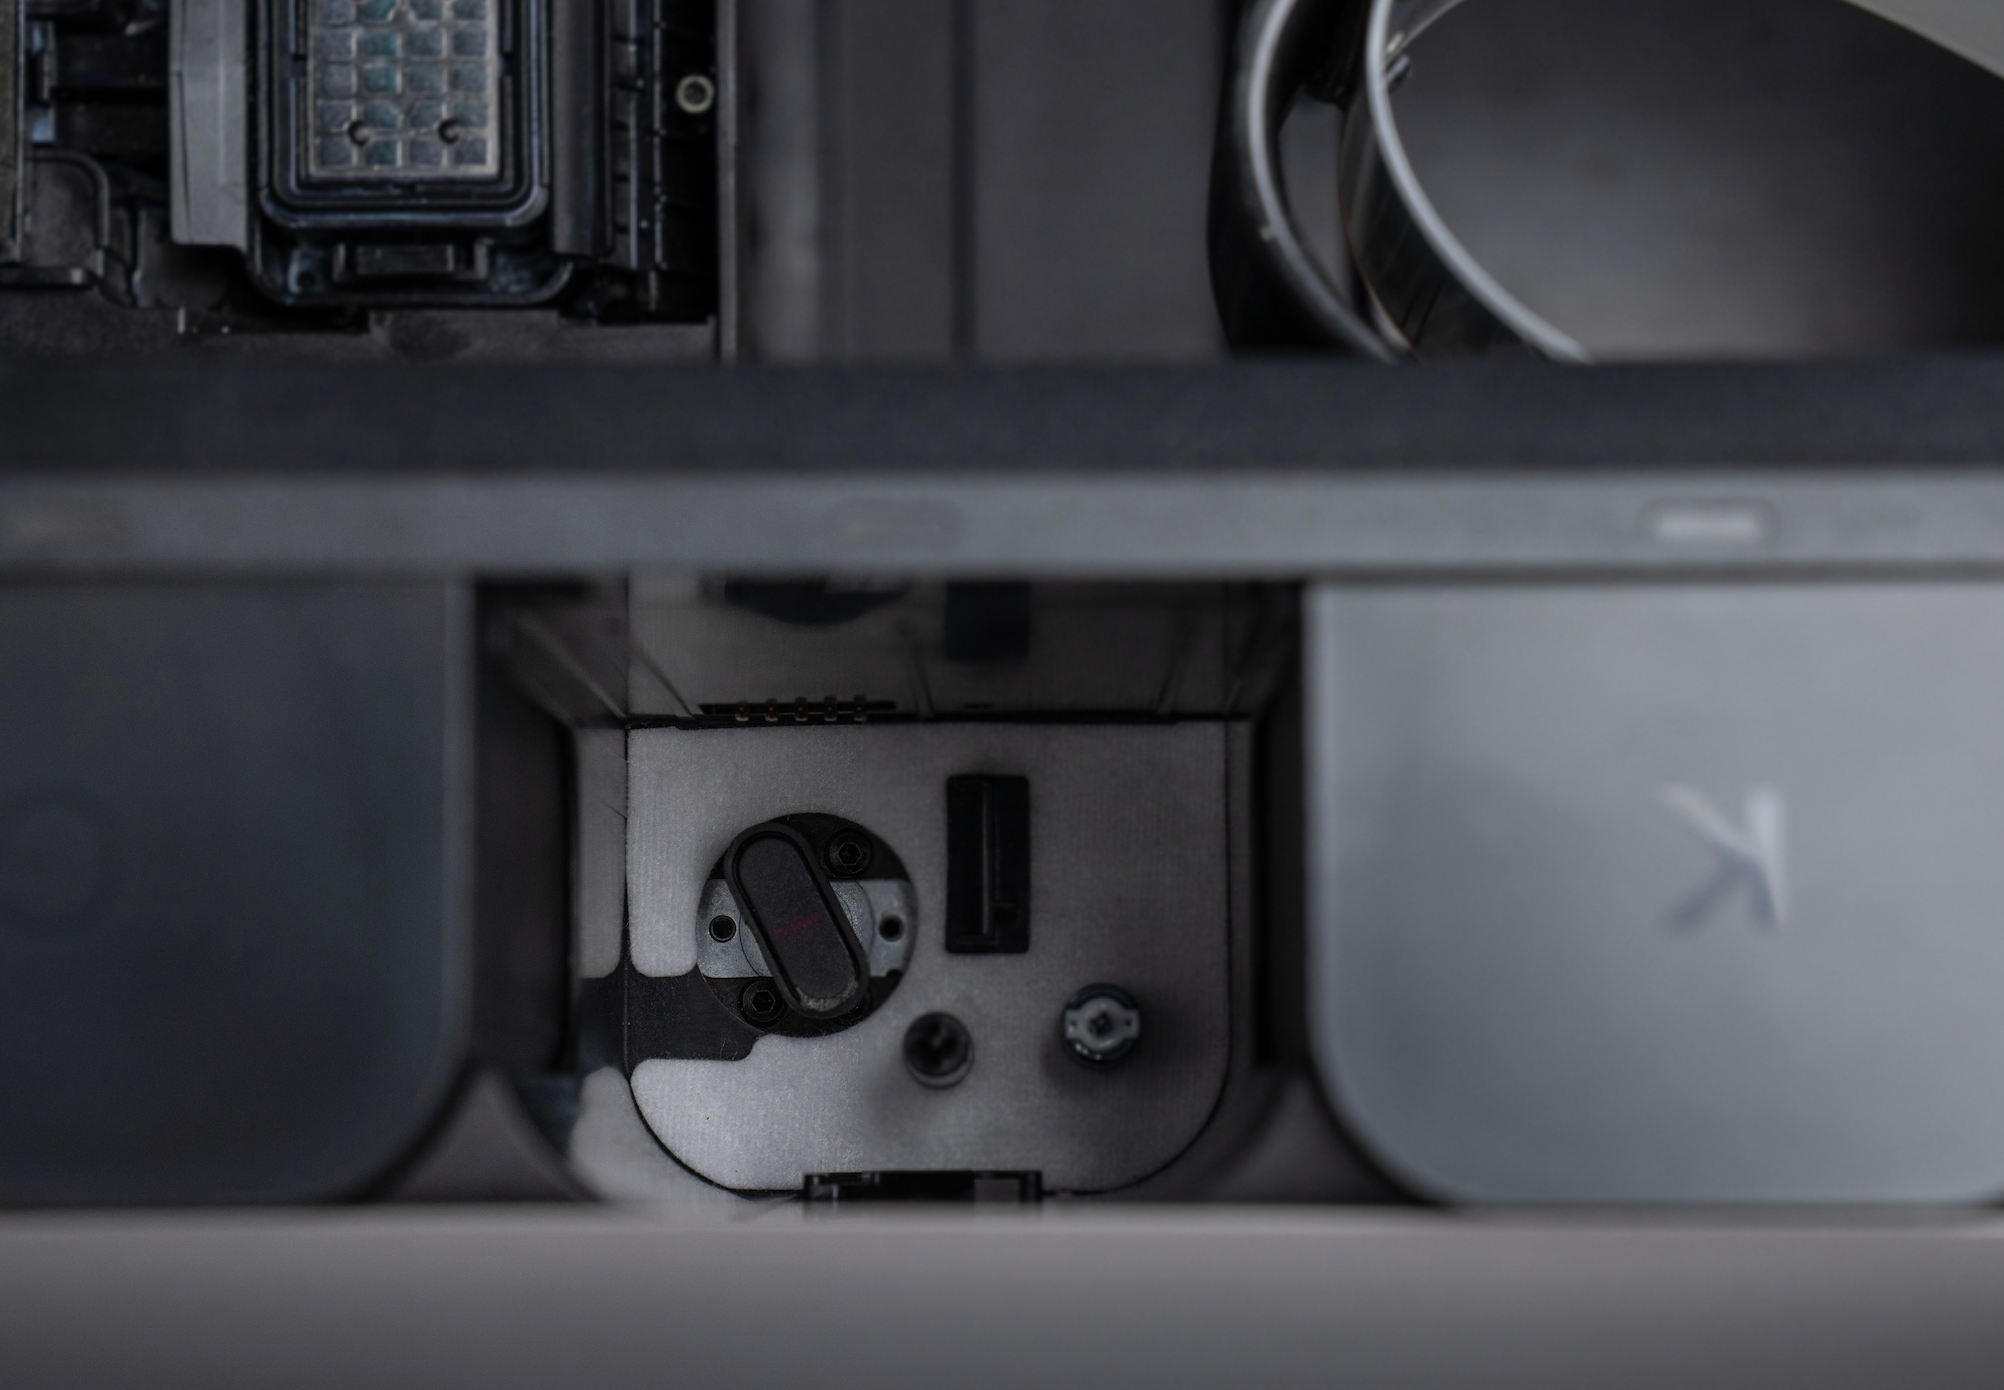
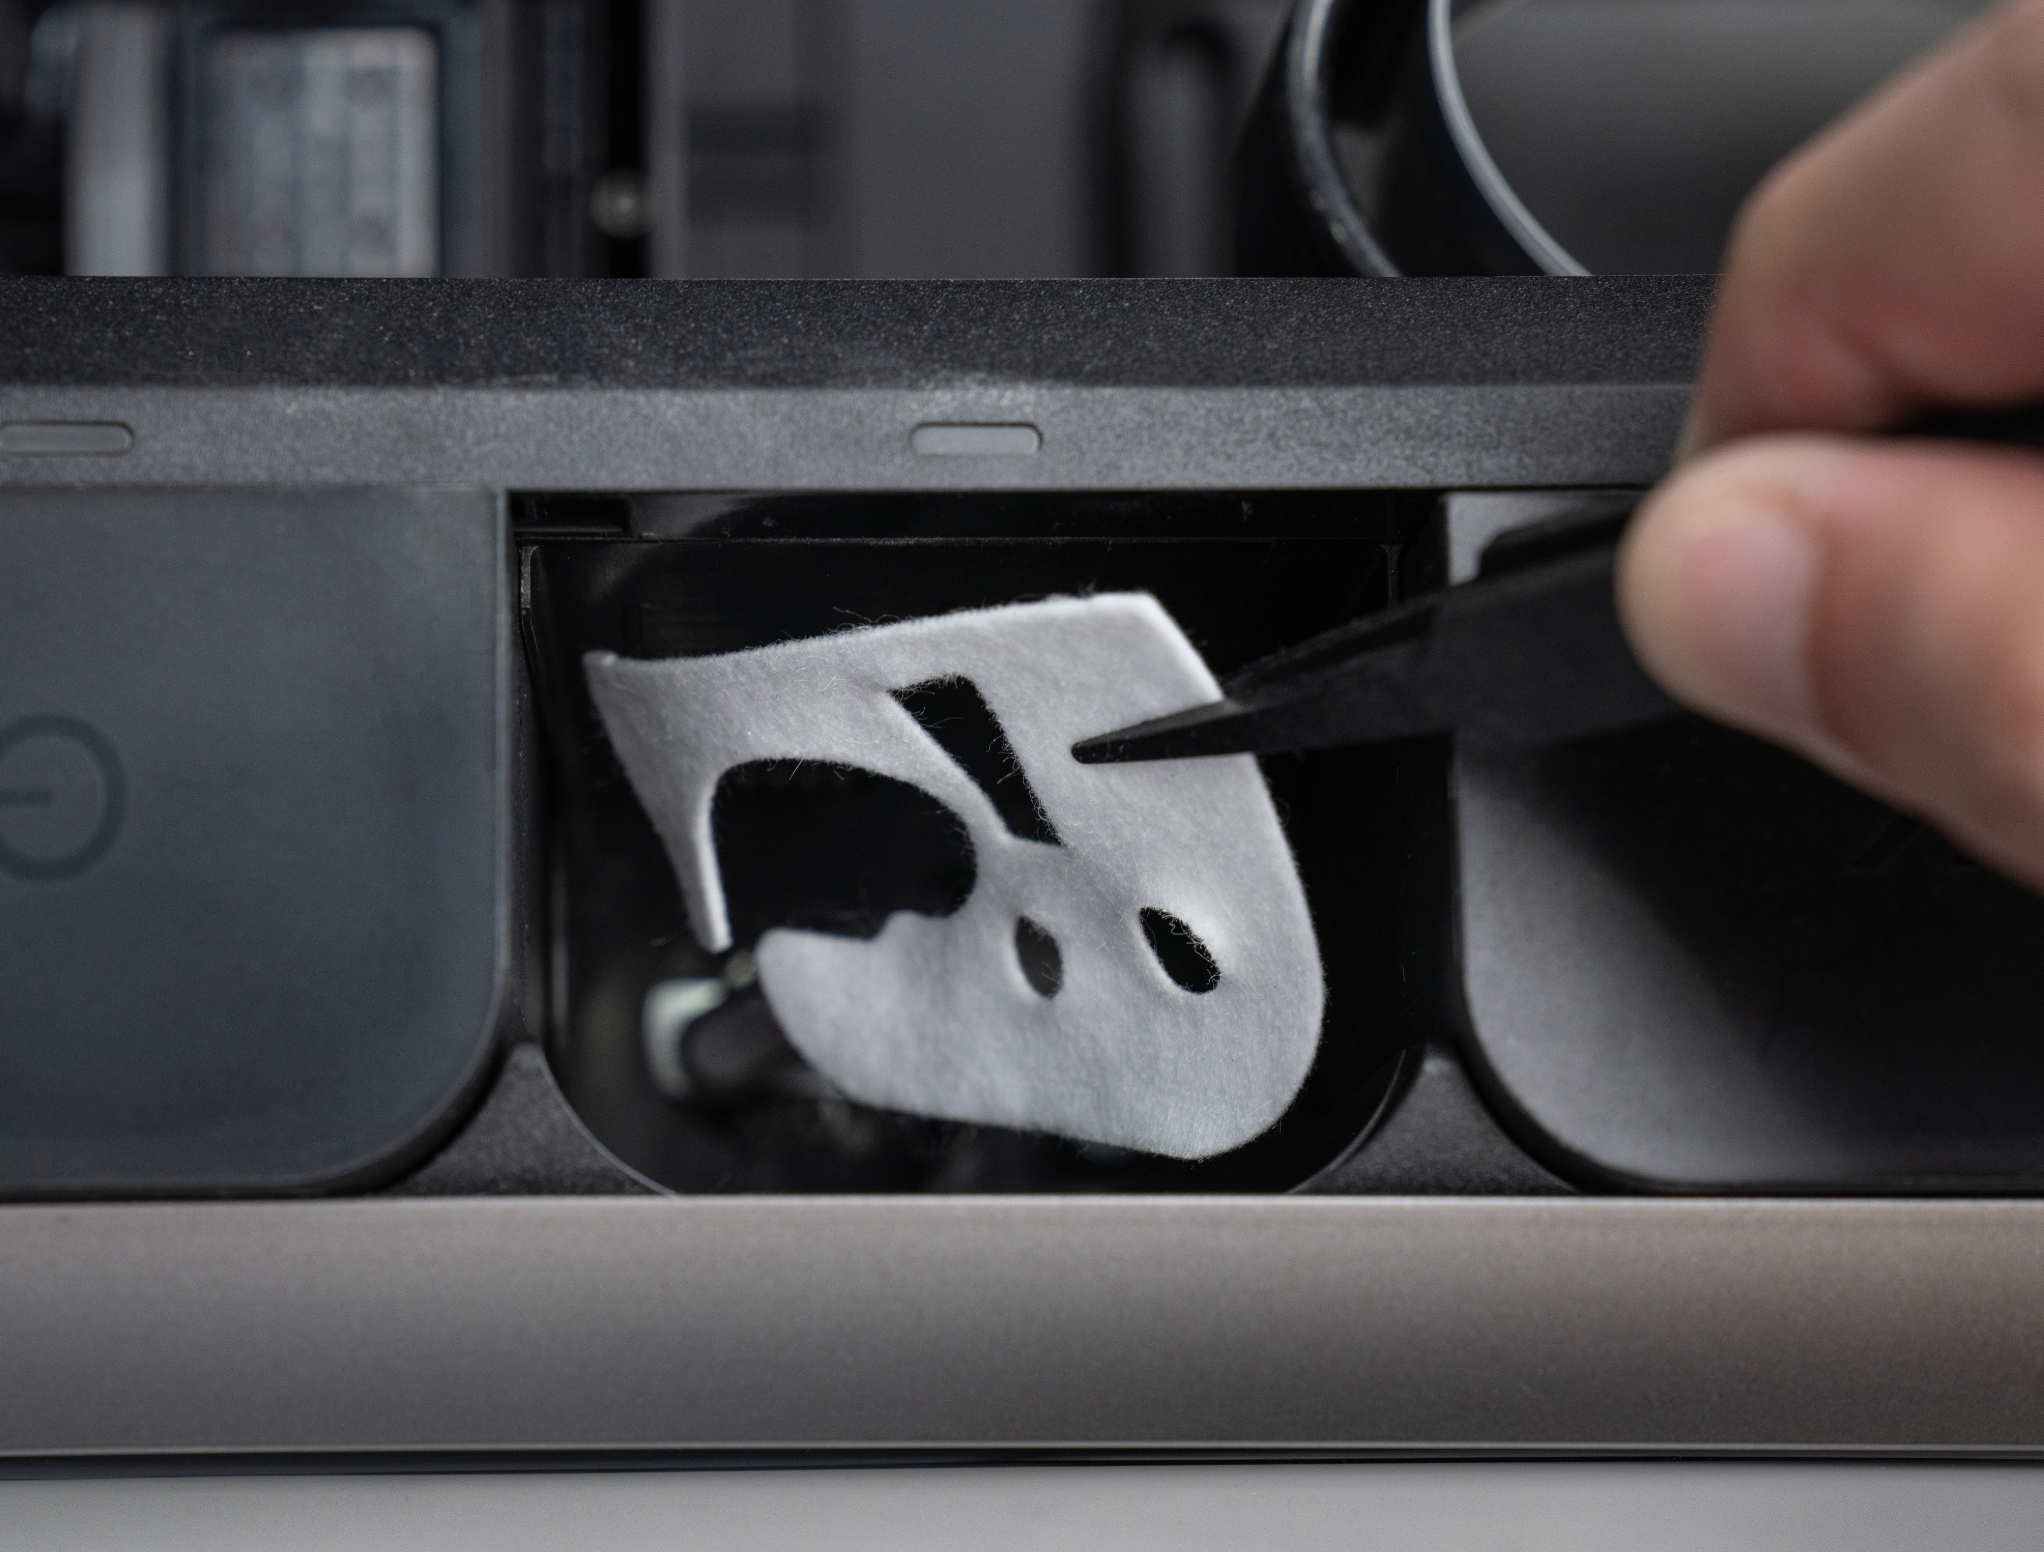
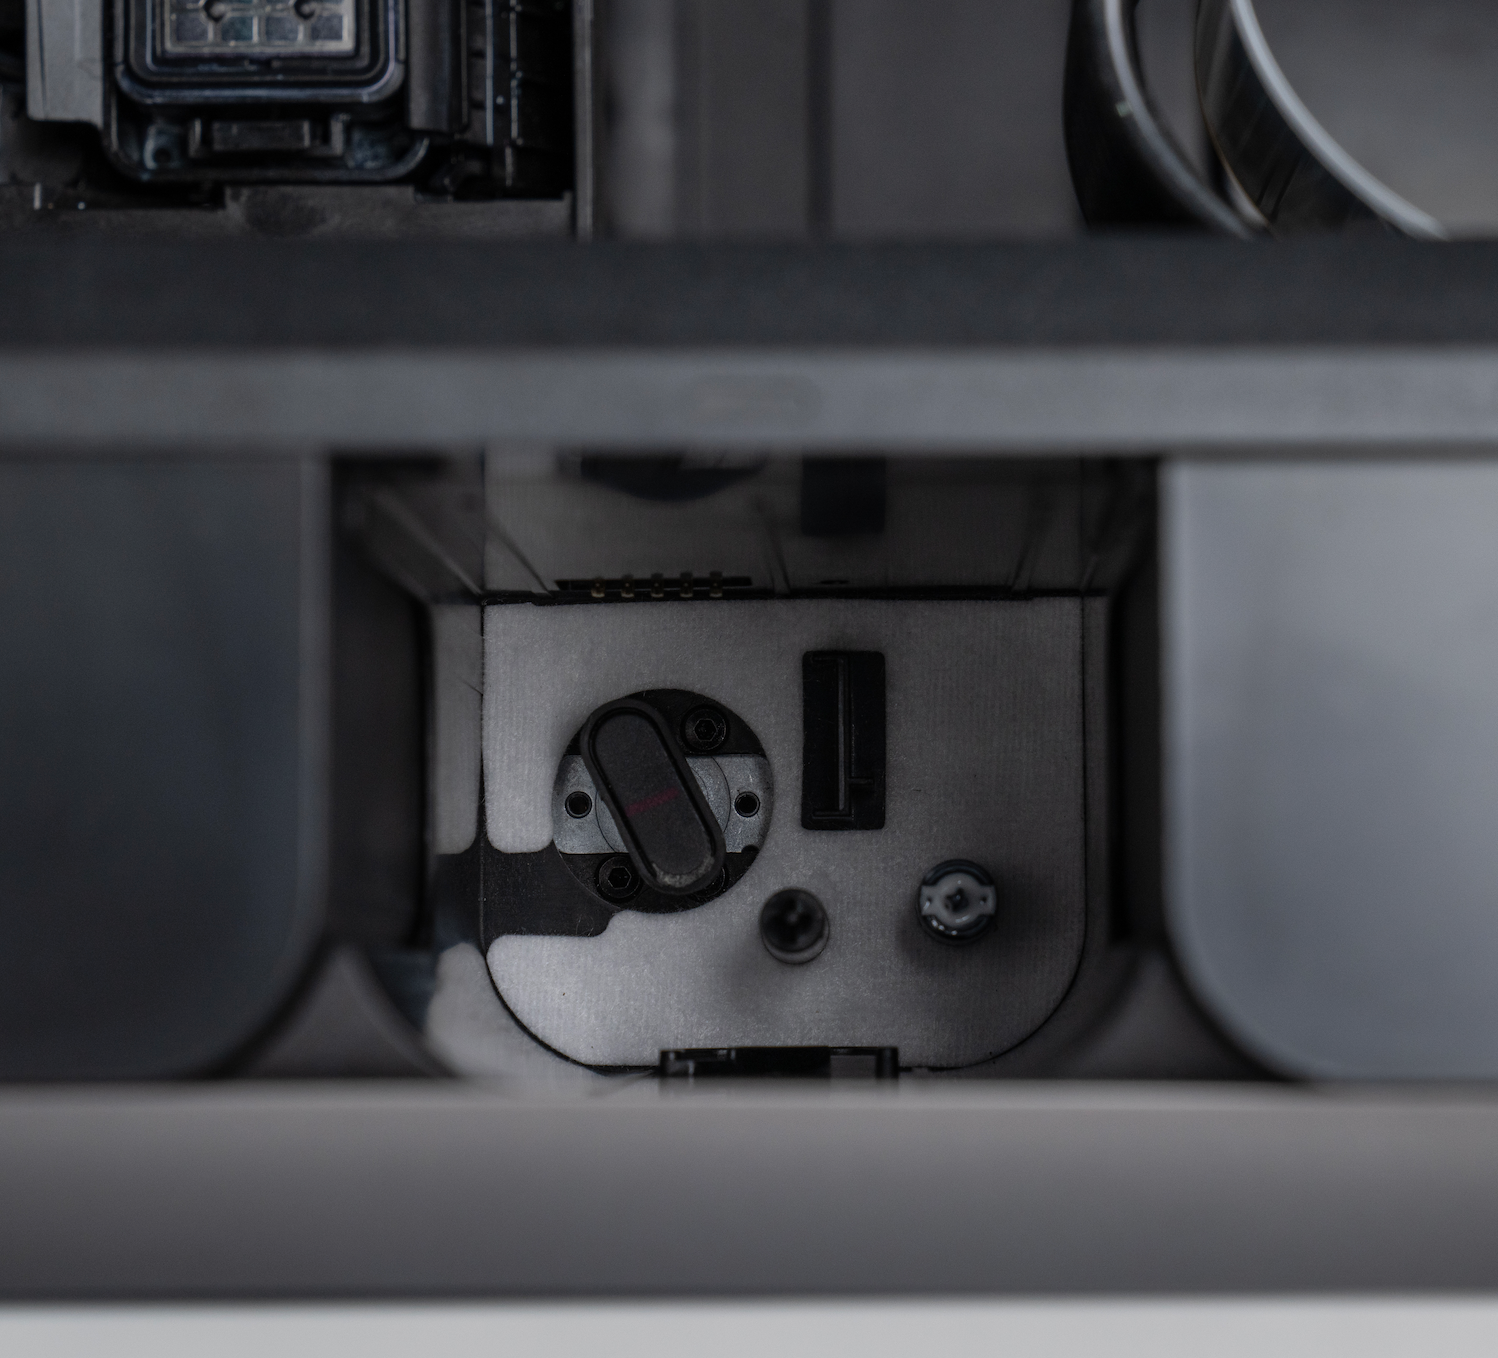
Function: It is used to absorb minor ink leakage that may occur during cartridge insertion, removal, or operation, preventing residual ink from contaminating the interface.
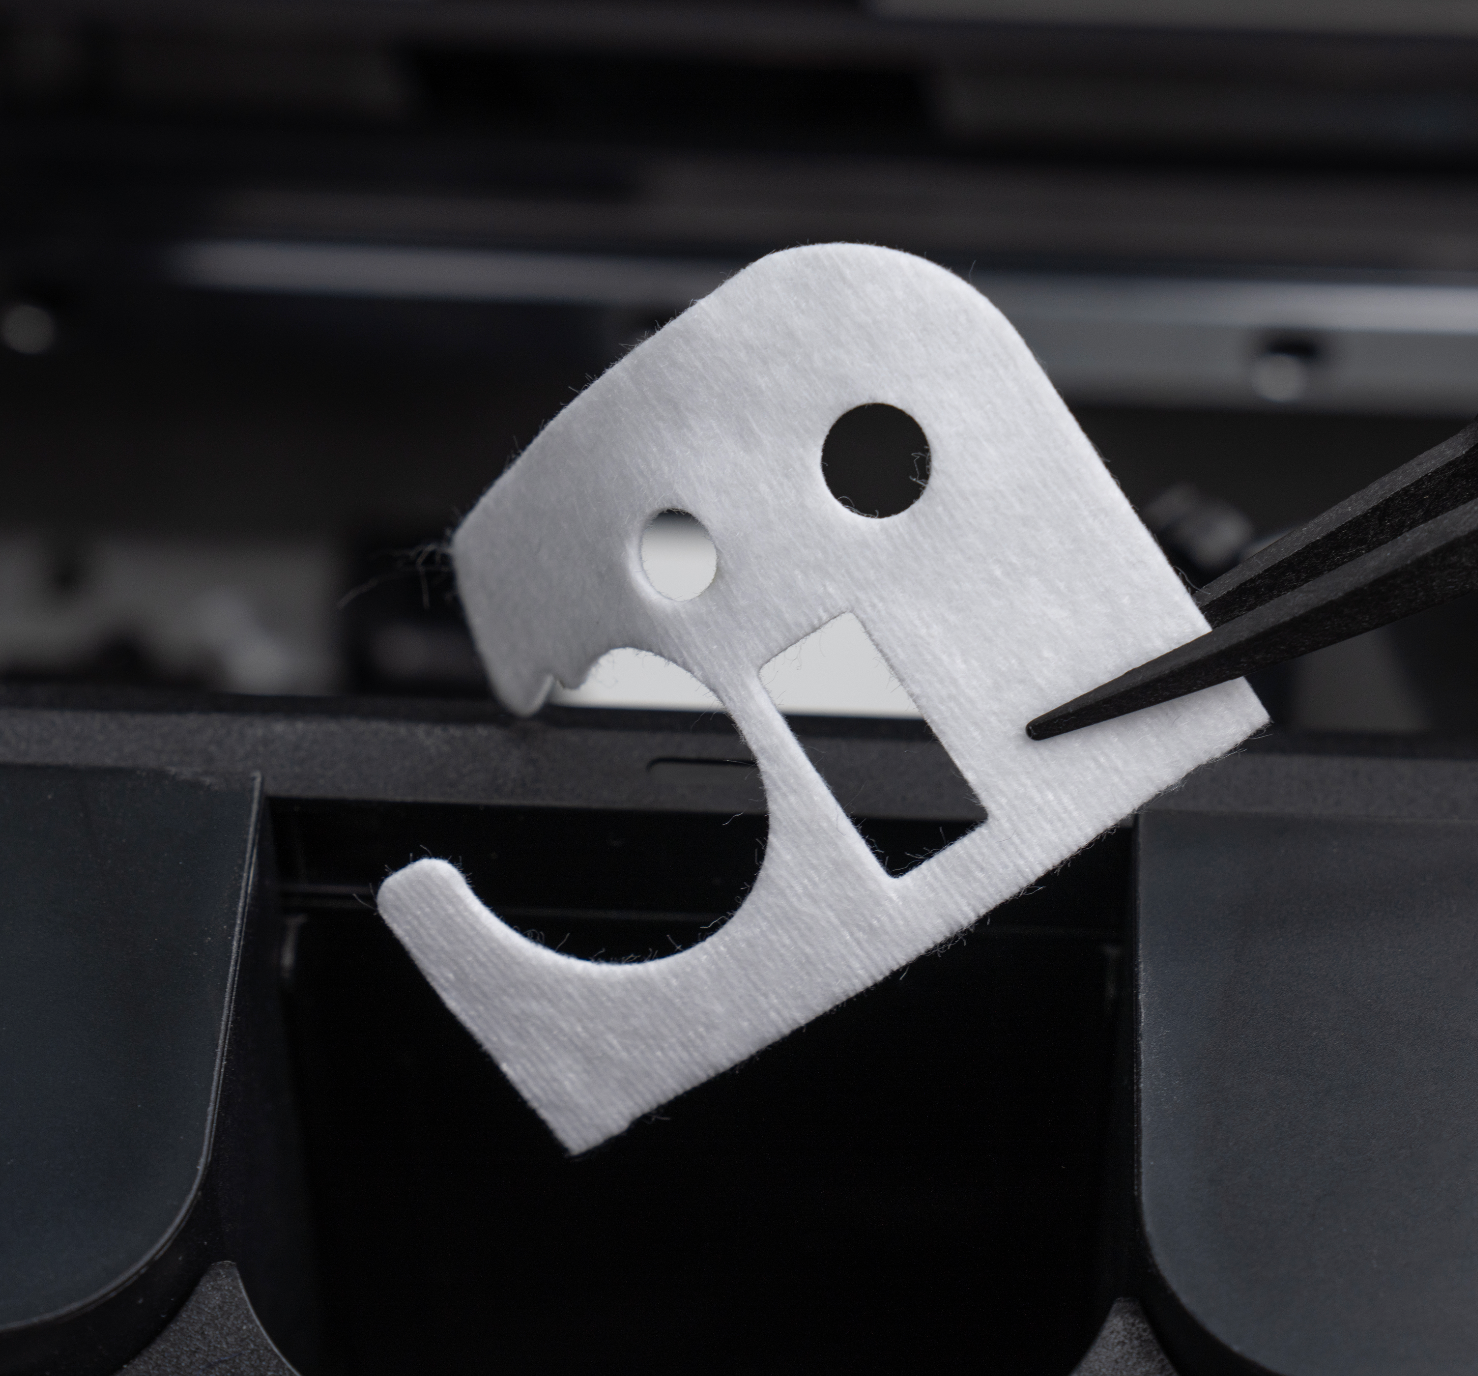
Component Location: Installed at the bottom of the ink cartridge interface, with the opening oriented to avoid interfering with nearby components.
Required Tools(Included in the Kit)
- Disposable nitrile gloves
- Tweezers
Safety Precautions
- Wear gloves before performing the maintenance and avoid contact with residual ink in the ink stack to prevent skin irritation.
- Perform the operation in a well-ventilated environment.
- Always disconnect power before performing print head–related operations. A short power-off will not affect the ink system.
- When replacing the ink tank pad, only one layer of pad is allowed to be installed. Installing two layers is prohibited, otherwise it will affect the cartridge removal operation.
¶ Replacement Steps
¶ Step 1 - Remove the Top Cover of the machine
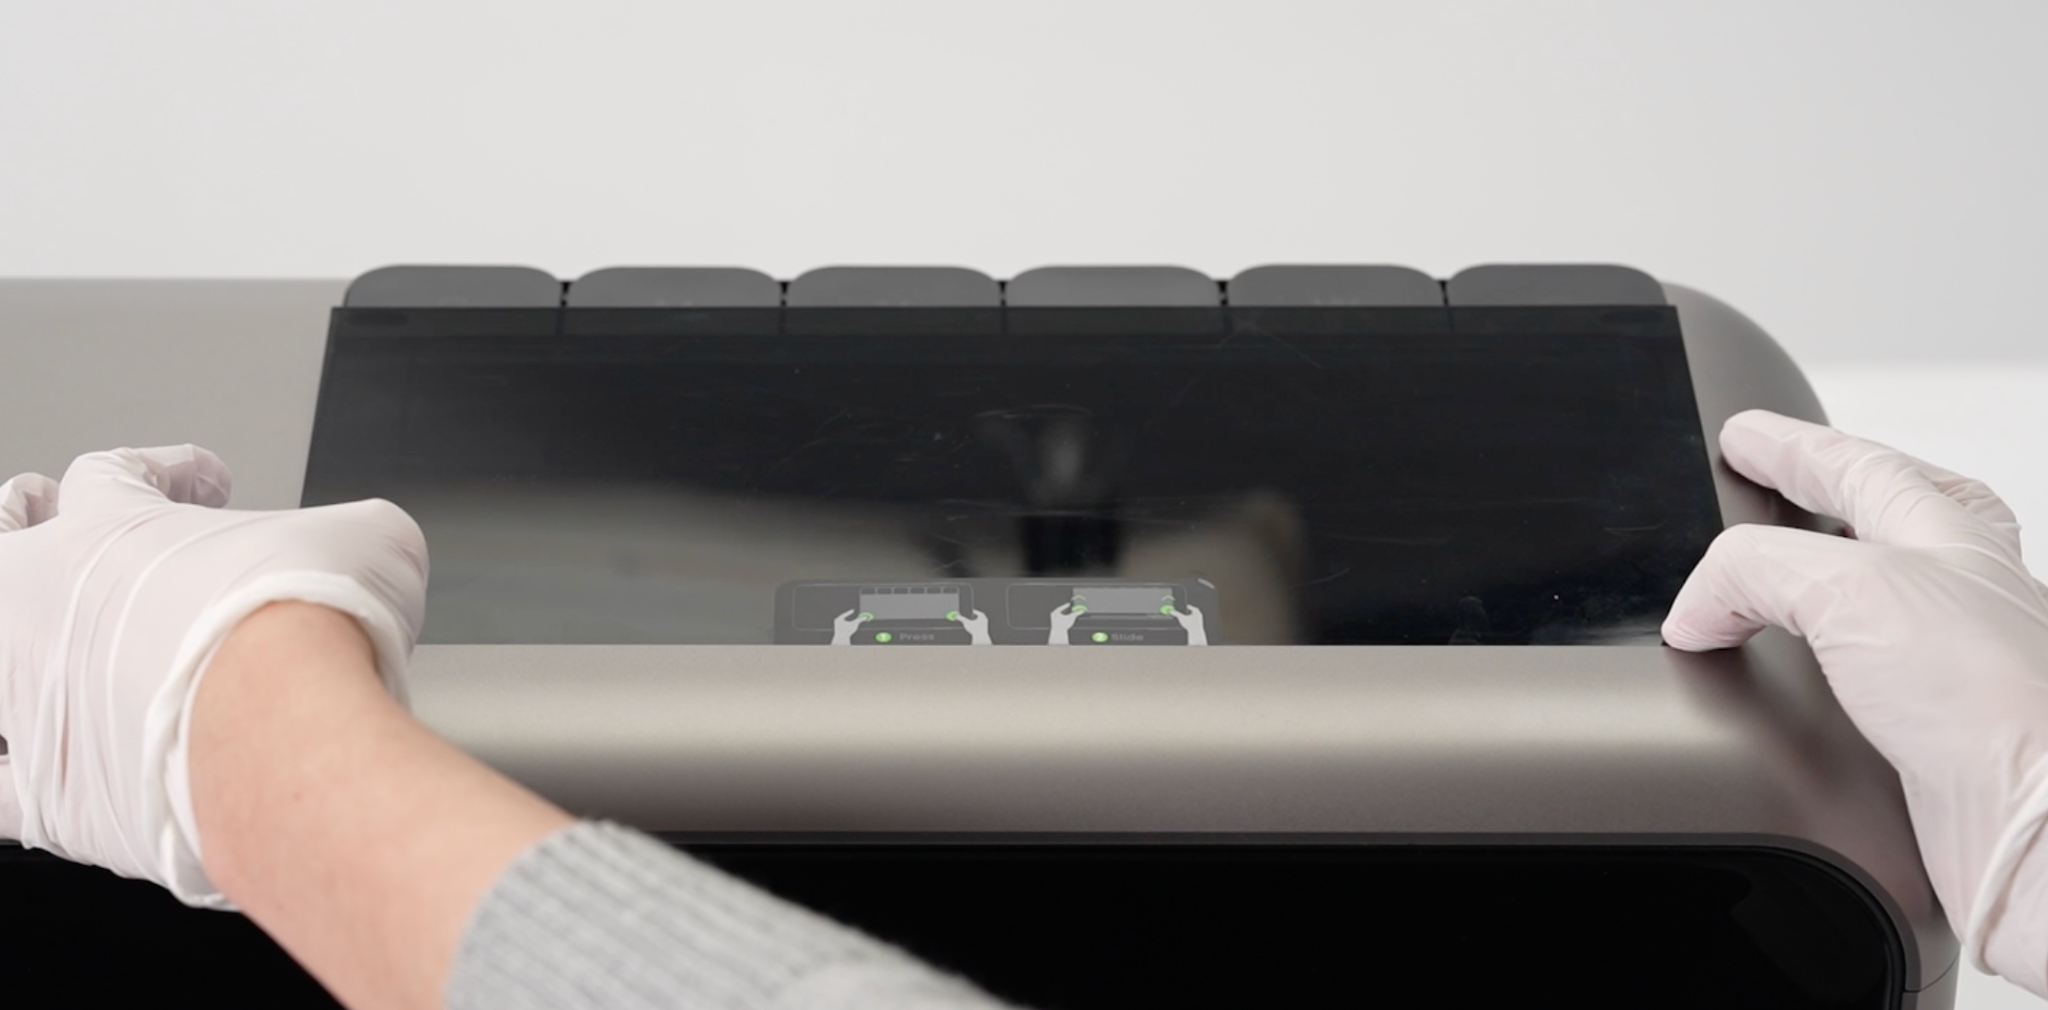
Press both sides of the semi-transparent, dark gray top cover at the bottom to remove it.
¶ Step 2 - Move the print head out of the ink stack
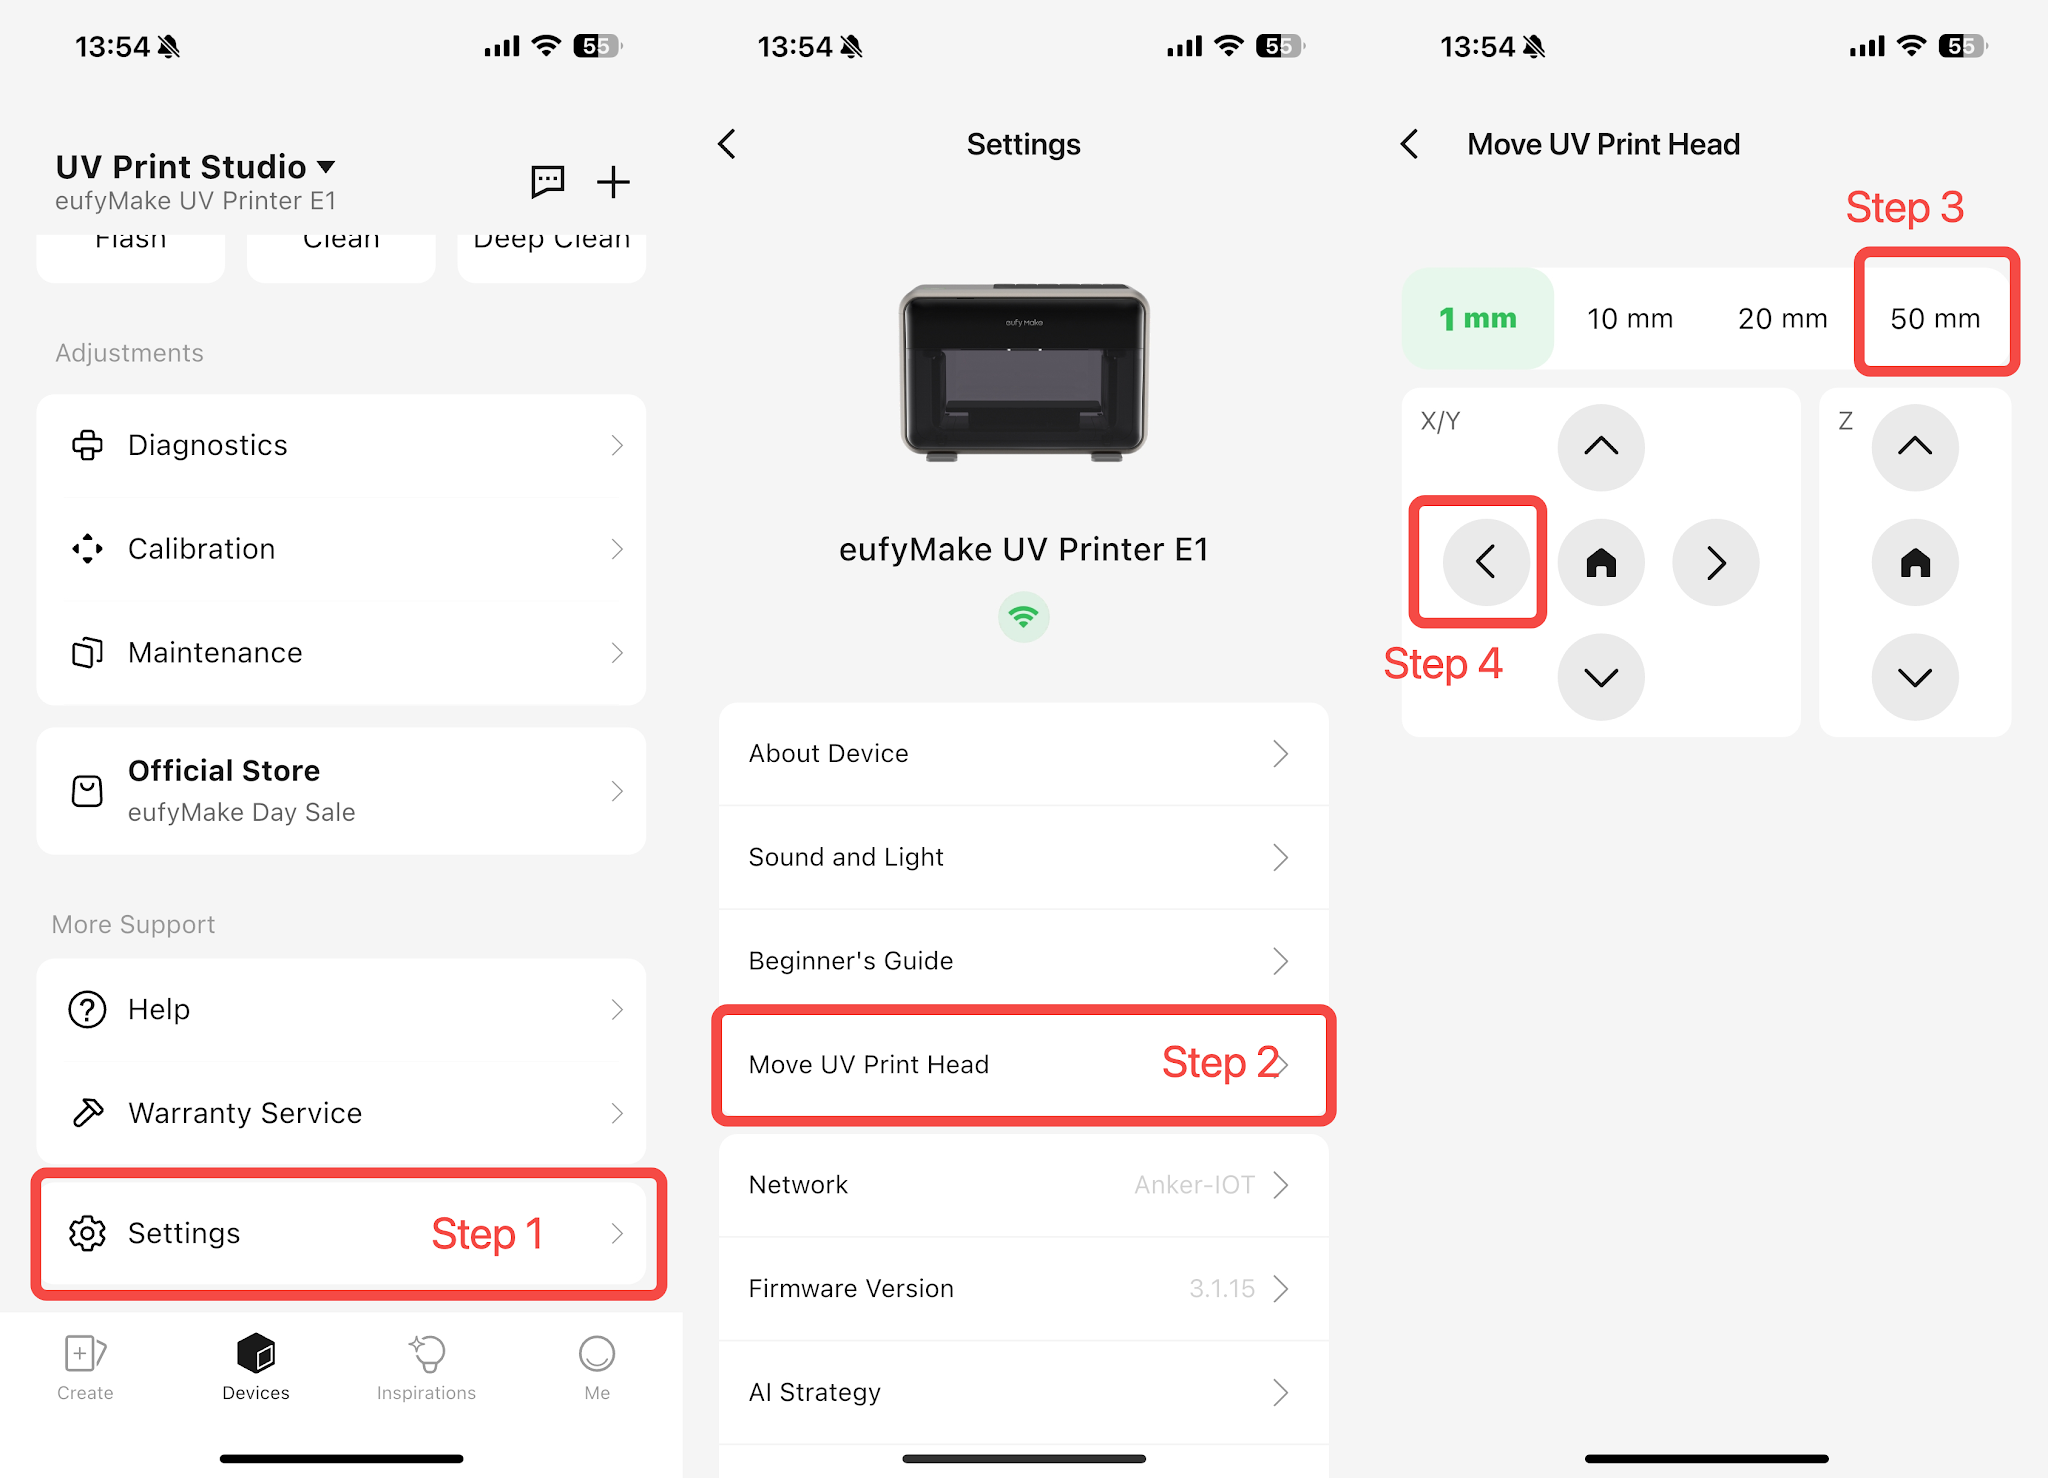
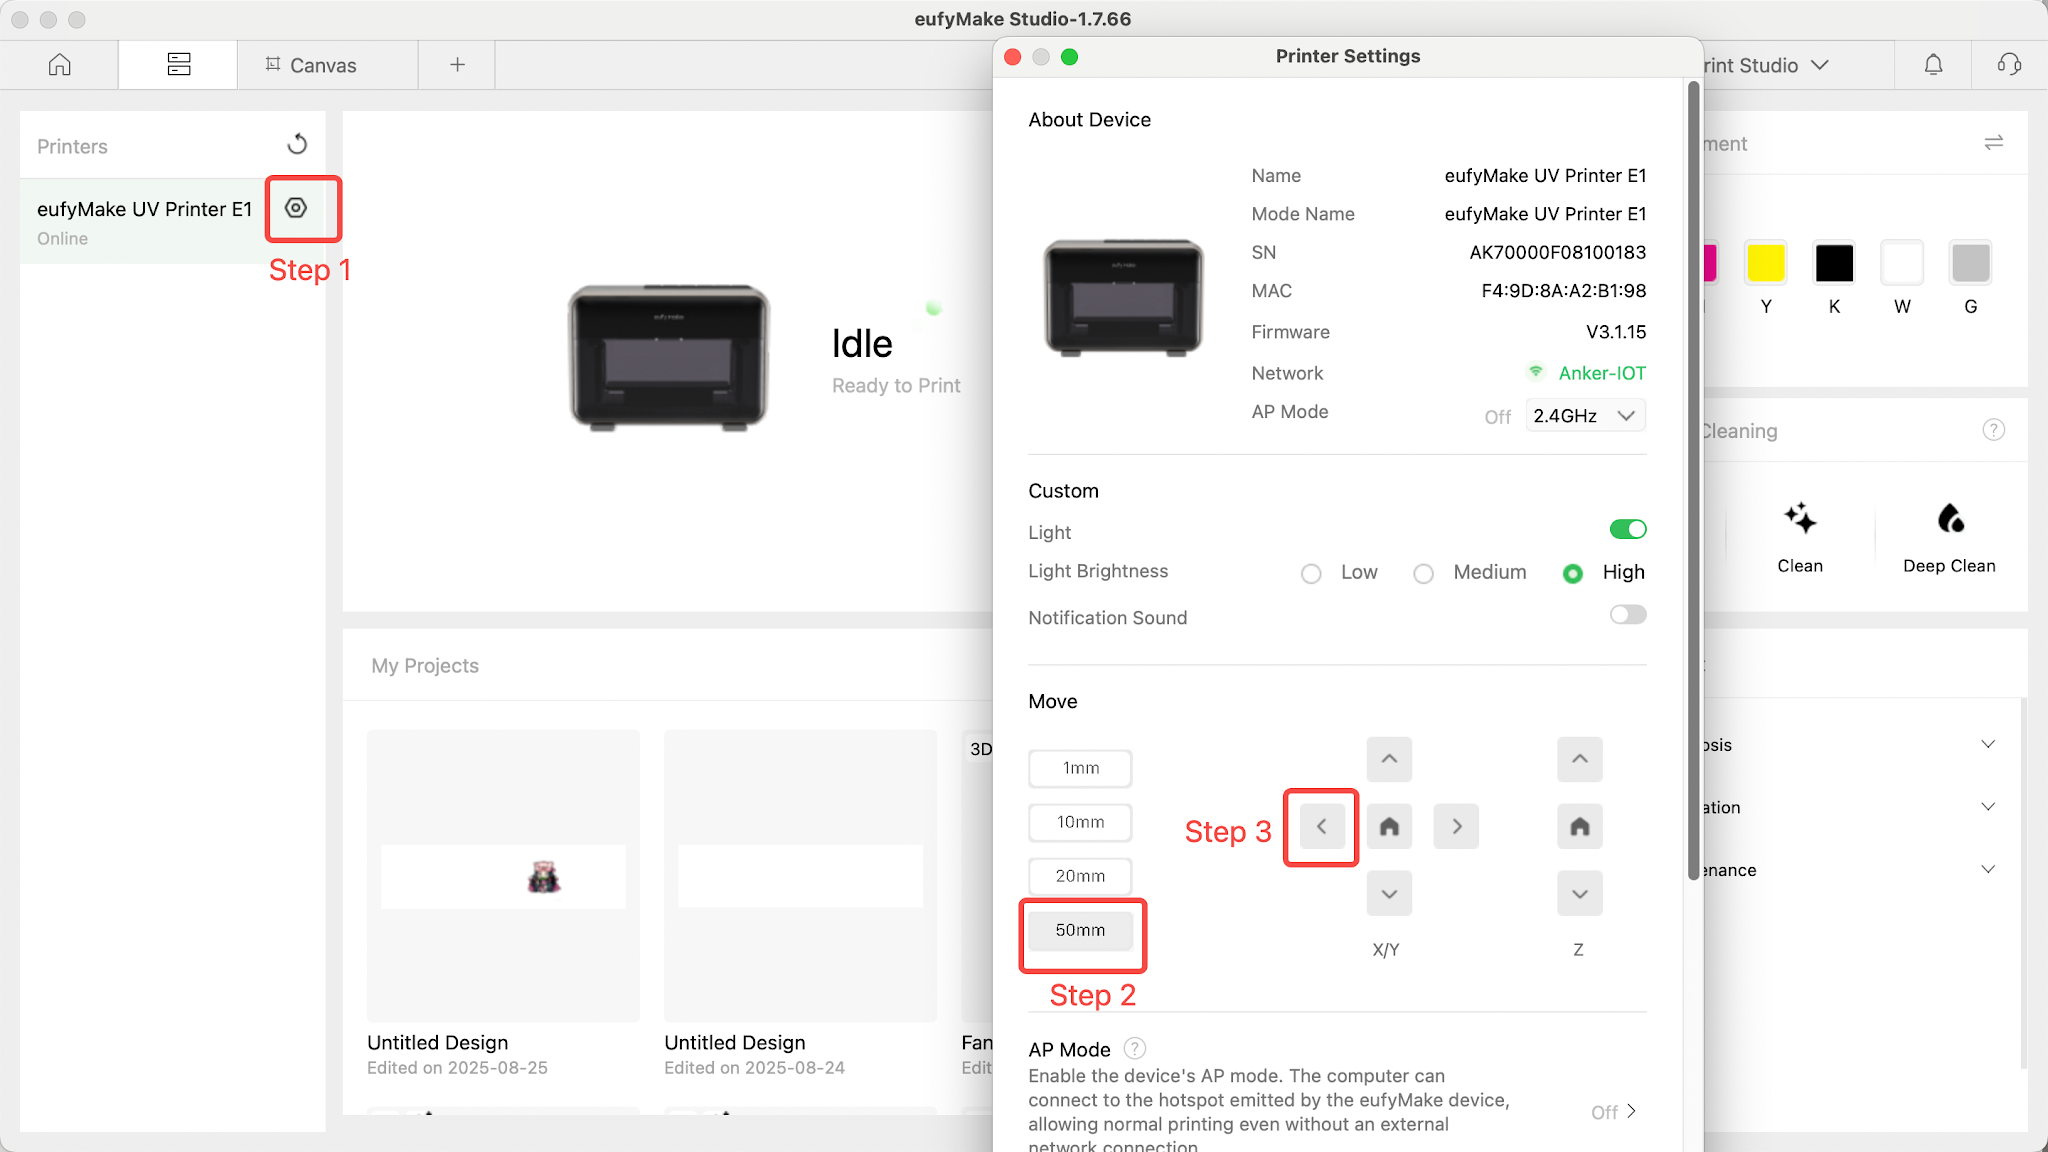
With the machine powered on and idle, open the eufyMake app or eufyMake Studio and move the print head out of the ink stack.
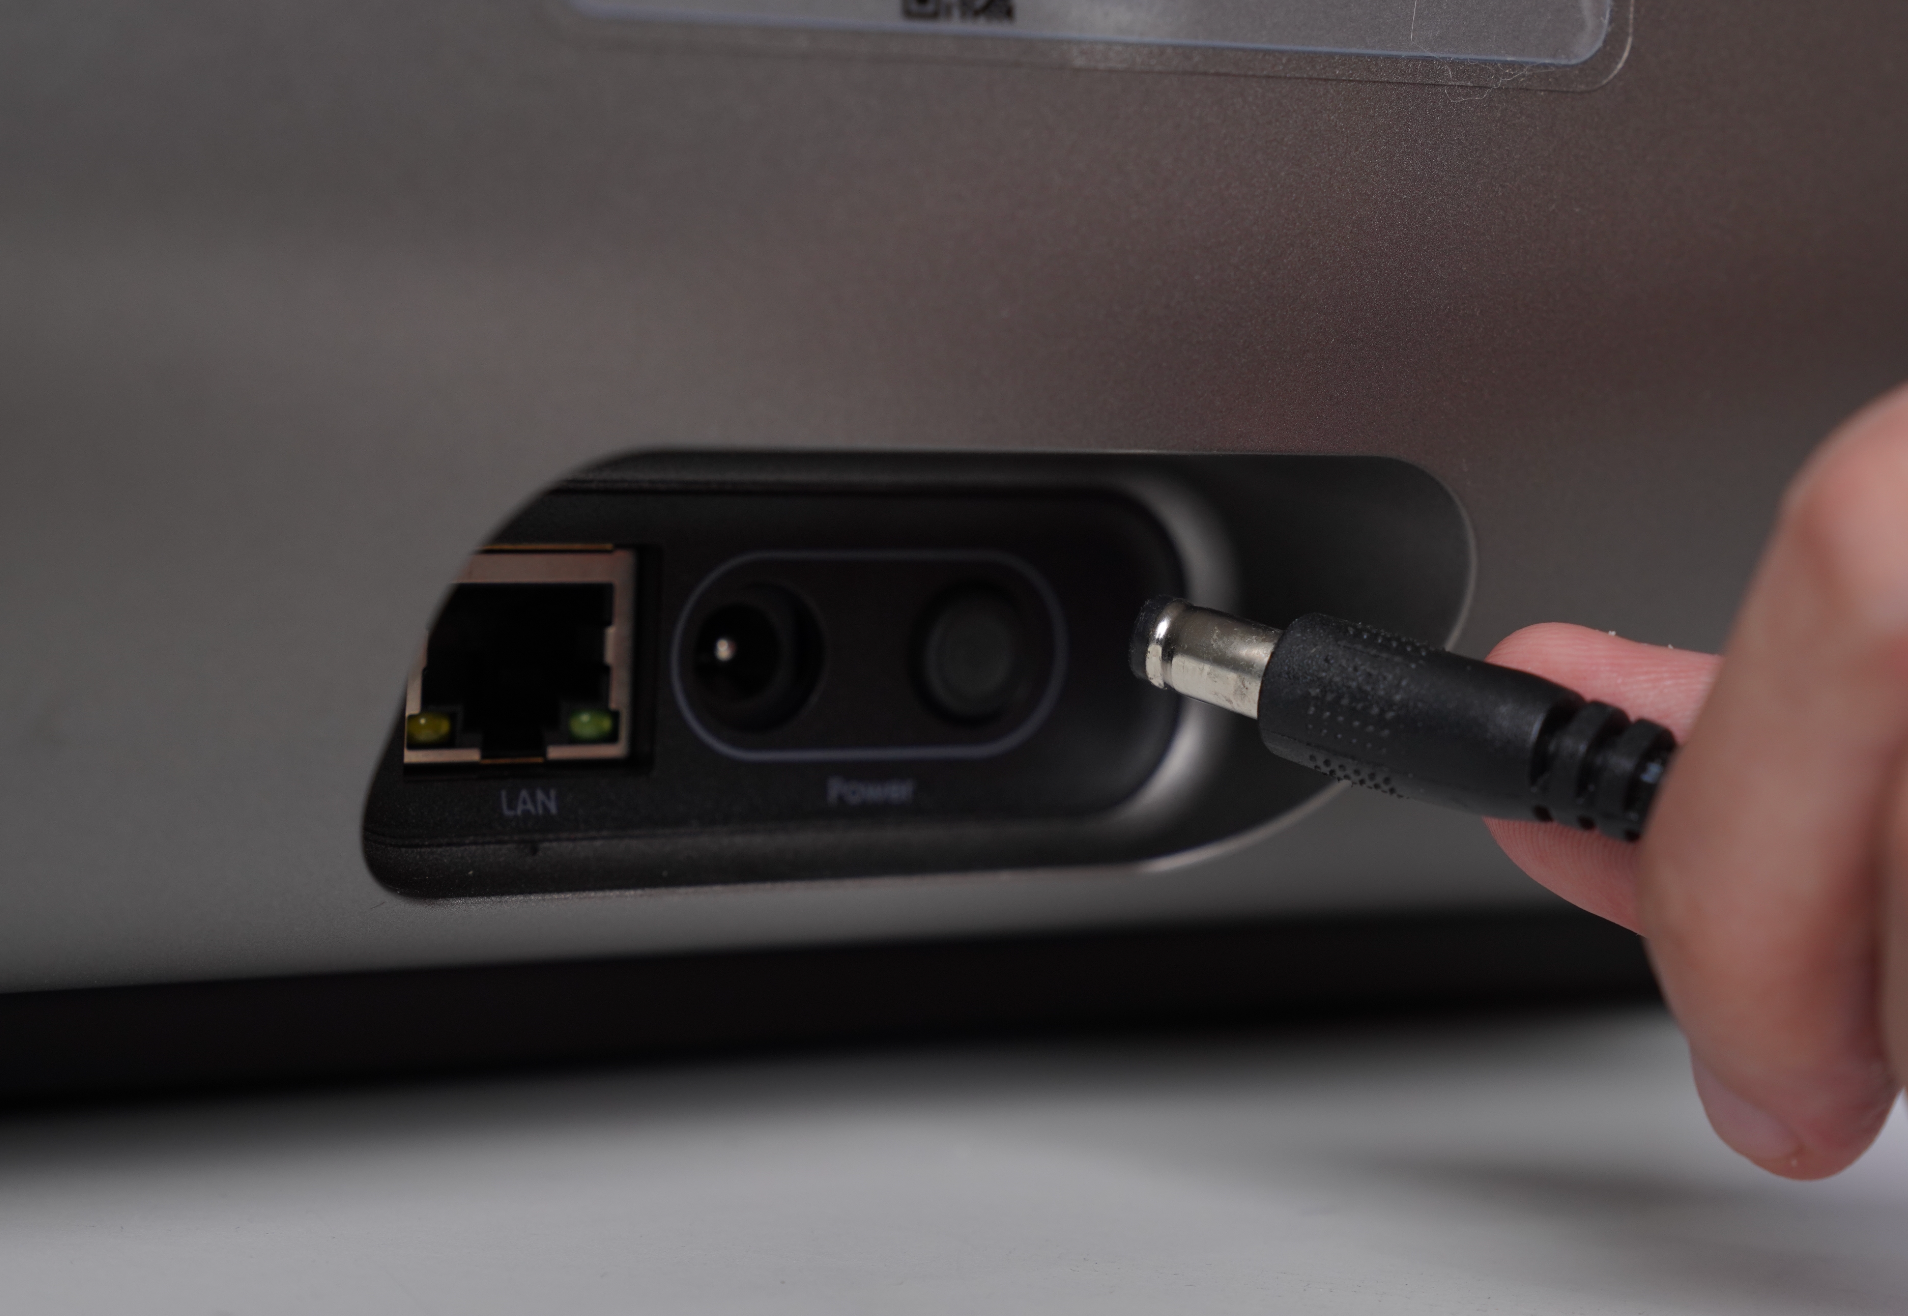
¶ Step 3 - Cut off the power supply of the machine and move the print head
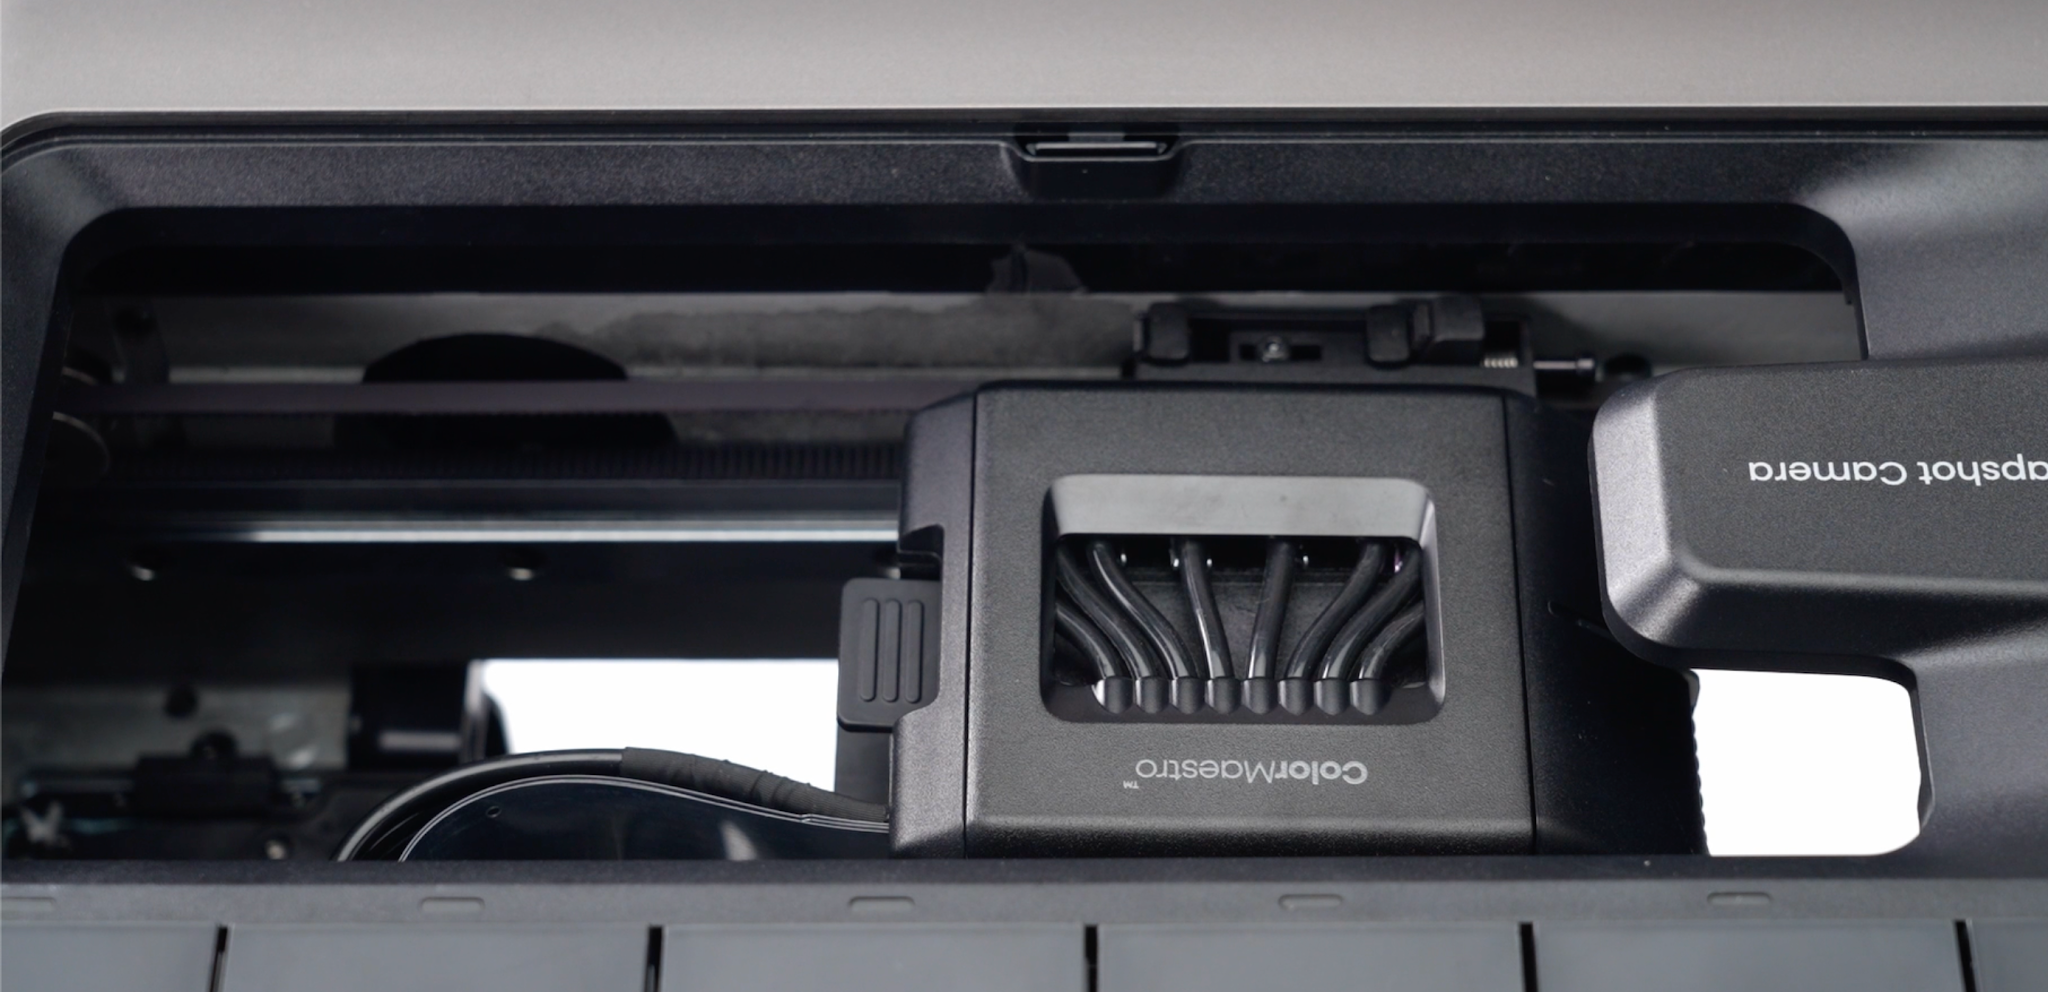
Turn off the power, then manually pull the print head further outward to expose the ink stack.
⚠️ Warning: Power must be off before performing ink stack operations. Short power-off will not affect the ink system.
¶ Step 4 - Replace the ink pad
⚠️ Gloves must be worn for the following steps.
¶ Remove the old ink pad
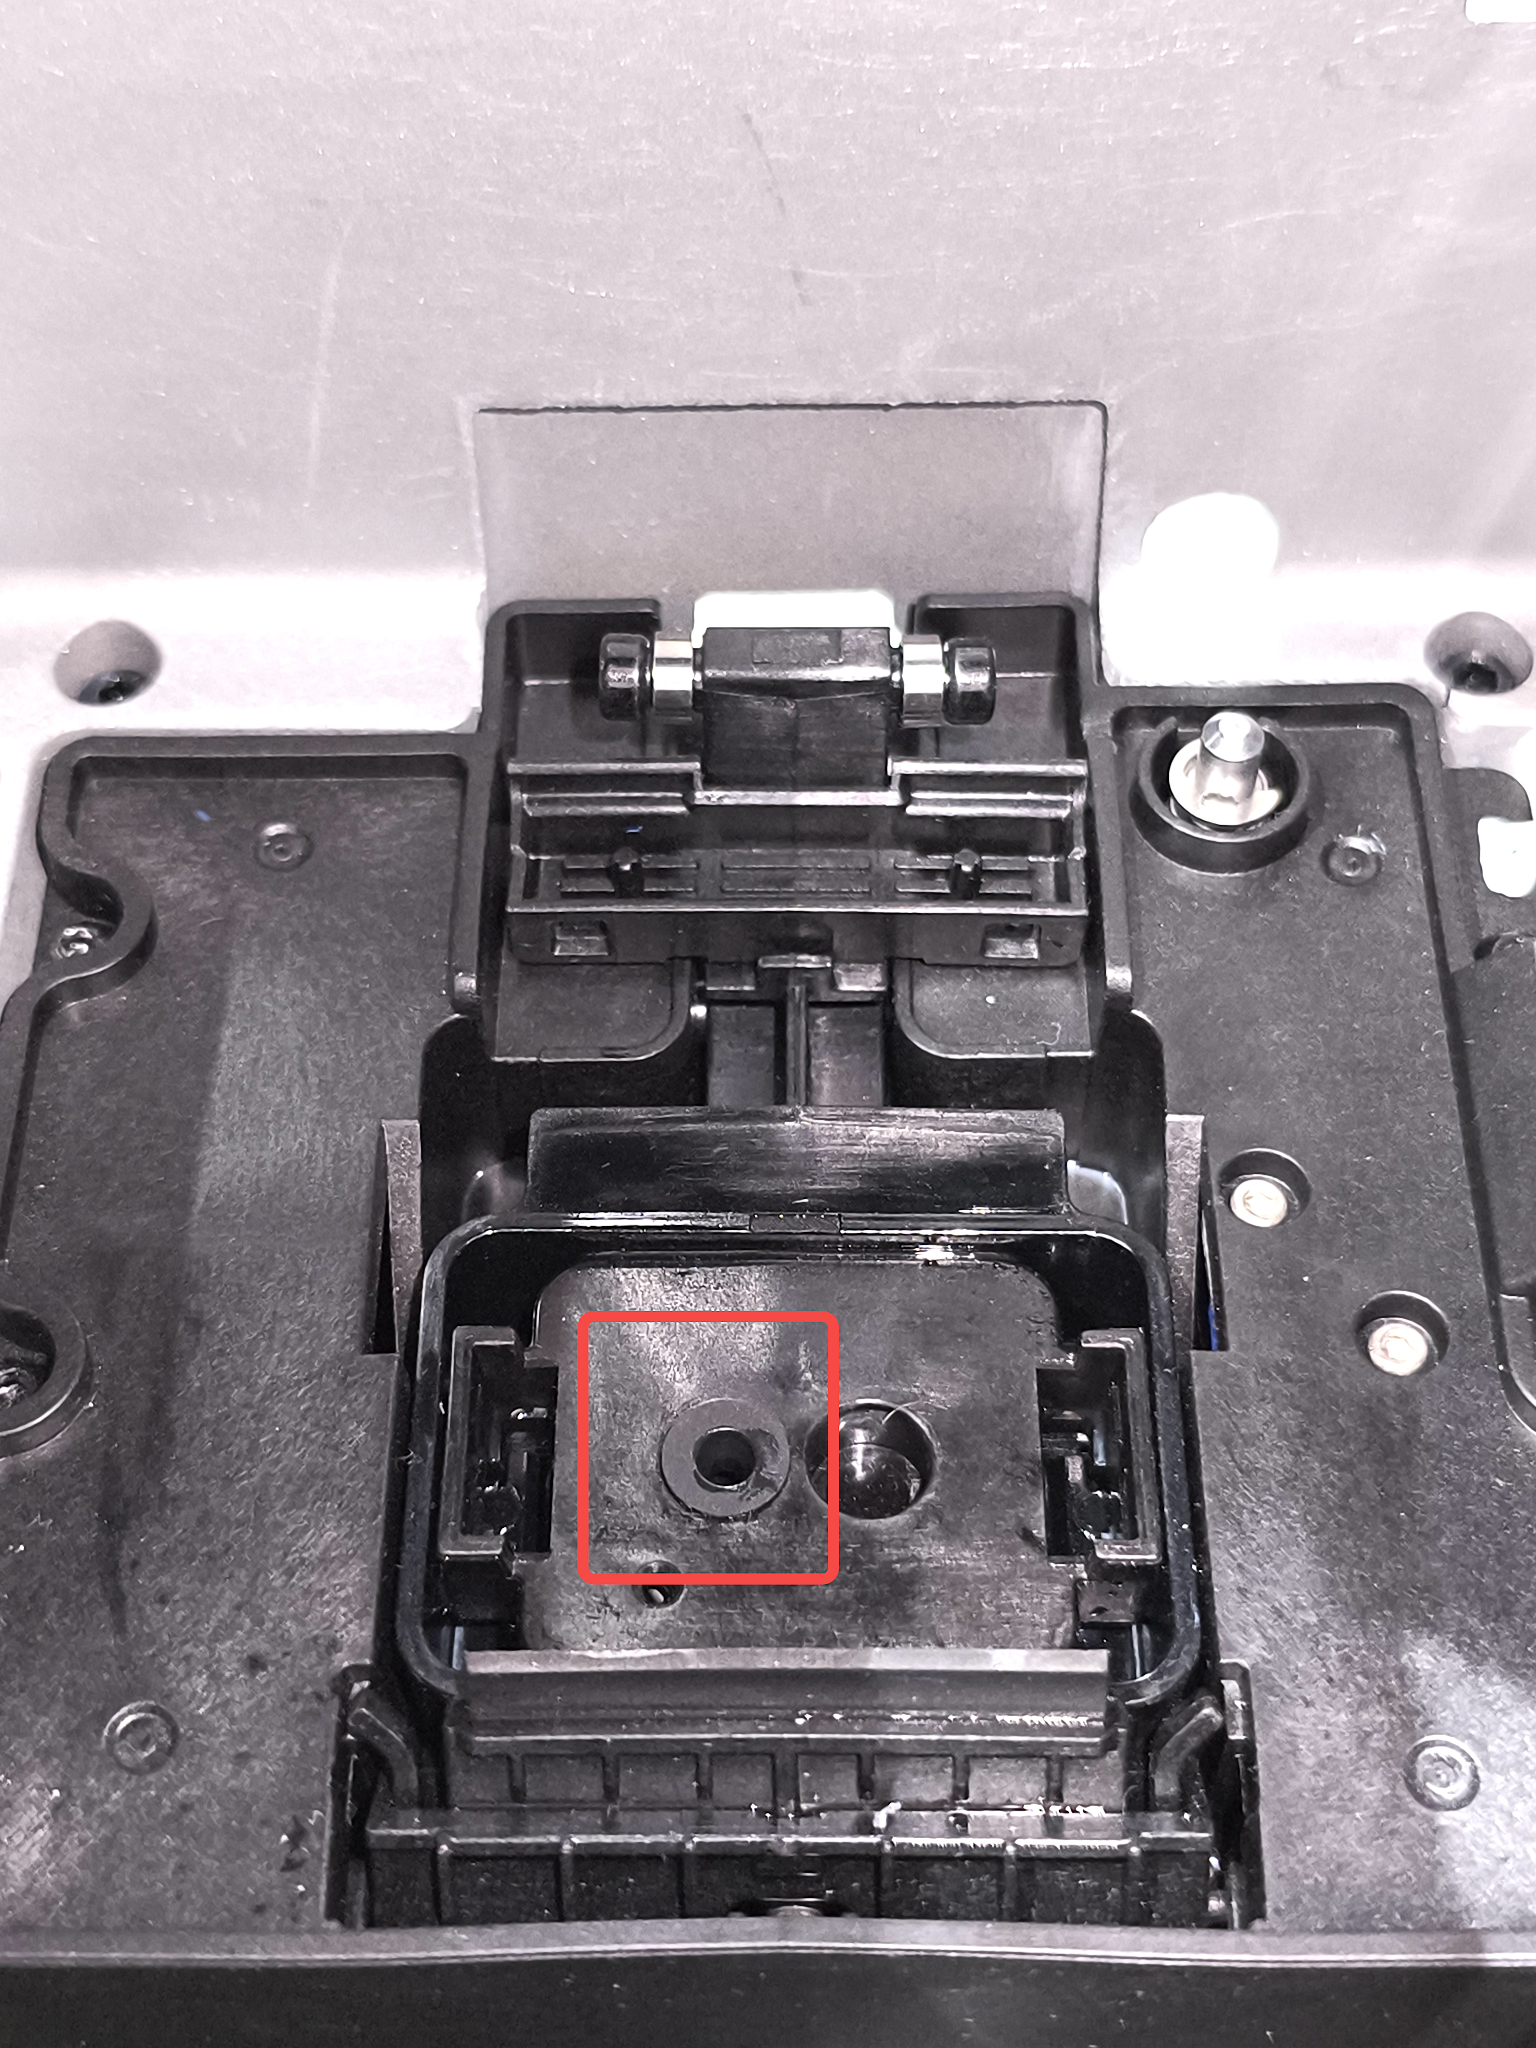
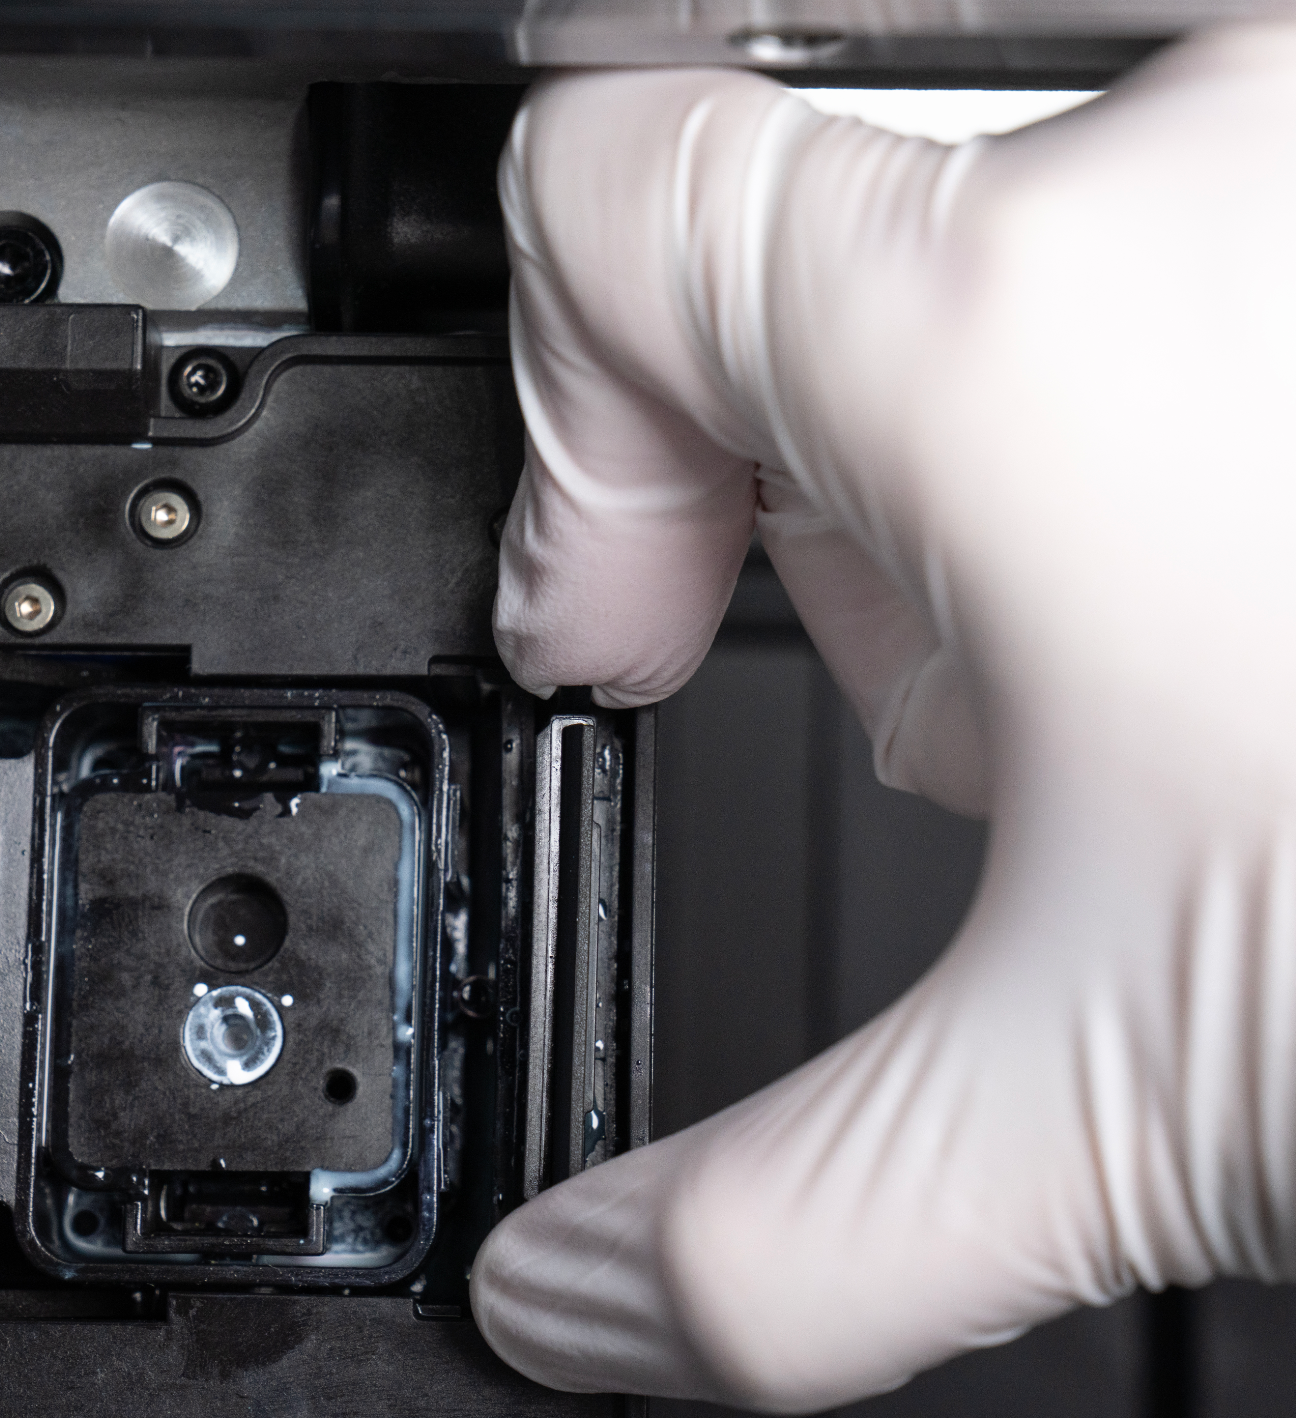
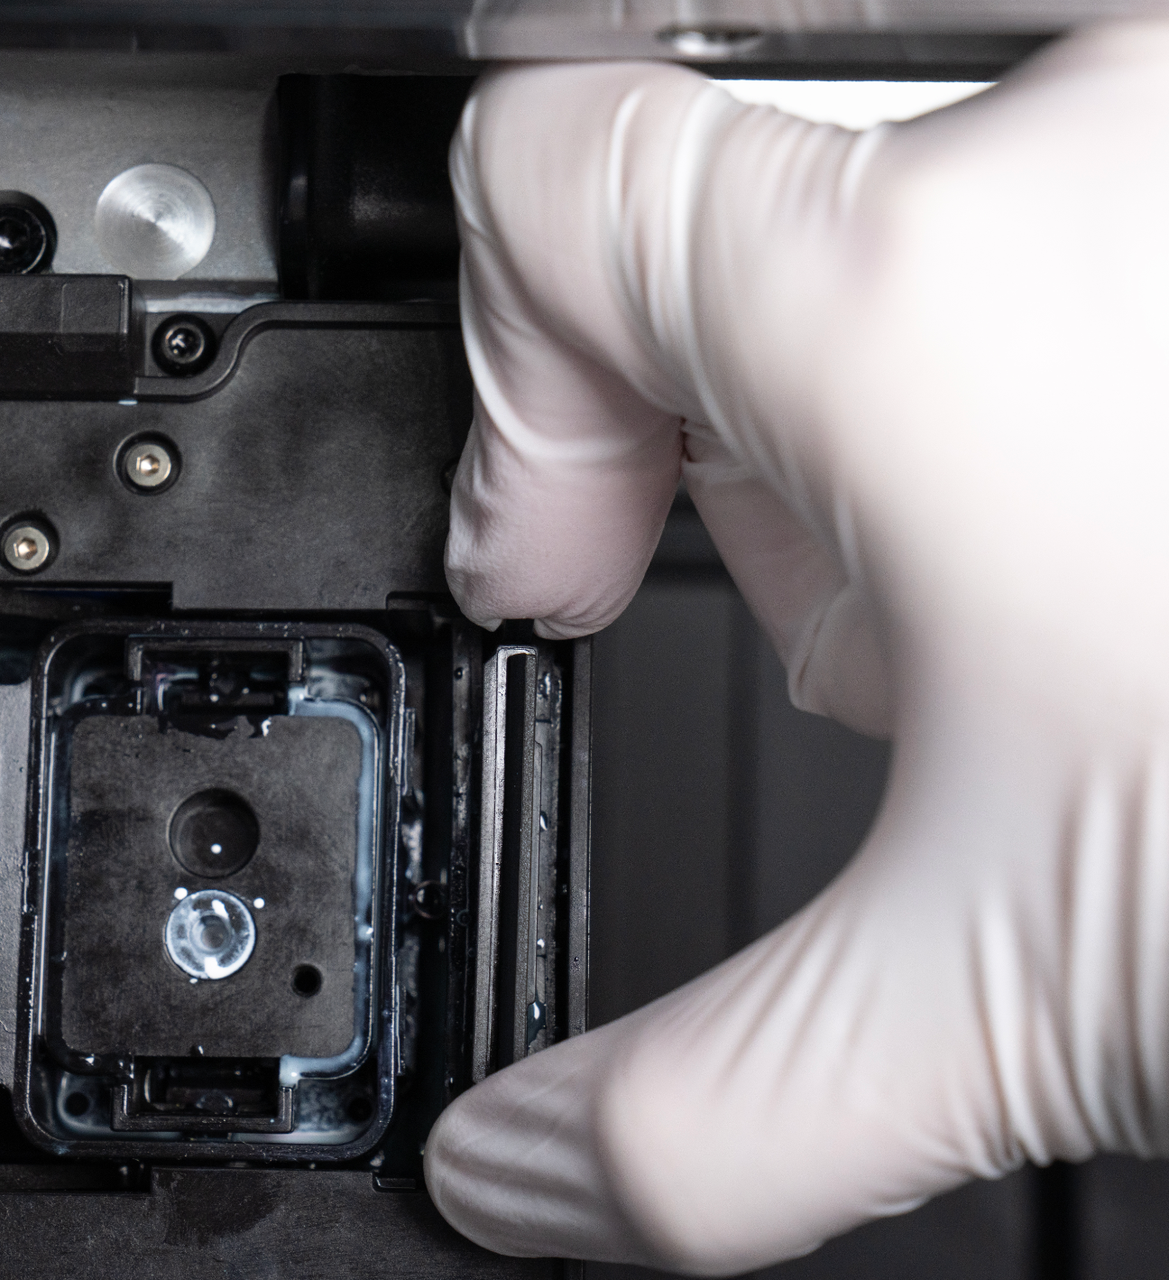
- Wearing gloves, squeeze the two clips shown and remove the old ink pad.
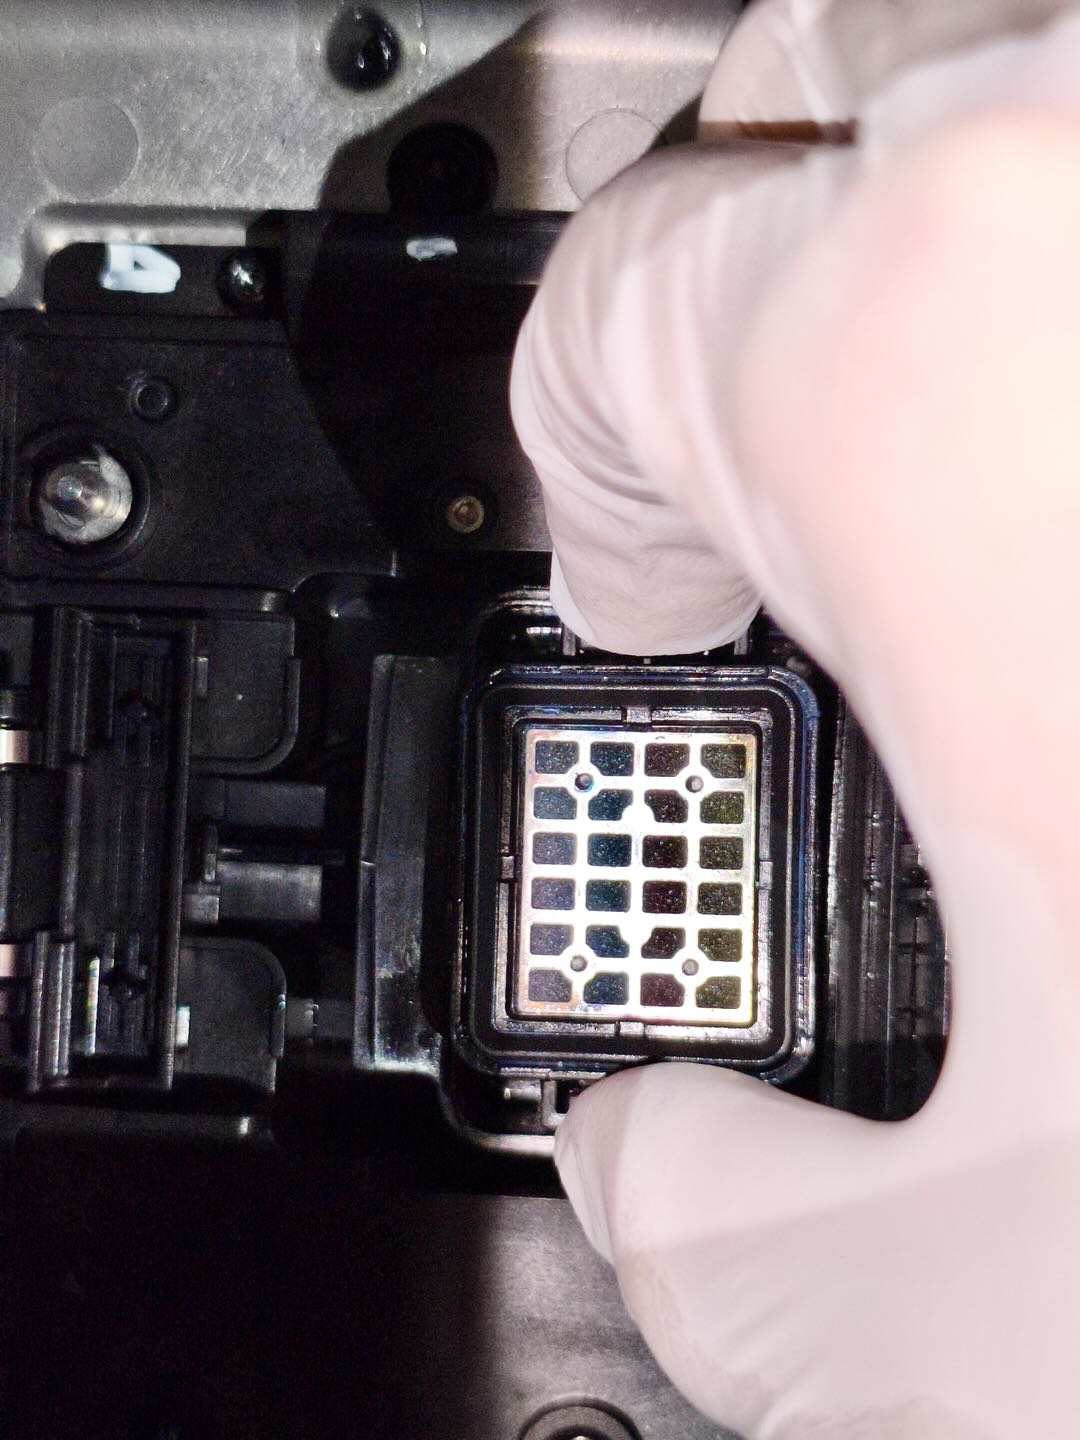
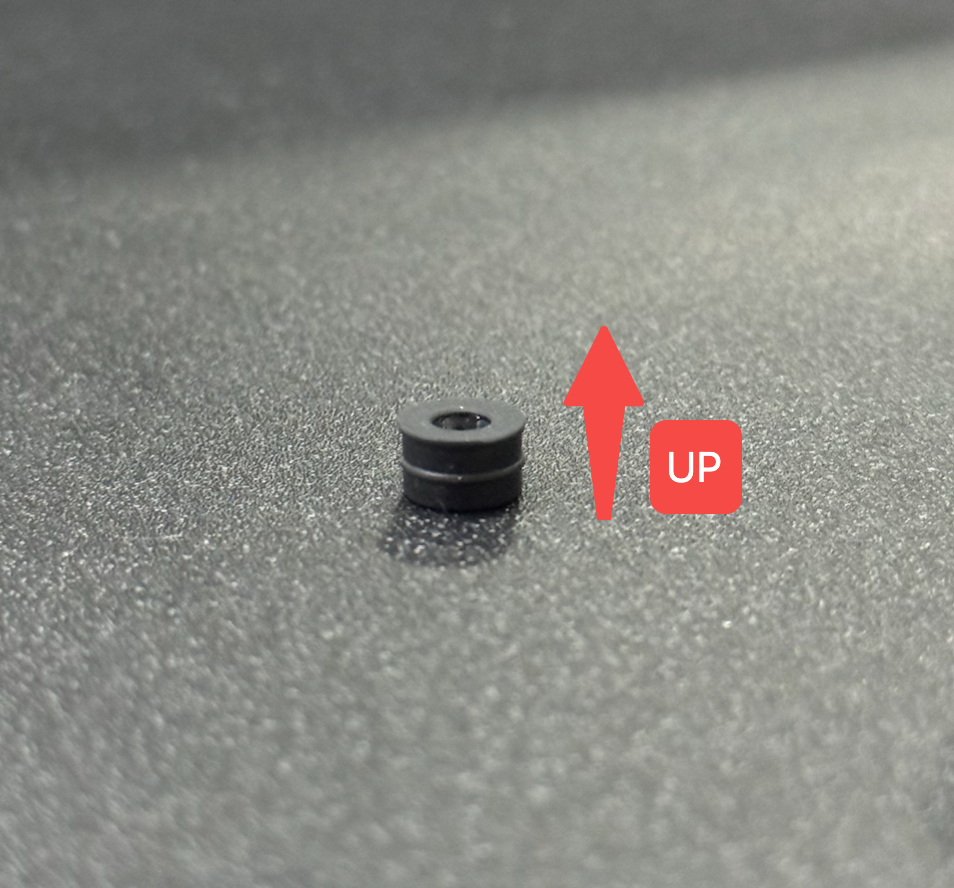
- If the rubber plug comes out during removal, reinstall it with the flanged side facing outward.
¶ Install the new ink pad
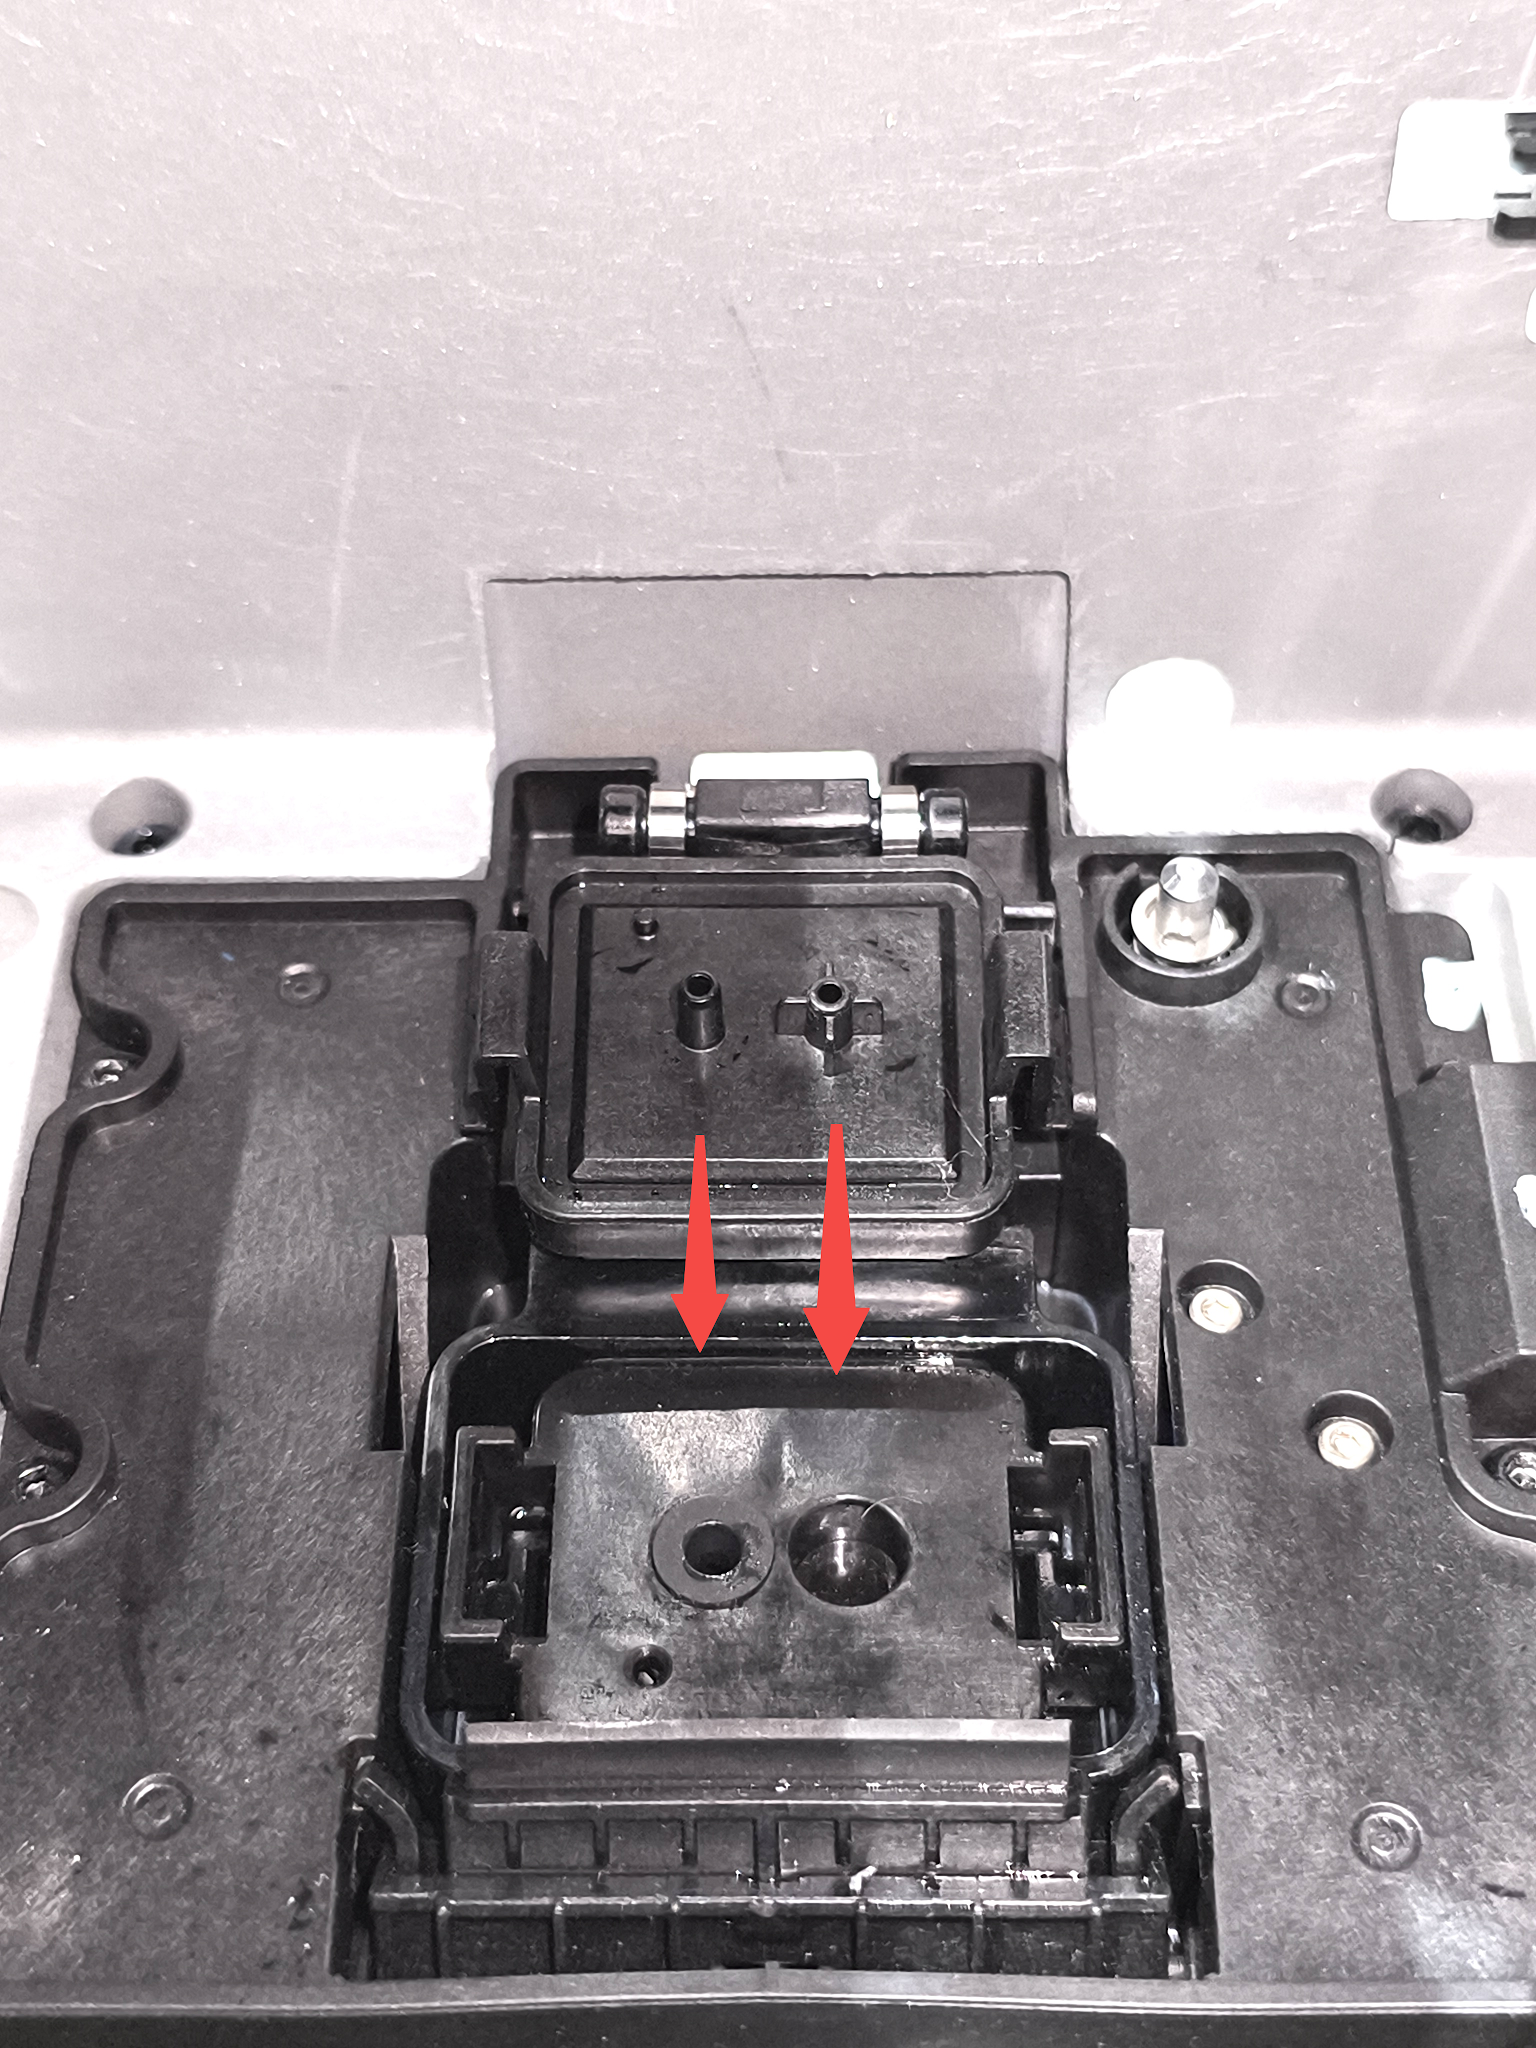
- Take the new ink pad and check the rubber plug (if missing, contact customer support). Align it correctly with the hole.
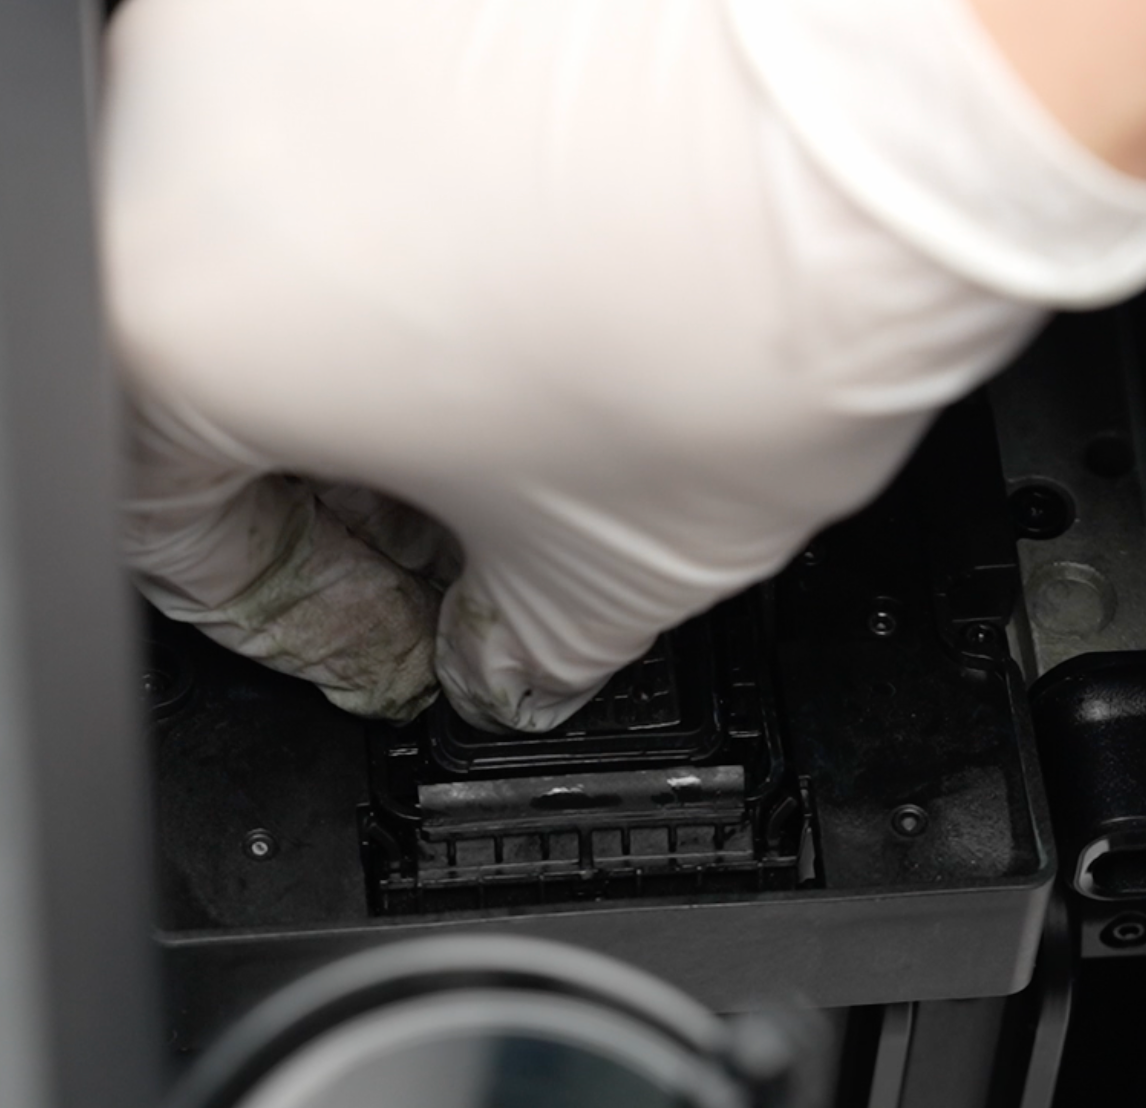
- Press down firmly until you hear or feel a “click,” indicating the clips are locked.
¶ Step 5 - Replace the Scraper
¶ Remove the old scraper
Move the component outward to a vertical position, squeeze the two clips together, and then remove it.
¶ Install the new scraper
1.Take a new scraper, ensuring correct orientation. Align the raised part of the scraper with the positioning slot on the ink stack body.
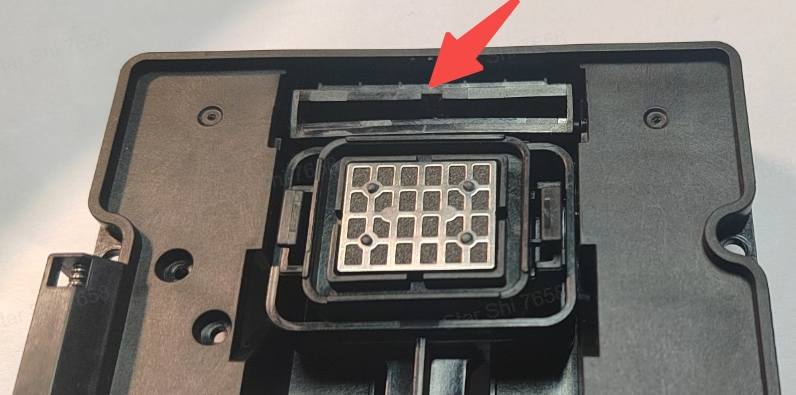
2. Press down firmly until you hear or feel a “click.”
¶ Step 6 - Replace the ink tank pads
¶ Remove the old ink tank pads
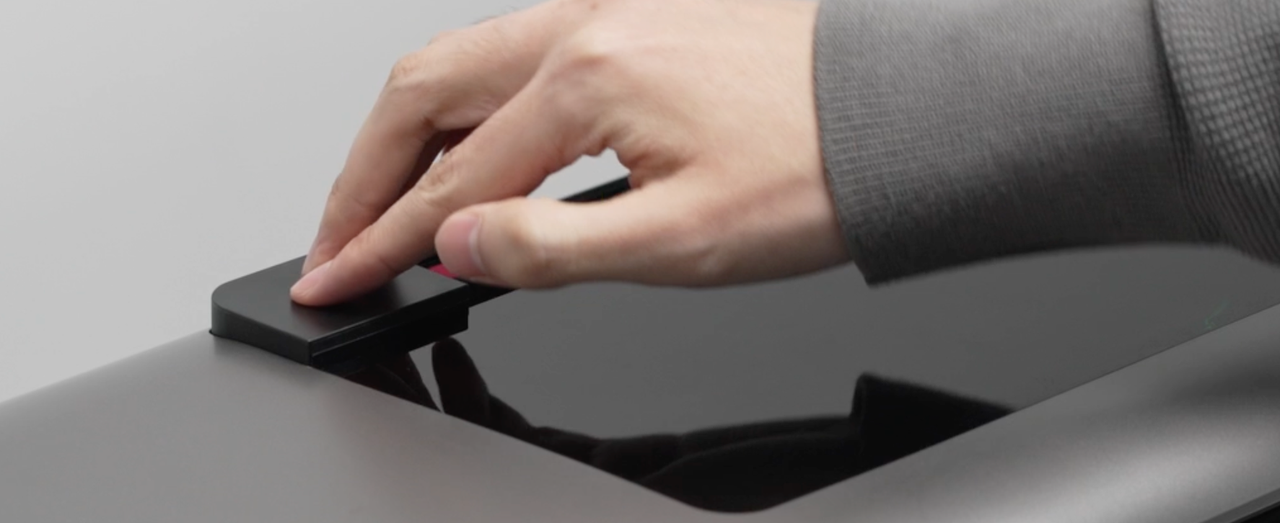
Press the ink cartridge release and remove the cartridge.
Use the tweezers provided in the kit to remove the ink tank pads.
¶ Install the new ink tank pads
Place the new ink tank pads into the cartridge slot using tweezers, then press them flat.
⚠️Note: When replacing the ink tank pad, only one layer of pad is allowed to be installed. Installing two layers is prohibited, otherwise it will affect the cartridge removal operation.
¶ Step 7 - Check installation and reconnect power
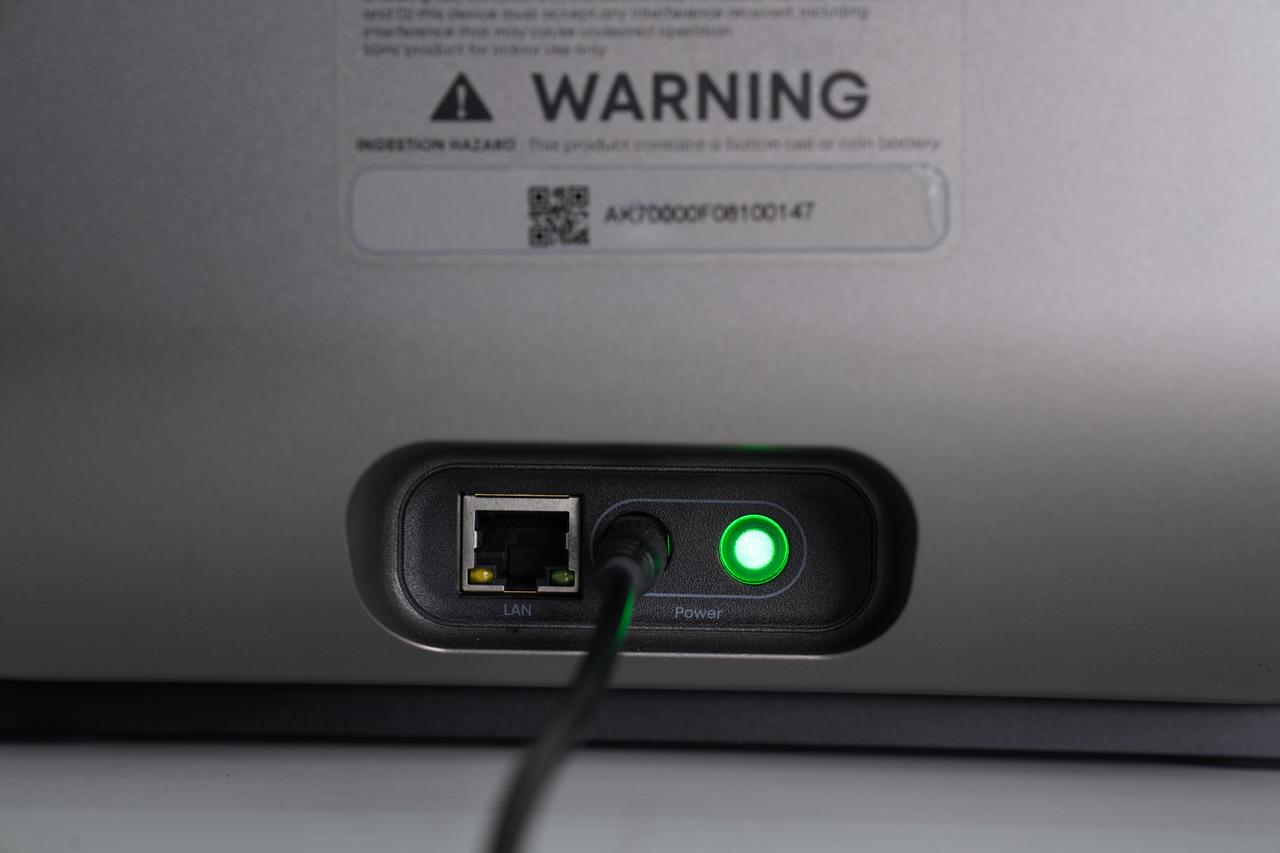
After replacement, check all components are correctly installed. Reconnect the power supply once confirmed.
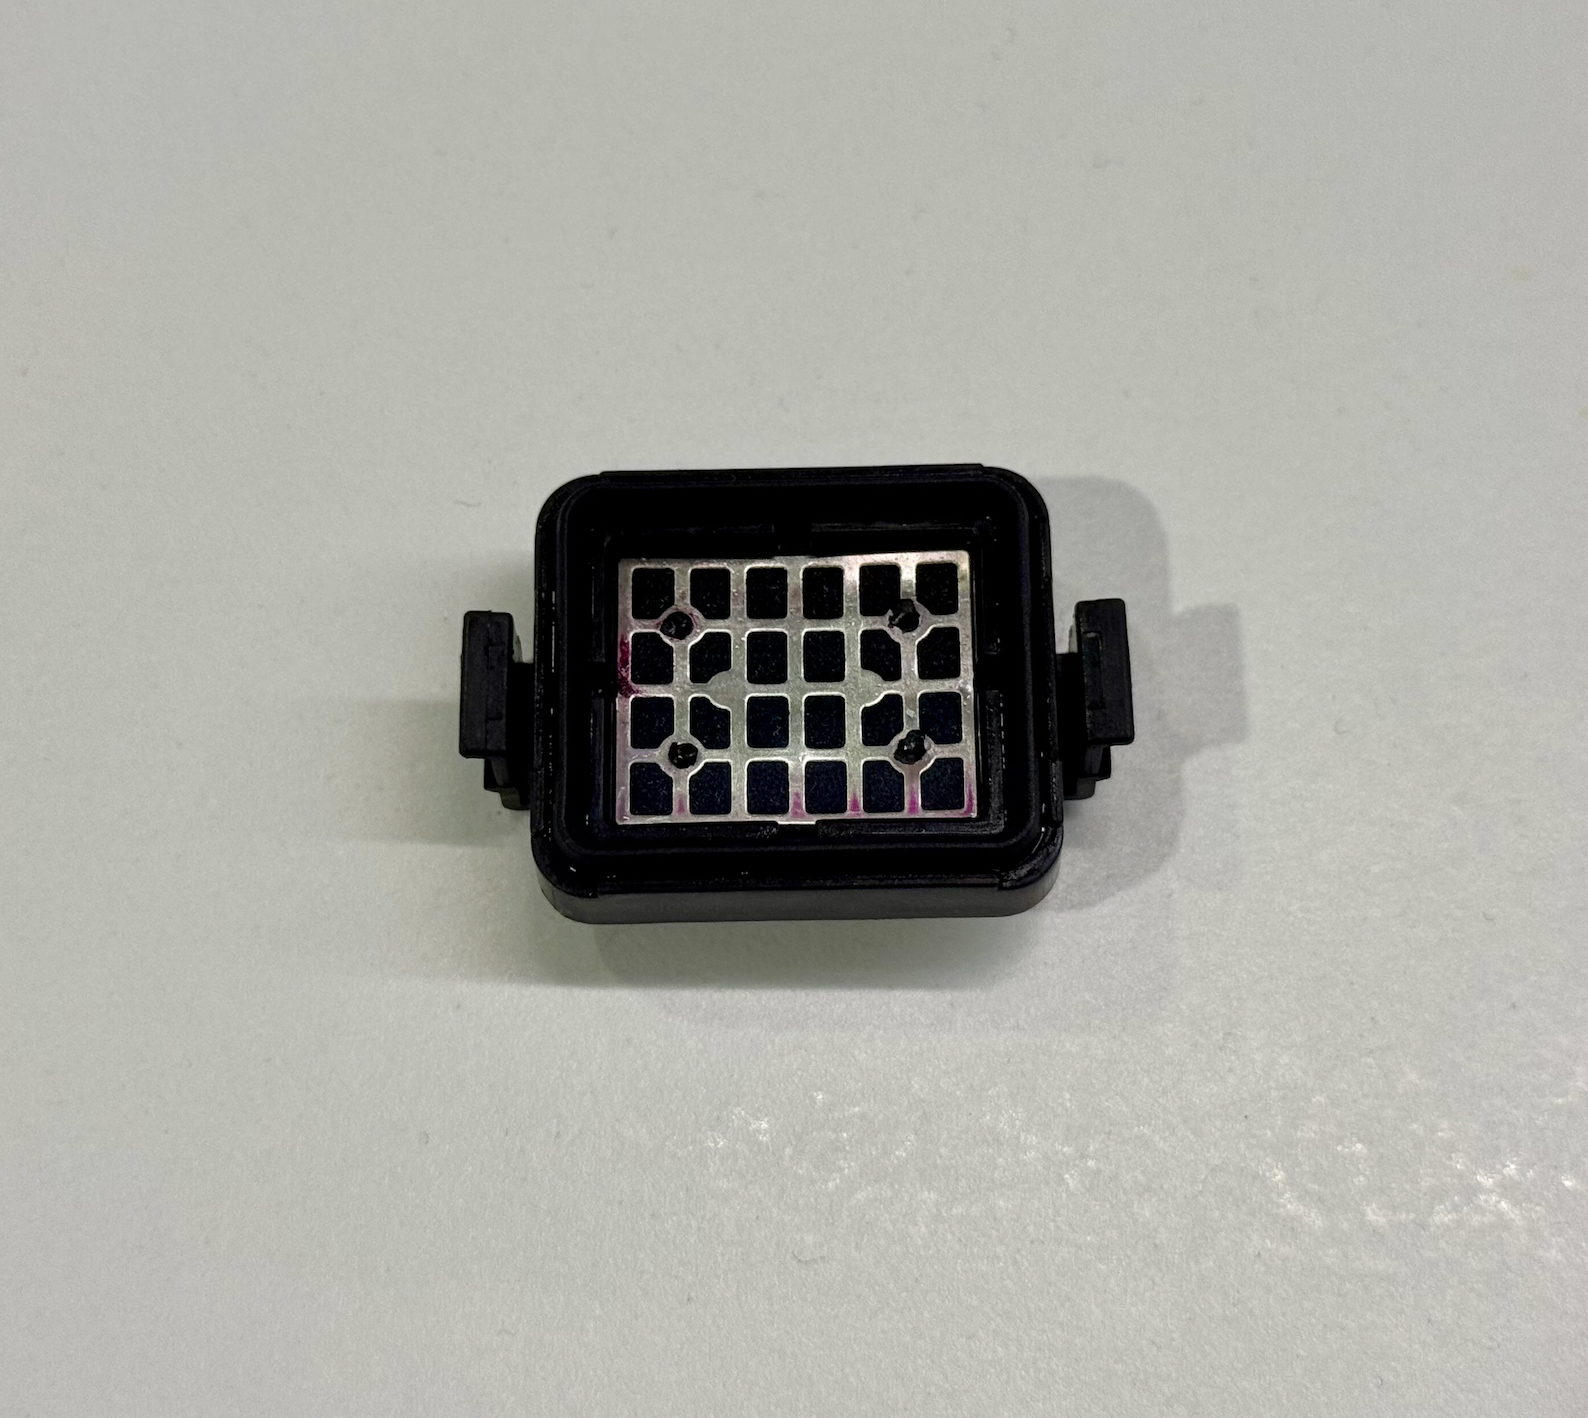
¶ Step 8 - Reset scraper maintenance cycle
With the printer powered on and idle, open the eufyMake app or eufyMake Studio and reset the Scraper Maintenance Cycle.