¶ What Is Camera Calibration?
Manual Camera Calibration is a standalone feature used to restore and maintain print positioning accuracy.
During calibration, the UV Printer E1 measures and compensates for physical positioning deviations so that printed designs align as closely as possible with their expected positions in the software preview.
¶ When Should You Use Camera Calibration?
¶ Scenario A: Print Positioning Accuracy Has Decreased
Run Camera Calibration if printed designs show a noticeable overall offset compared with their positions in the software preview.
¶ Scenario B: After Replacing the Flatbed
A new Mini Flatbed or Standard Flatbed requires a one-time manual calibration so that the printer can account for the physical characteristics of the new Flatbed.
A Flatbed that has already been calibrated does not need to be calibrated again unless print positioning accuracy has decreased.
¶ Scenario C: When Advised by Customer Support
eufyMake Customer Support may ask you to perform Camera Calibration while troubleshooting certain print-positioning or hardware-related issues.
¶ Calibration Steps
¶ Step 1: Start Camera Calibration
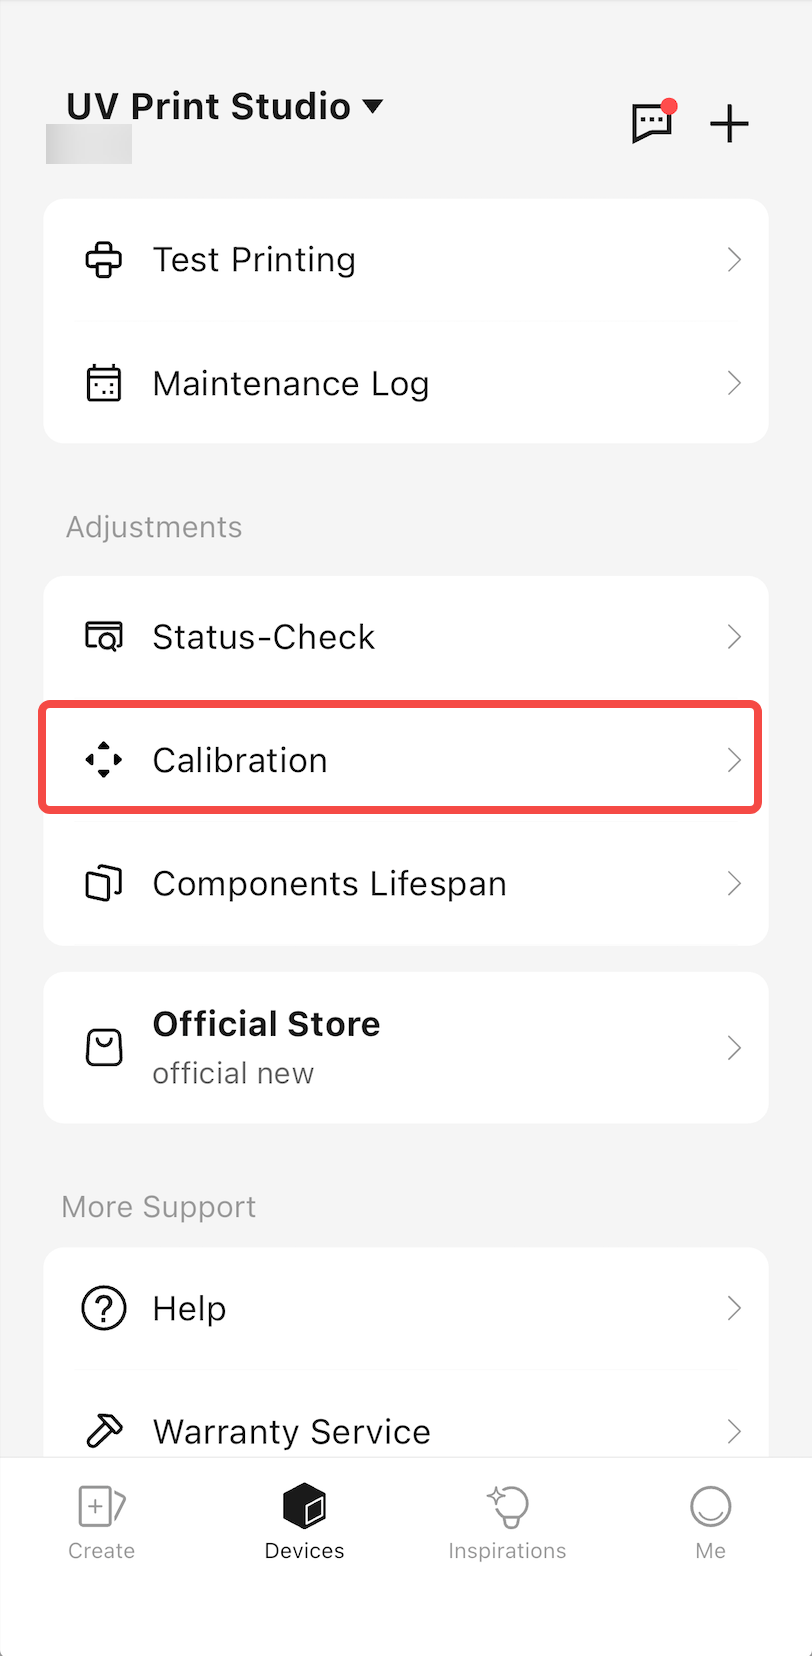
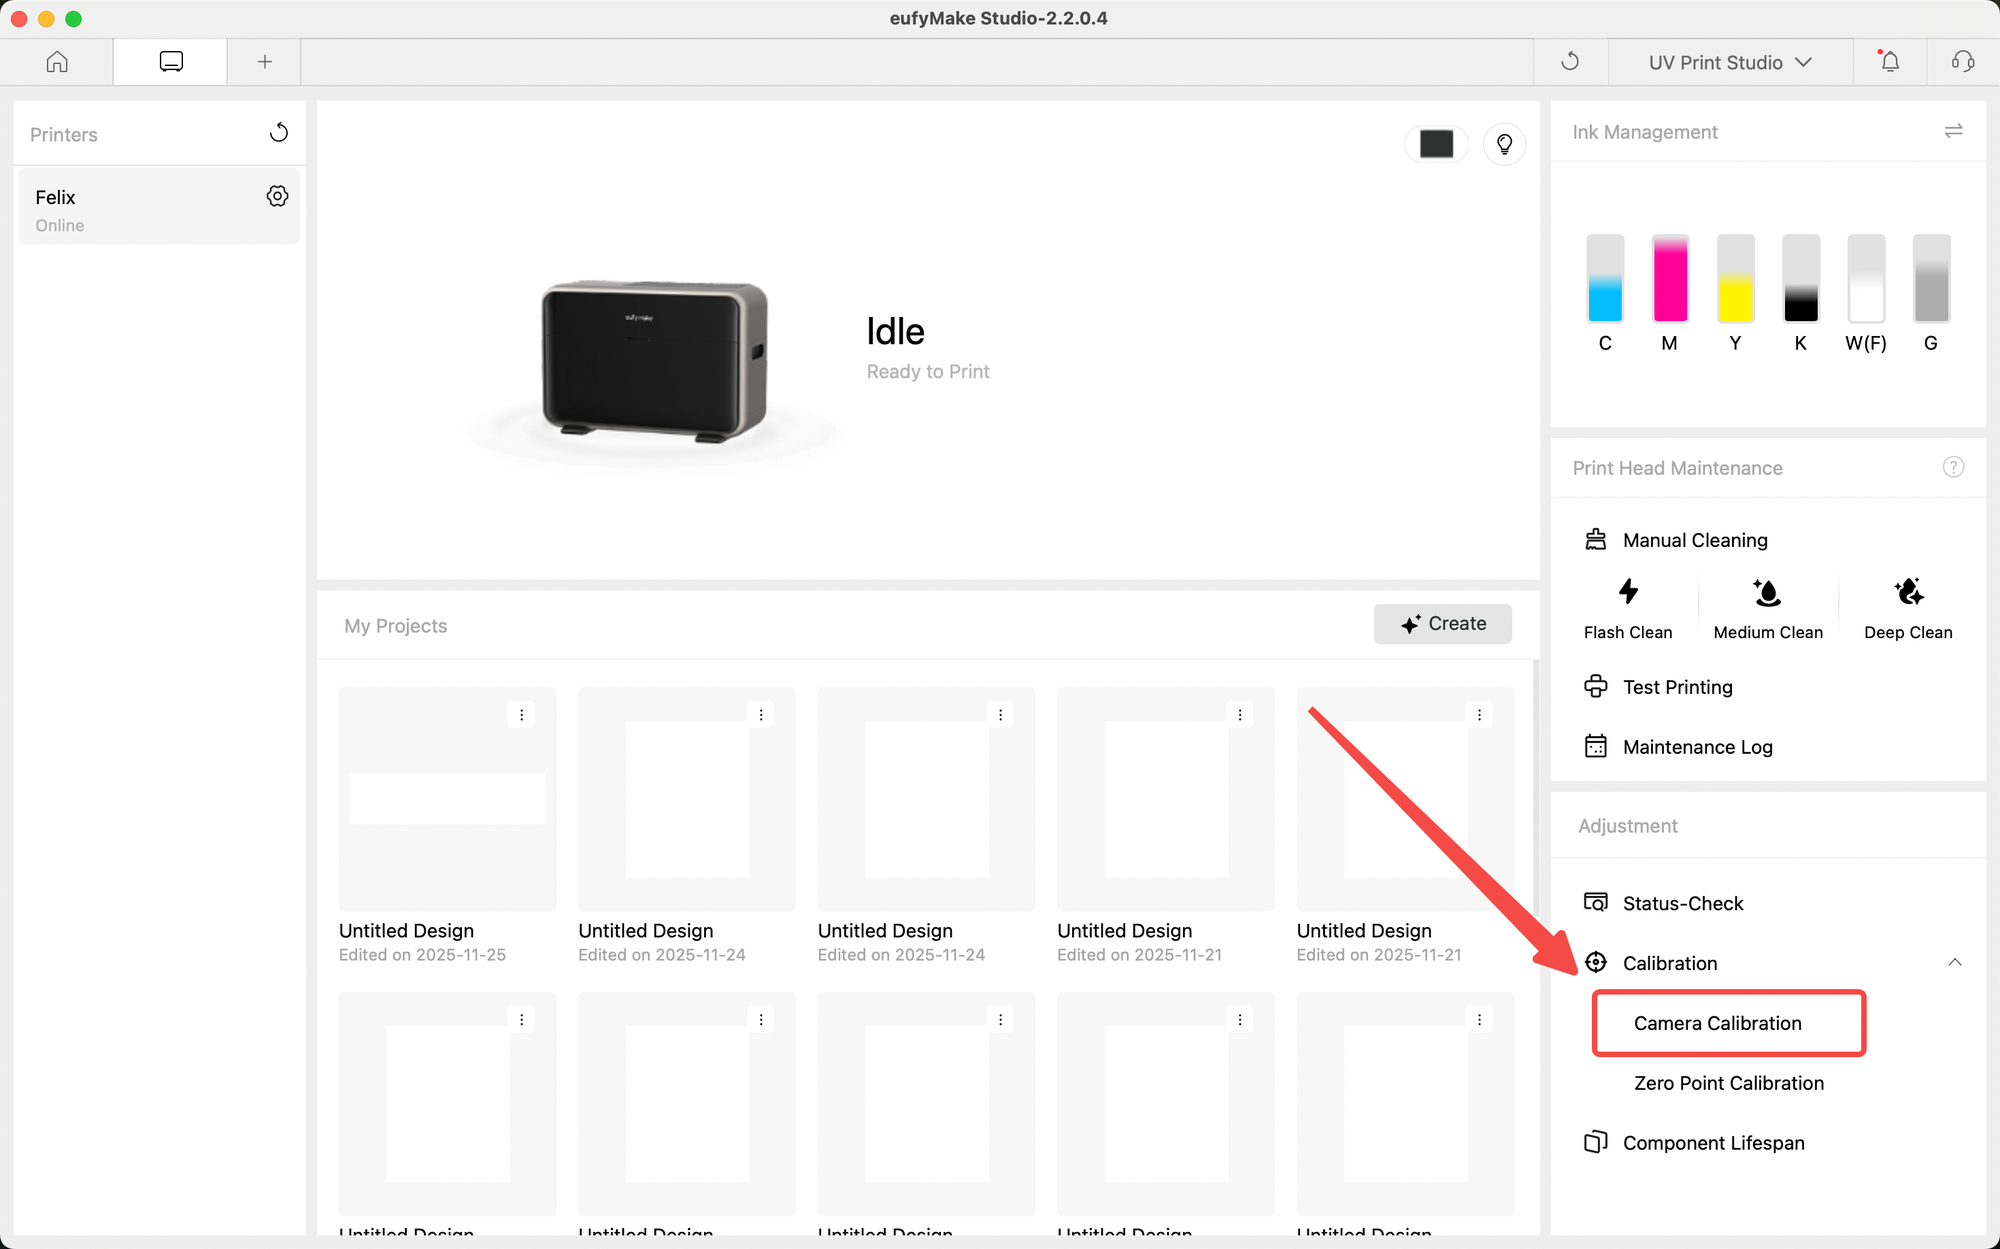
On the Device Management page in the eufyMake App or eufyMake Studio, select Camera Calibration.
The calibration process is the same on both platforms. The following instructions use the eufyMake App as an example.
¶ Step 2: Prepare the Calibration Surface
The required setup depends on whether the Flatbed is being calibrated for the first time.
¶ First-Time Calibration of a New Flatbed
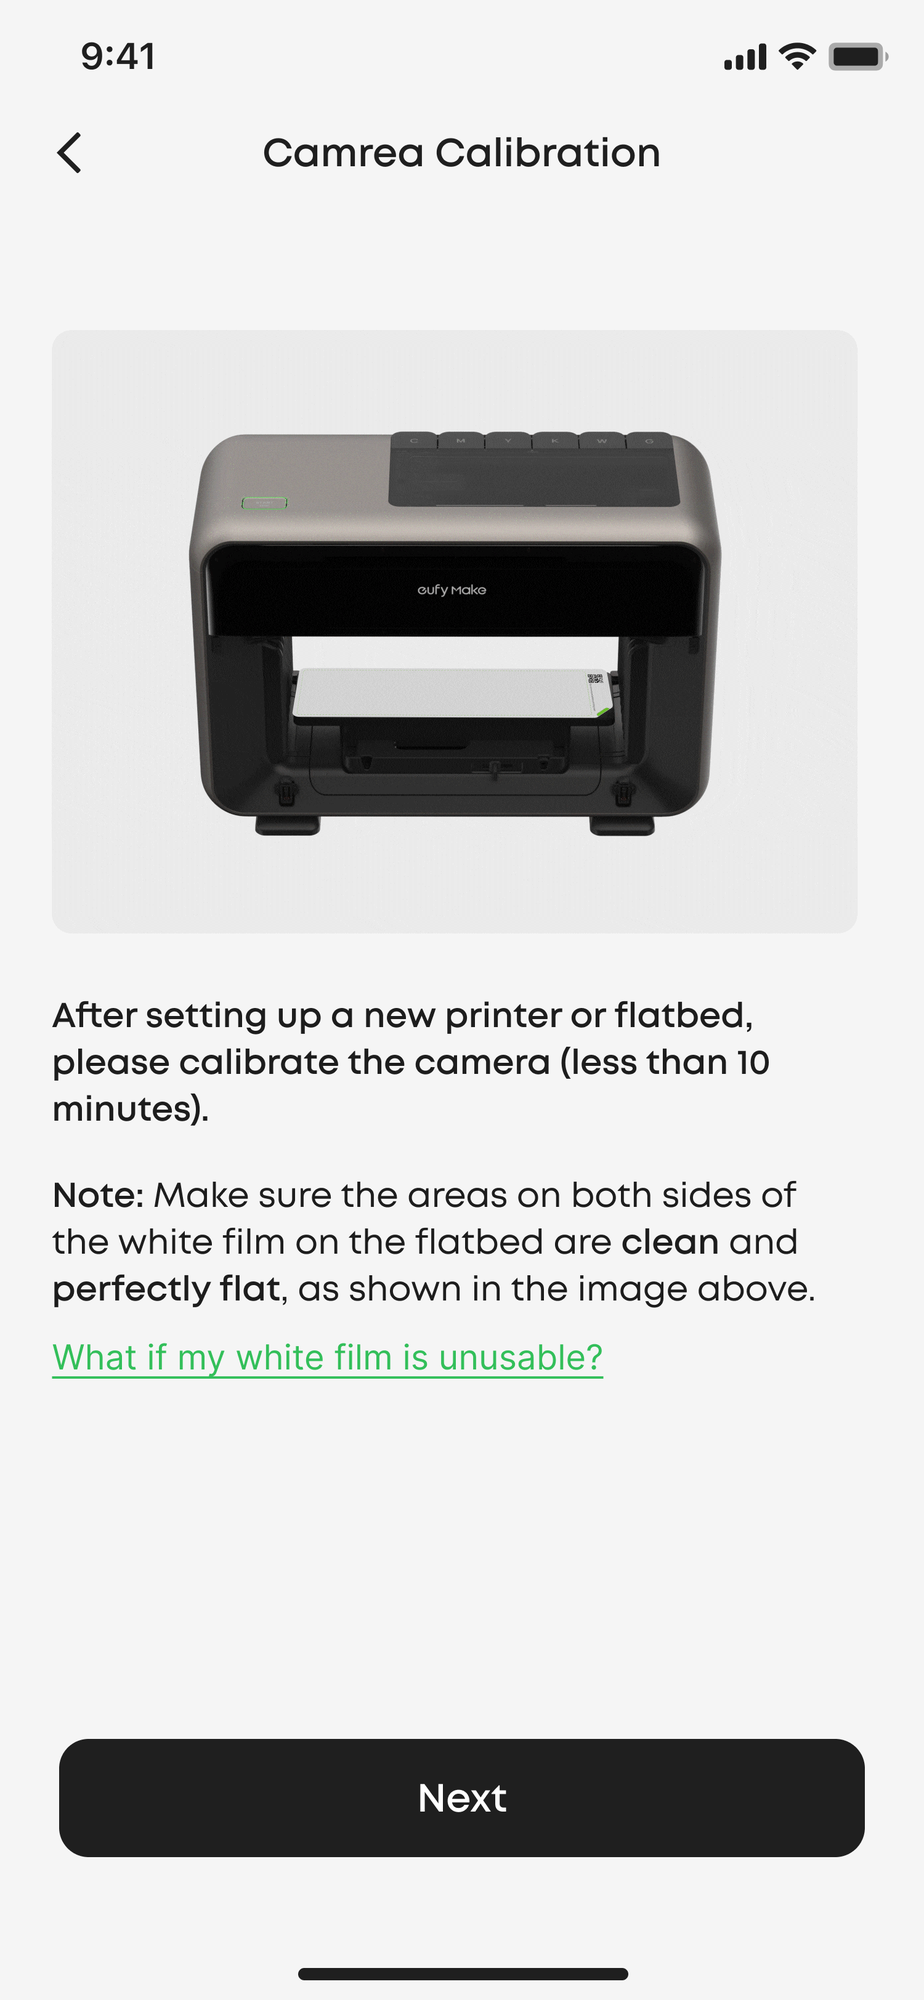
A new Flatbed does not require the black Adhesive Mat or a calibration sticker.
The system automatically recognizes the new Flatbed and displays the corresponding calibration screen.
¶ Routine Calibration
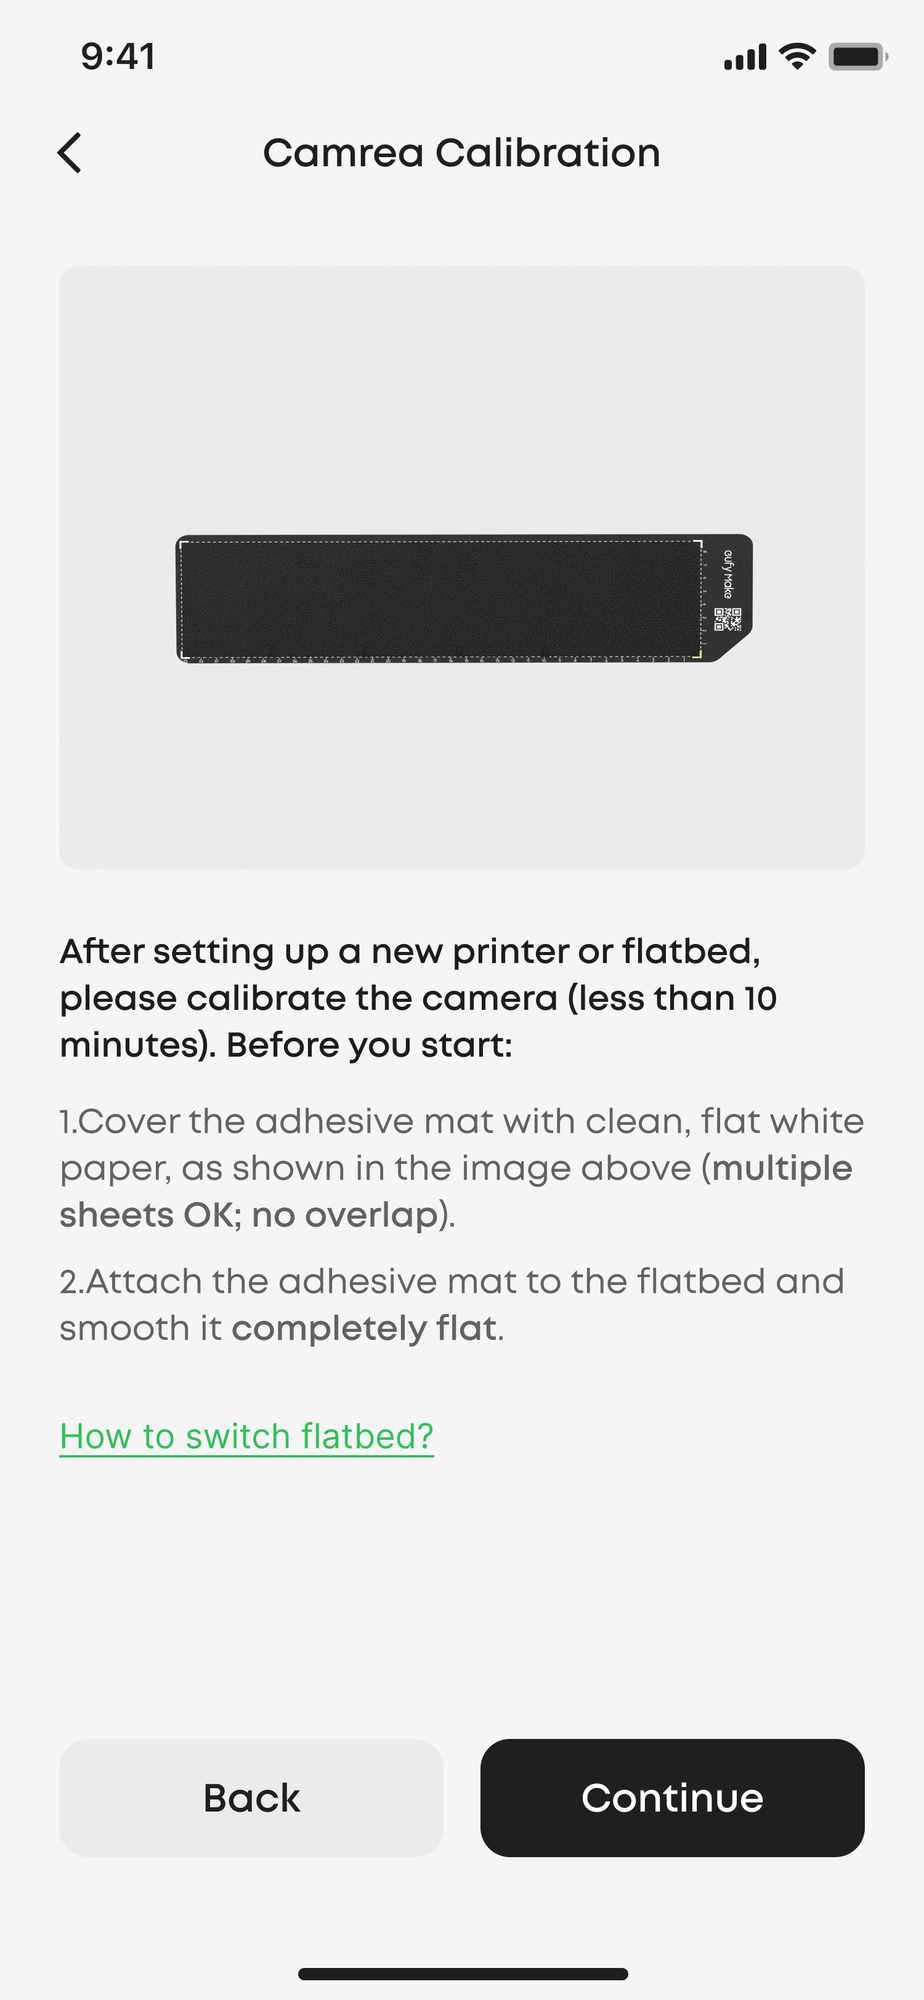
For routine calibration, install the black Adhesive Mat and prepare a clean white calibration surface.
The UV Printer E1 must print and recognize calibration patterns on a clean, flat, white surface.
Please note:
- The Mini Flatbed and Standard Flatbed require different calibration surface sizes.
- Follow the on-screen guide for the Flatbed currently installed.
- Make sure the calibration surface is clean, flat, and free from wrinkles, dust, or debris.
¶ Mini Flatbed
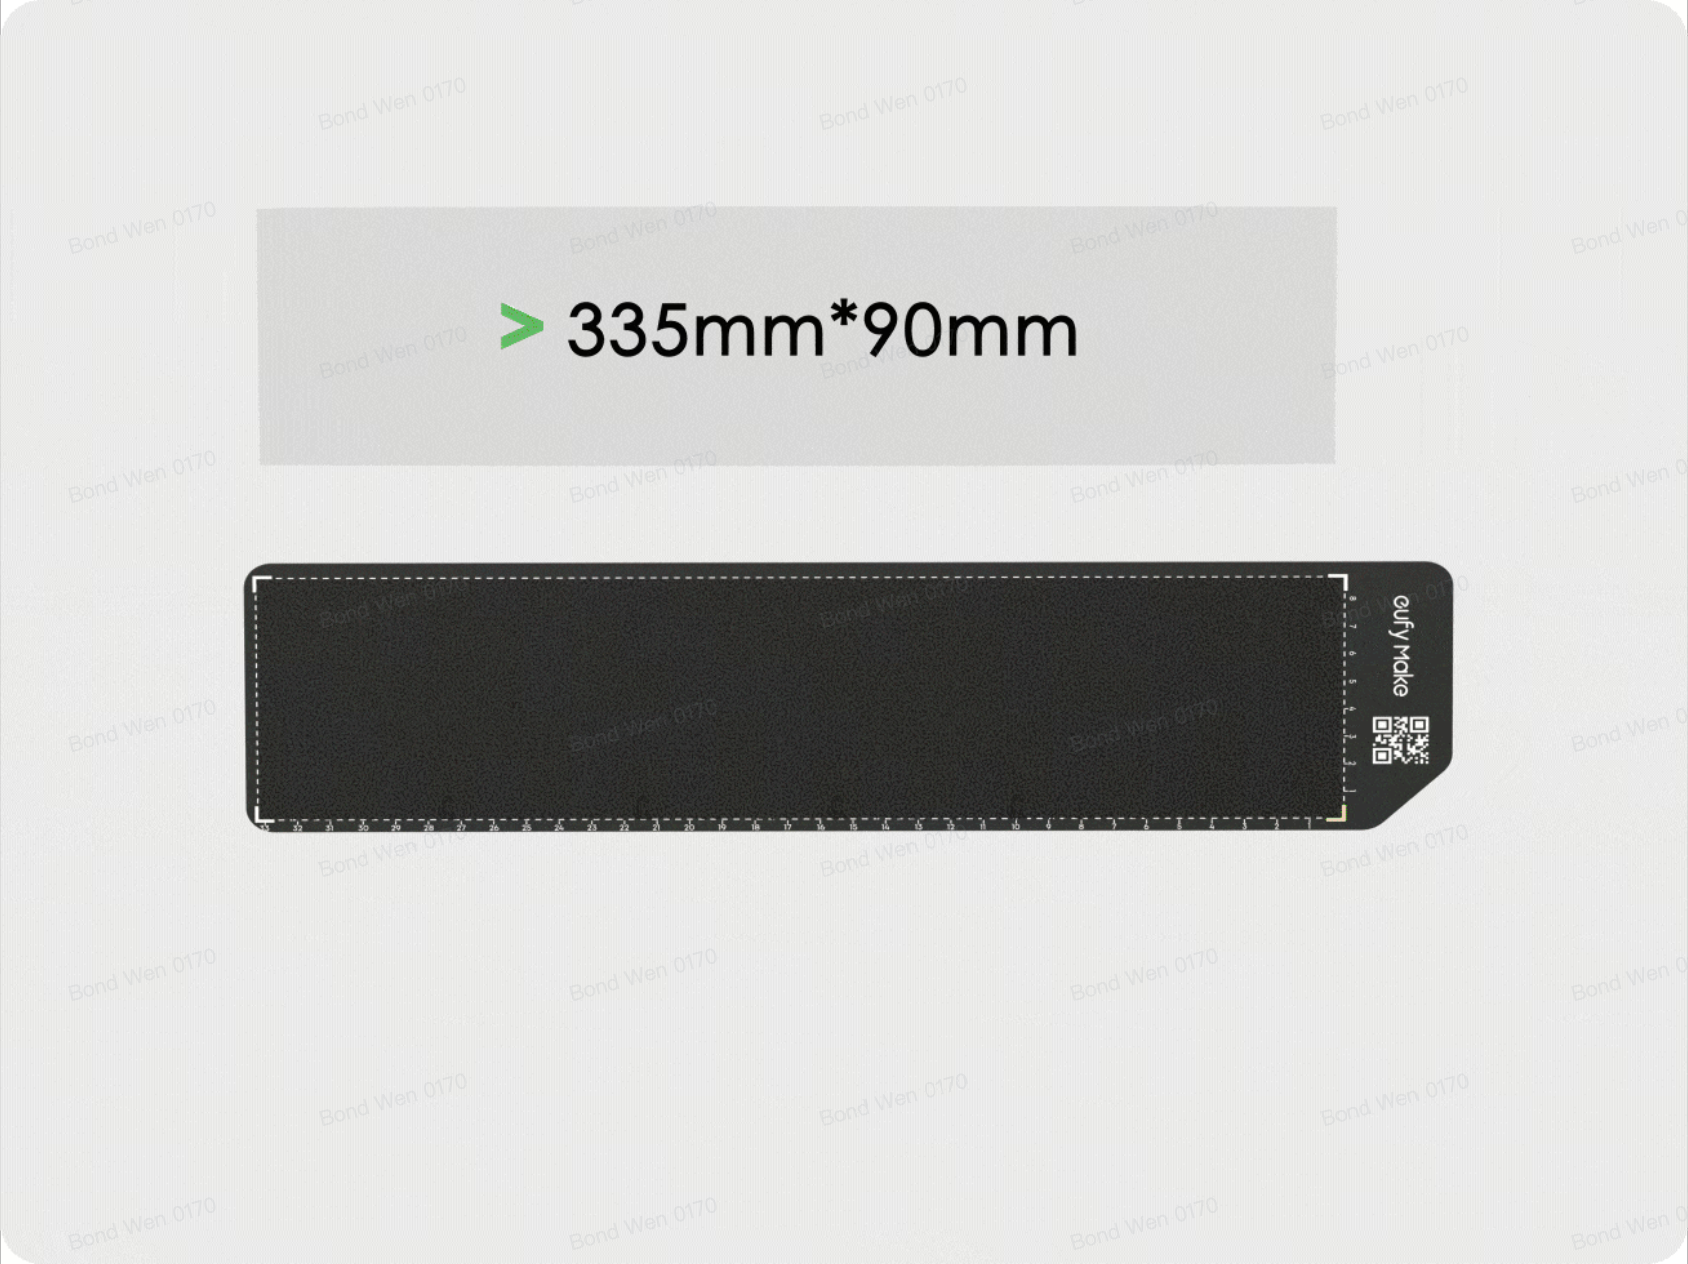
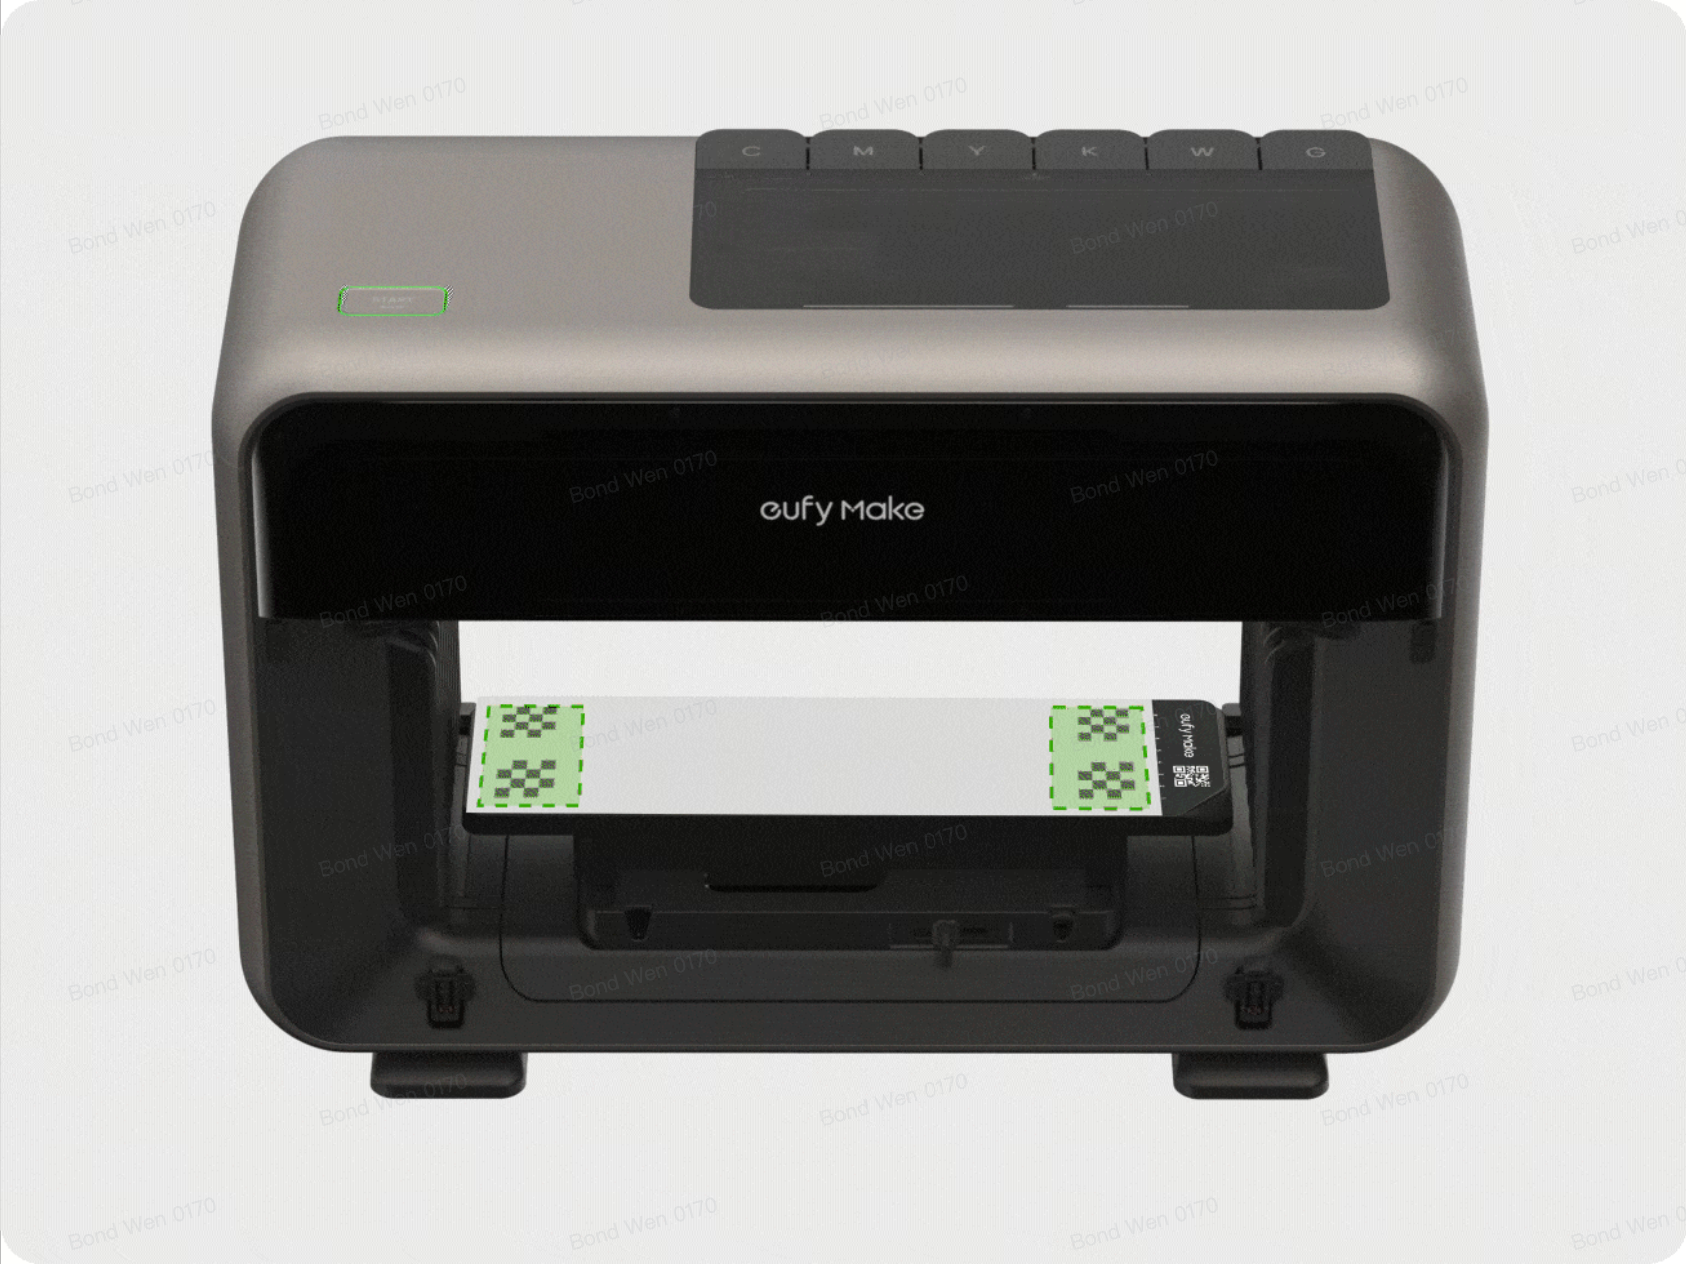
Use a white sticker or sheet measuring more than 335 mm × 90 mm so that it fully covers the calibration print area.
The calibration pattern will be printed within the green area shown below.
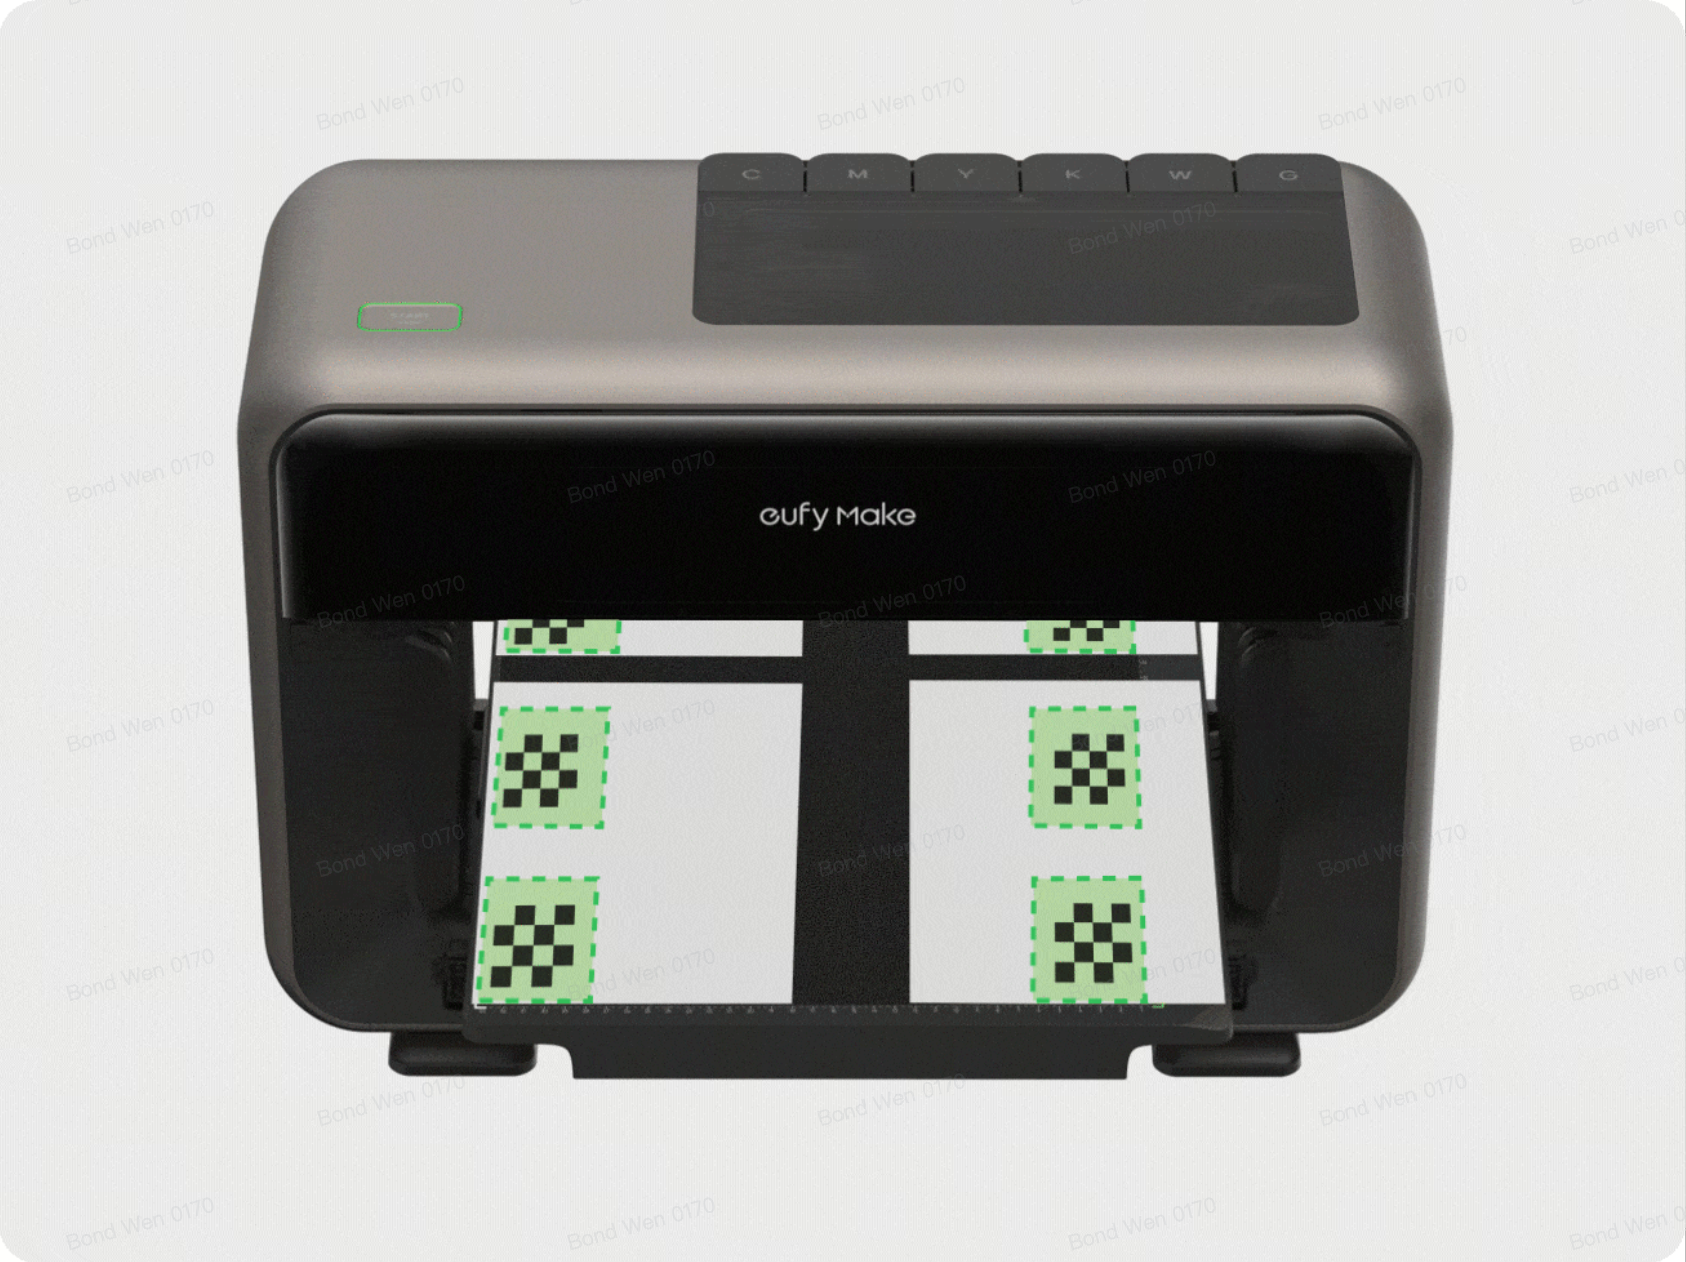
¶ Standard Flatbed
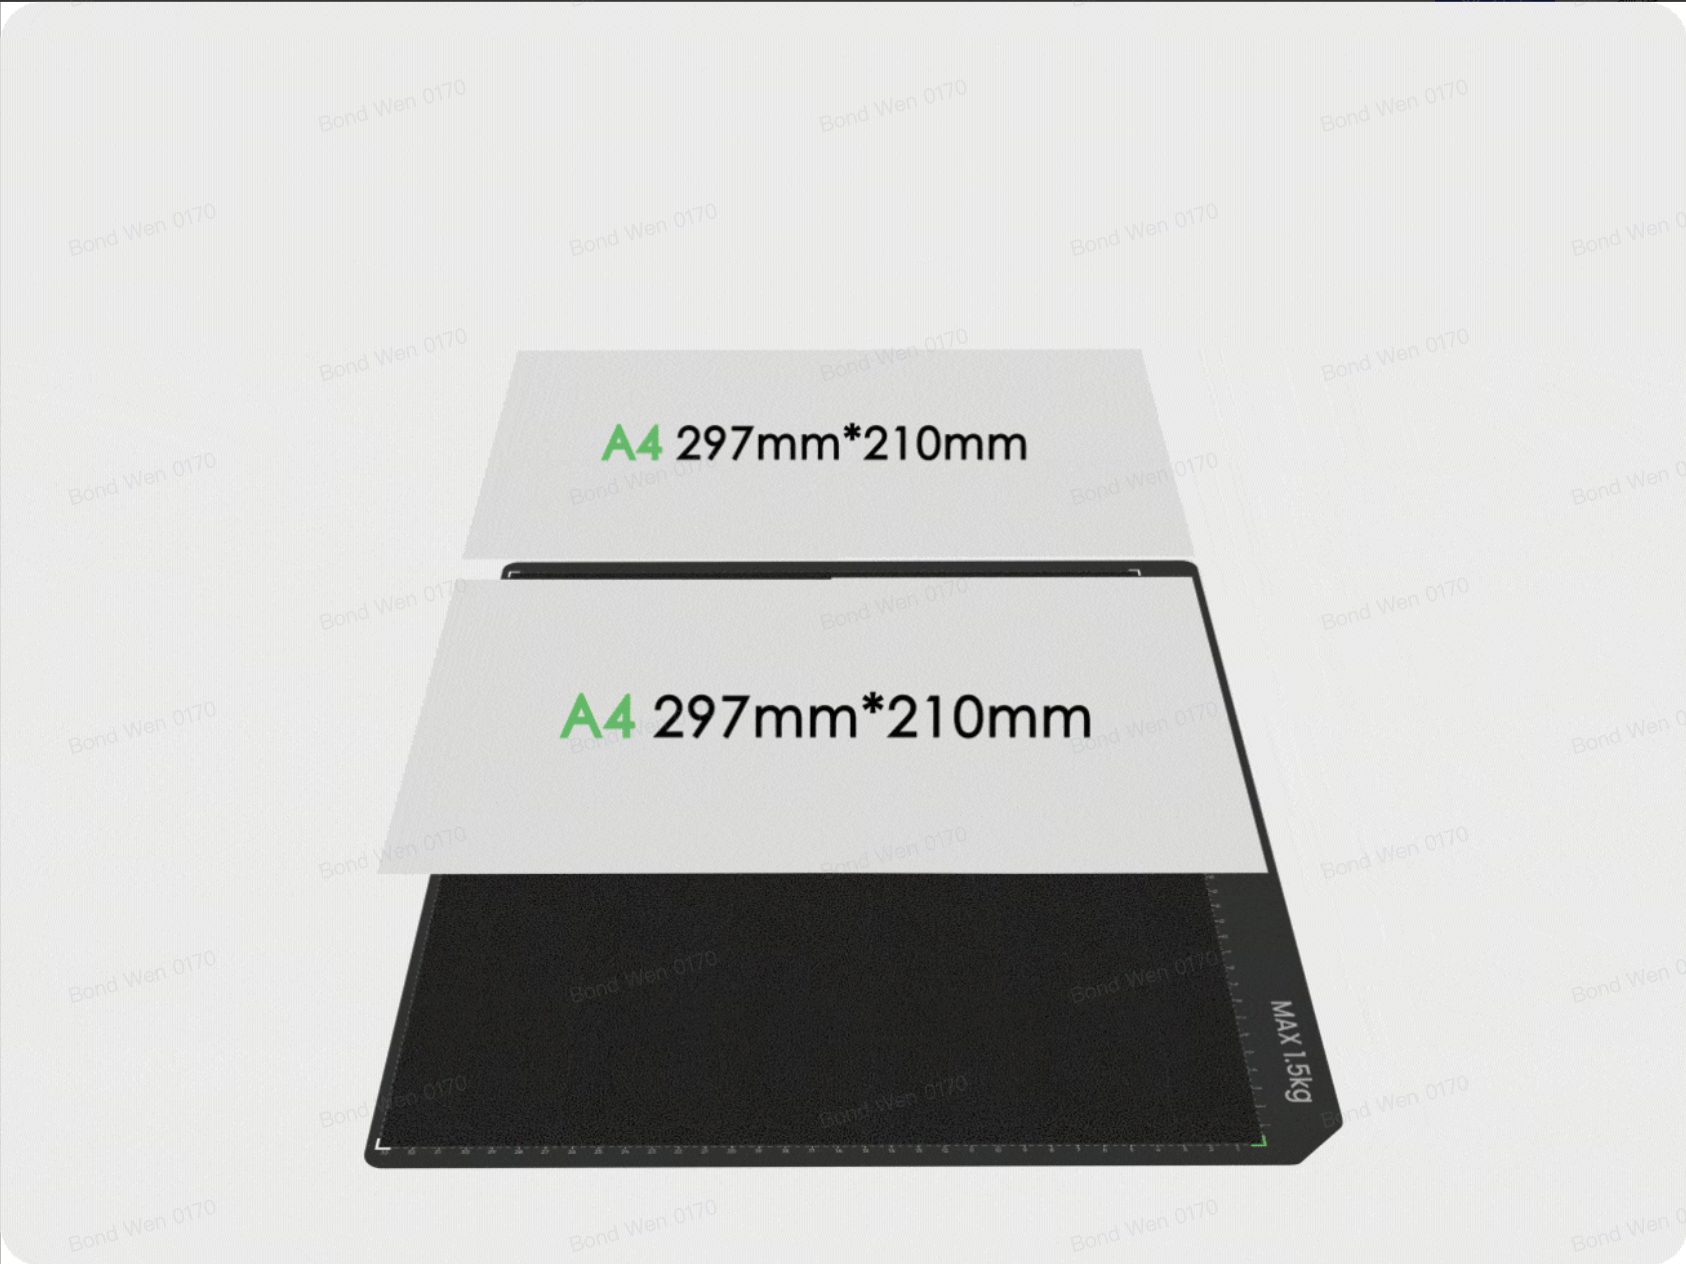
Prepare two A4 sheets.
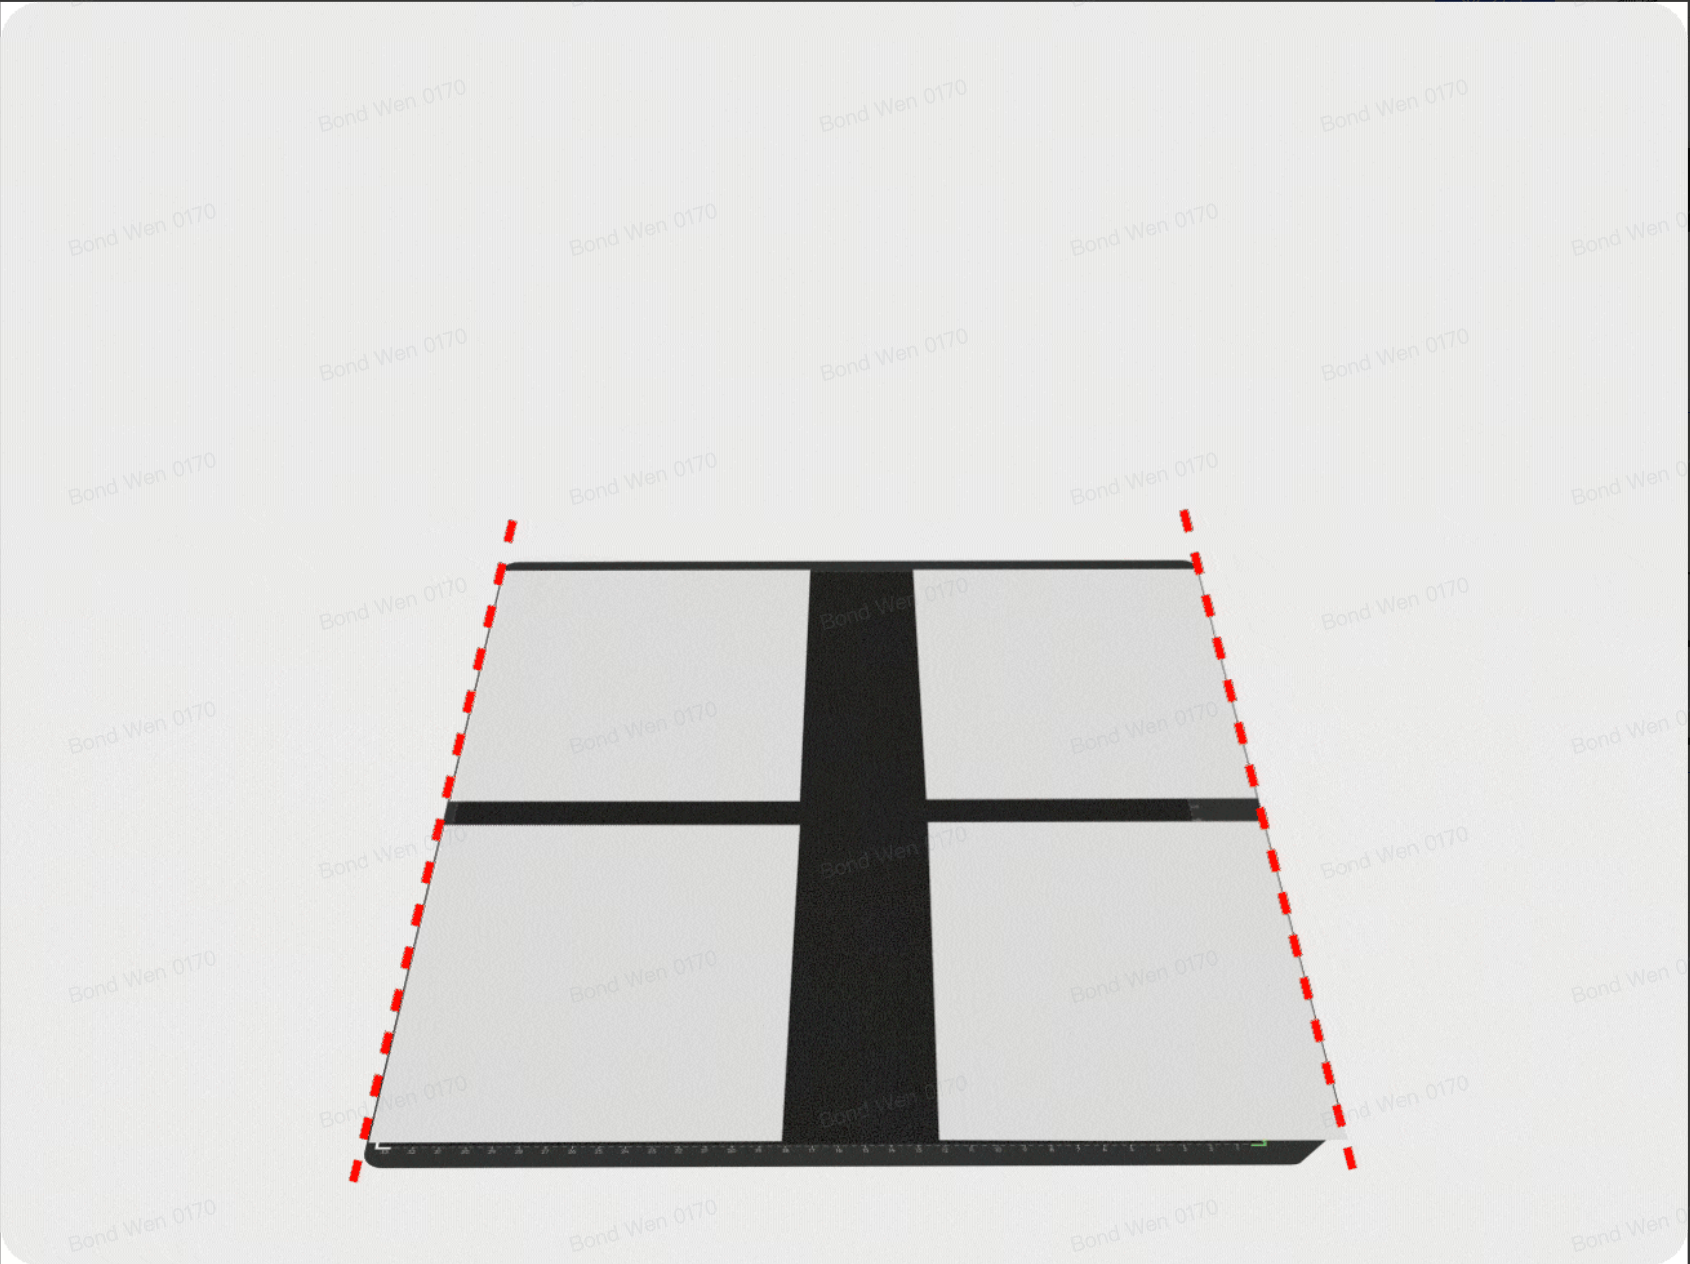
Cut each sheet in half, then place the four resulting pieces at the four corners of the Adhesive Mat.
The calibration patterns will be printed within the green areas shown below.
¶ Step 3: Run the Initial Self-Check
Tap Continue.
Before calibration begins, the printer performs a status self-check.
During this check, the printer confirms that a Flatbed is installed correctly.
If another attachment, such as the Rotary Printing Attachment, is detected, the app will prompt you to replace it with the appropriate Flatbed before continuing.
¶ Step 4: Wait for Calibration to Complete
After the self-check passes, the printer completes the remaining calibration process automatically.
The printer will:
- Print the calibration patterns.
- Capture images using the camera.
- Analyze the printed patterns.
- Calculate any positioning deviations.
- Save the updated calibration data.
No further input is required during this process.
Approximate calibration times are:
- Mini Flatbed: 5 minutes
- Standard Flatbed: 10 minutes
Wait until the process is complete.
¶ Step 5: Check the Calibration Result
¶ Calibration Successful
The app displays a Calibration Successful message.
The updated calibration data has been saved and print positioning accuracy has been corrected.
¶ Calibration Failed
If calibration fails, refer to the following knowledge base article and follow the troubleshooting instructions for the specific error displayed:
Device Binding Operation Guide, Initialization and Calibration Procedure
¶ Important Notes
- Before calibration, make sure the Flatbed and white calibration surface are clean, flat, and free from dust, foreign objects, folds, or wrinkles. Surface condition directly affects calibration accuracy and the likelihood of successful completion.
- Manual Camera Calibration is separate from the initial printer setup process.
- Camera Calibration only corrects positioning accuracy. It does not perform other setup procedures such as ink injection or a test print.
¶ Important Notes
- Before calibration, make sure the Flatbed and white calibration surface are clean, flat, and free from dust, foreign objects, folds, or wrinkles. Surface condition directly affects calibration accuracy and the likelihood of successful completion.
- Manual Camera Calibration is separate from the initial printer setup process.
- Camera Calibration only corrects positioning accuracy. It does not perform other setup procedures such as ink injection or a test print.
¶ Frequently Asked Questions
¶ Q: The print position is still incorrect after calibration. What should I do?
A: Possible causes include:
- The print material was not placed in the same position used during calibration.
- The material thickness differs from the thickness used during calibration.
- A hardware issue is affecting positioning, such as a problem with the Print Head or motion system.
Run Camera Calibration again while ensuring that the material setup remains consistent.
If the issue persists, contact eufyMake Customer Support.
¶ Q: Can the calibration data be lost?
A: No.
Calibration data is stored in the printer firmware and remains available after:
- Restarting the software
- Reinstalling the software
- Updating the system
- Connecting the printer to a different computer
The saved calibration data will only change when Camera Calibration is run again.