¶ Applicable scenarios:
You have already entered the software operation stage and is unsure how to set parameters
You want to know what to pay attention to when importing image or design files into the software
You encounter issues such as blurry images after import, unclean edges, incorrect transparency effects, or inconvenient positioning
¶ I. Parameter Settings FAQ
How to set up on the canvas when printing
¶ Q1: Ink Mode
¶ How should I choose the Ink Mode for light Substrate, dark Substrate, and transparent Substrate?
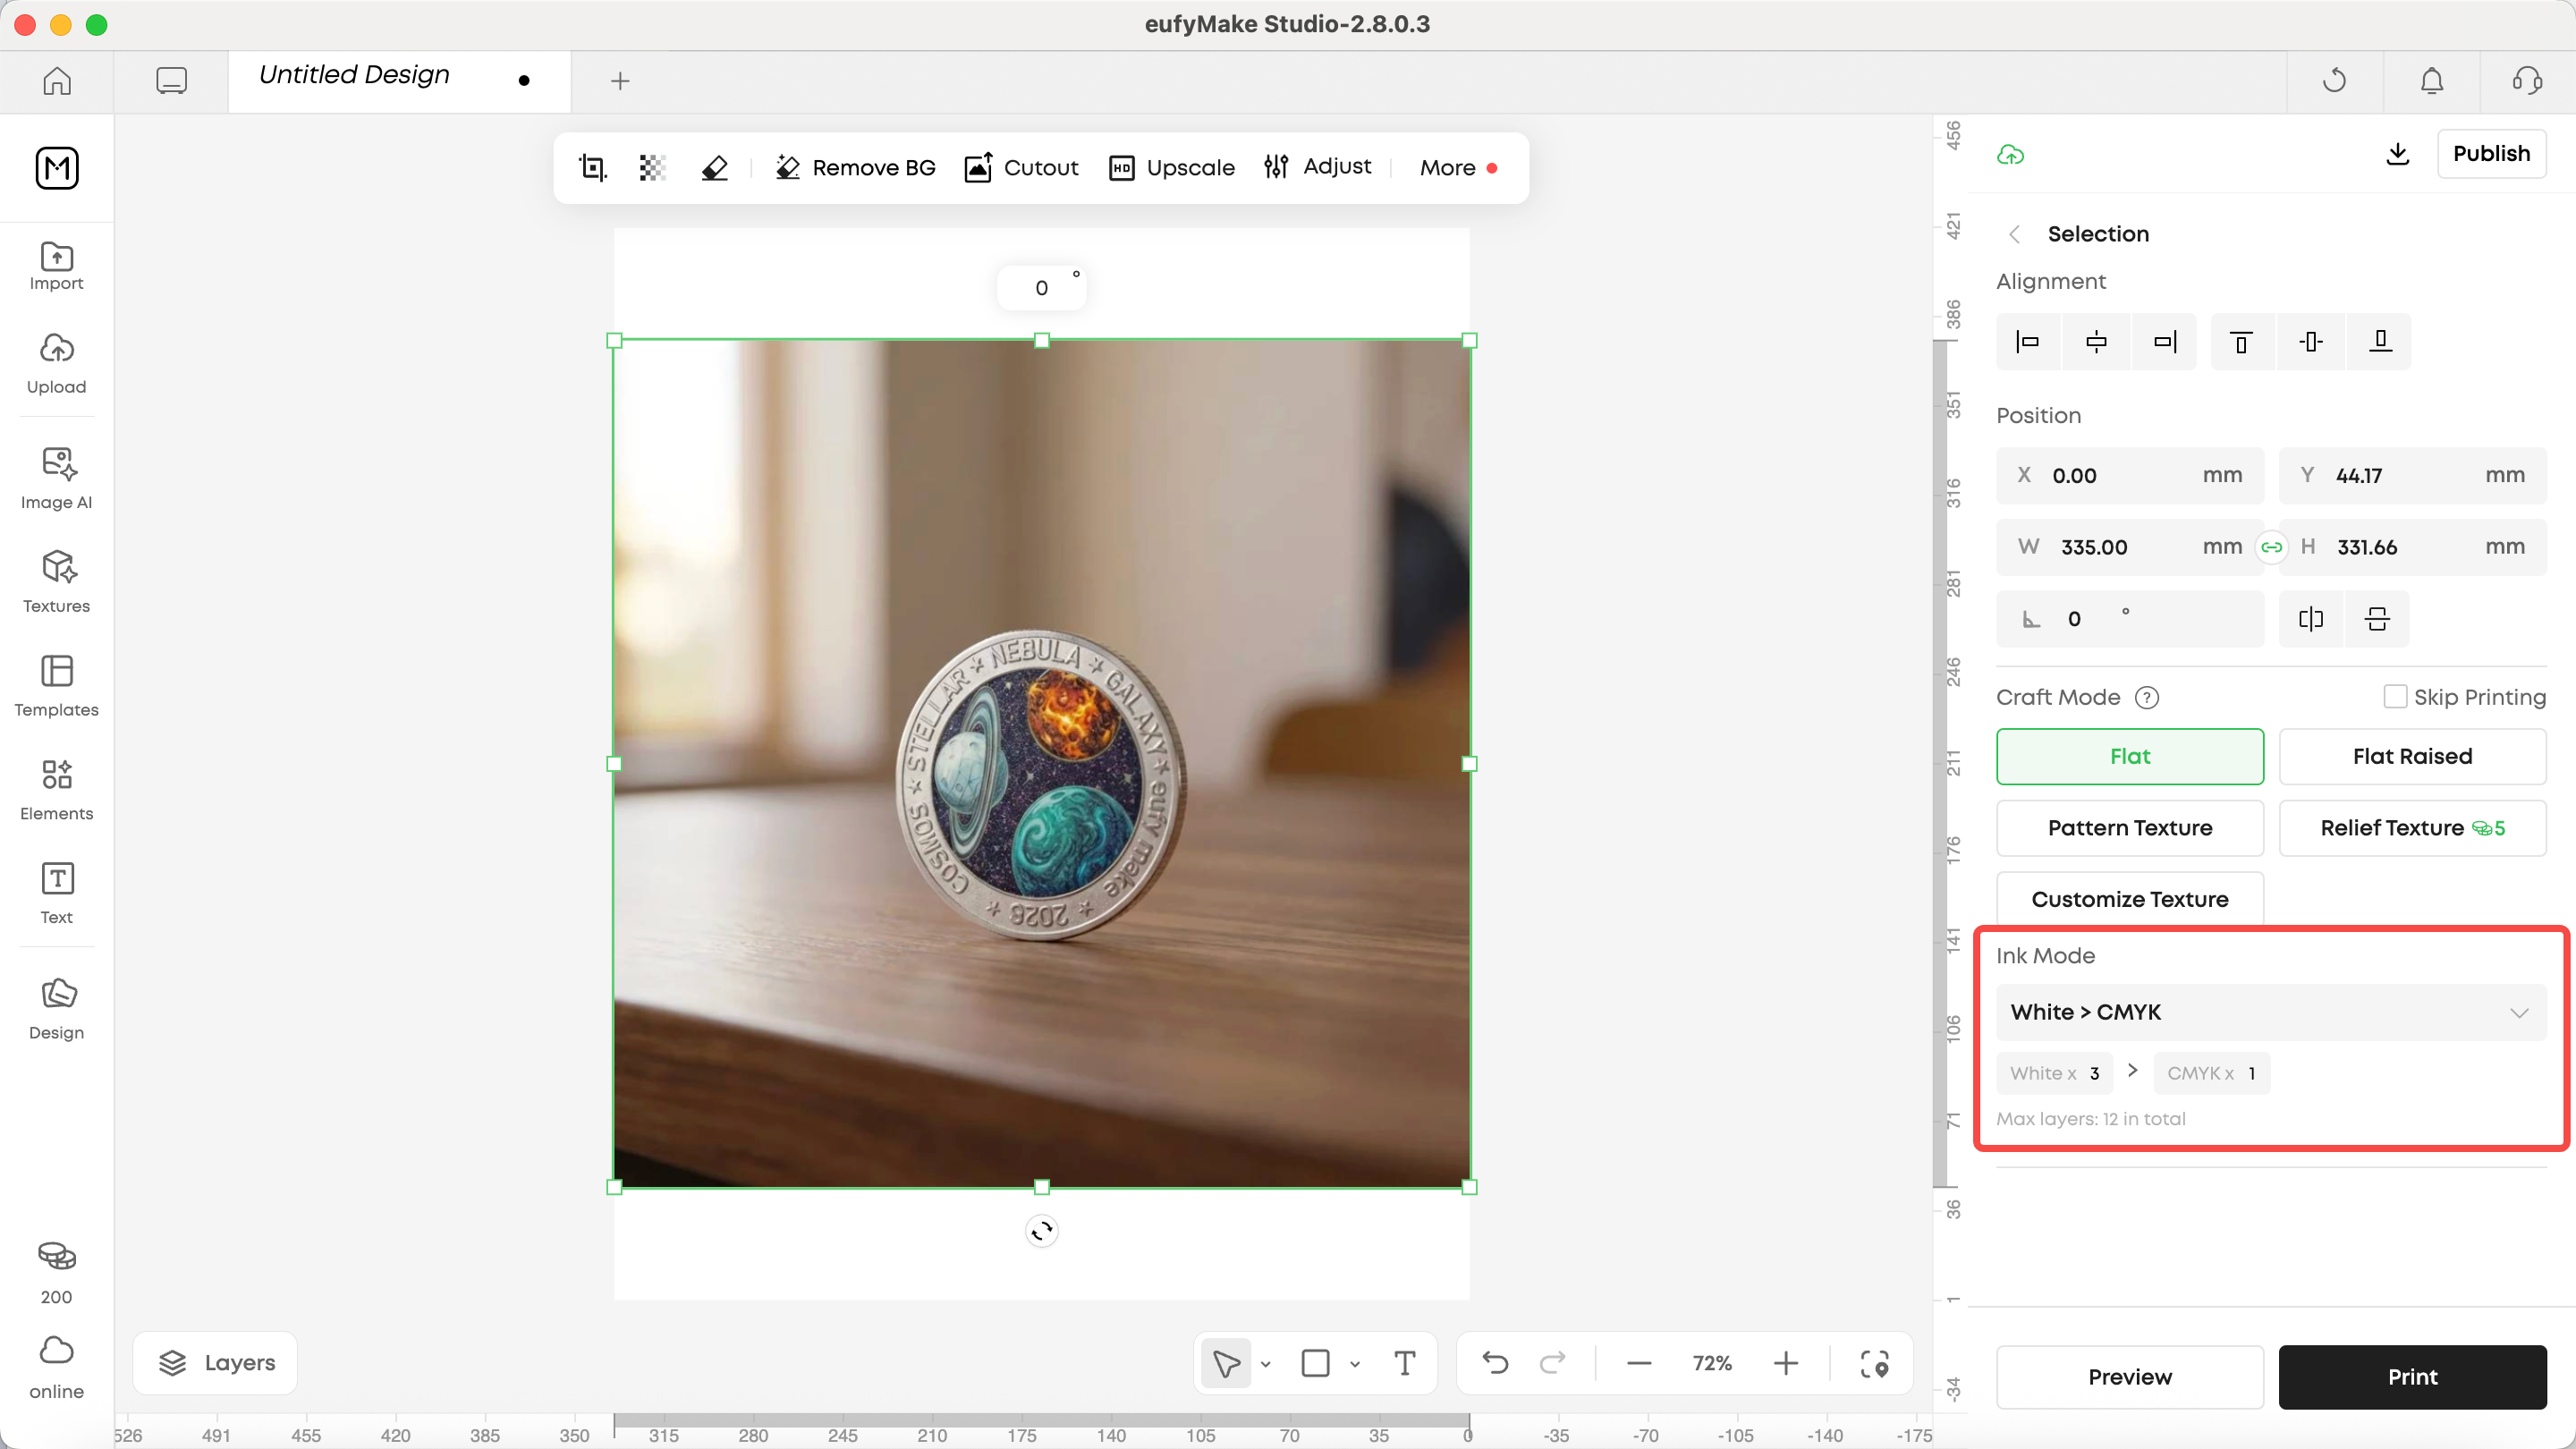
A: You can follow the logic below.
| Scenario | Recommended Mode |
| Light Substrate | CMYK |
| Dark Substrate | White+CMYK |
| Clear items with two-sided or multi-layered designs. | CMYK-White-CMYK |
| Requires surface protection and gloss | White-CMYK-Gloss |
| UV DTF Sticker | Sticker |
Judgment method:
- Whenever the underlying color may interfere with the pattern display, consider adding White Ink
- Whenever you are concerned about light transmission, graying, or color desaturation, prioritize White Ink underbase
- For special layered effects, consider multi-layer modes
¶ Q2: White Underbase Choke
¶ What is White Underbase Choke? What is the default value? How do I adjust it?
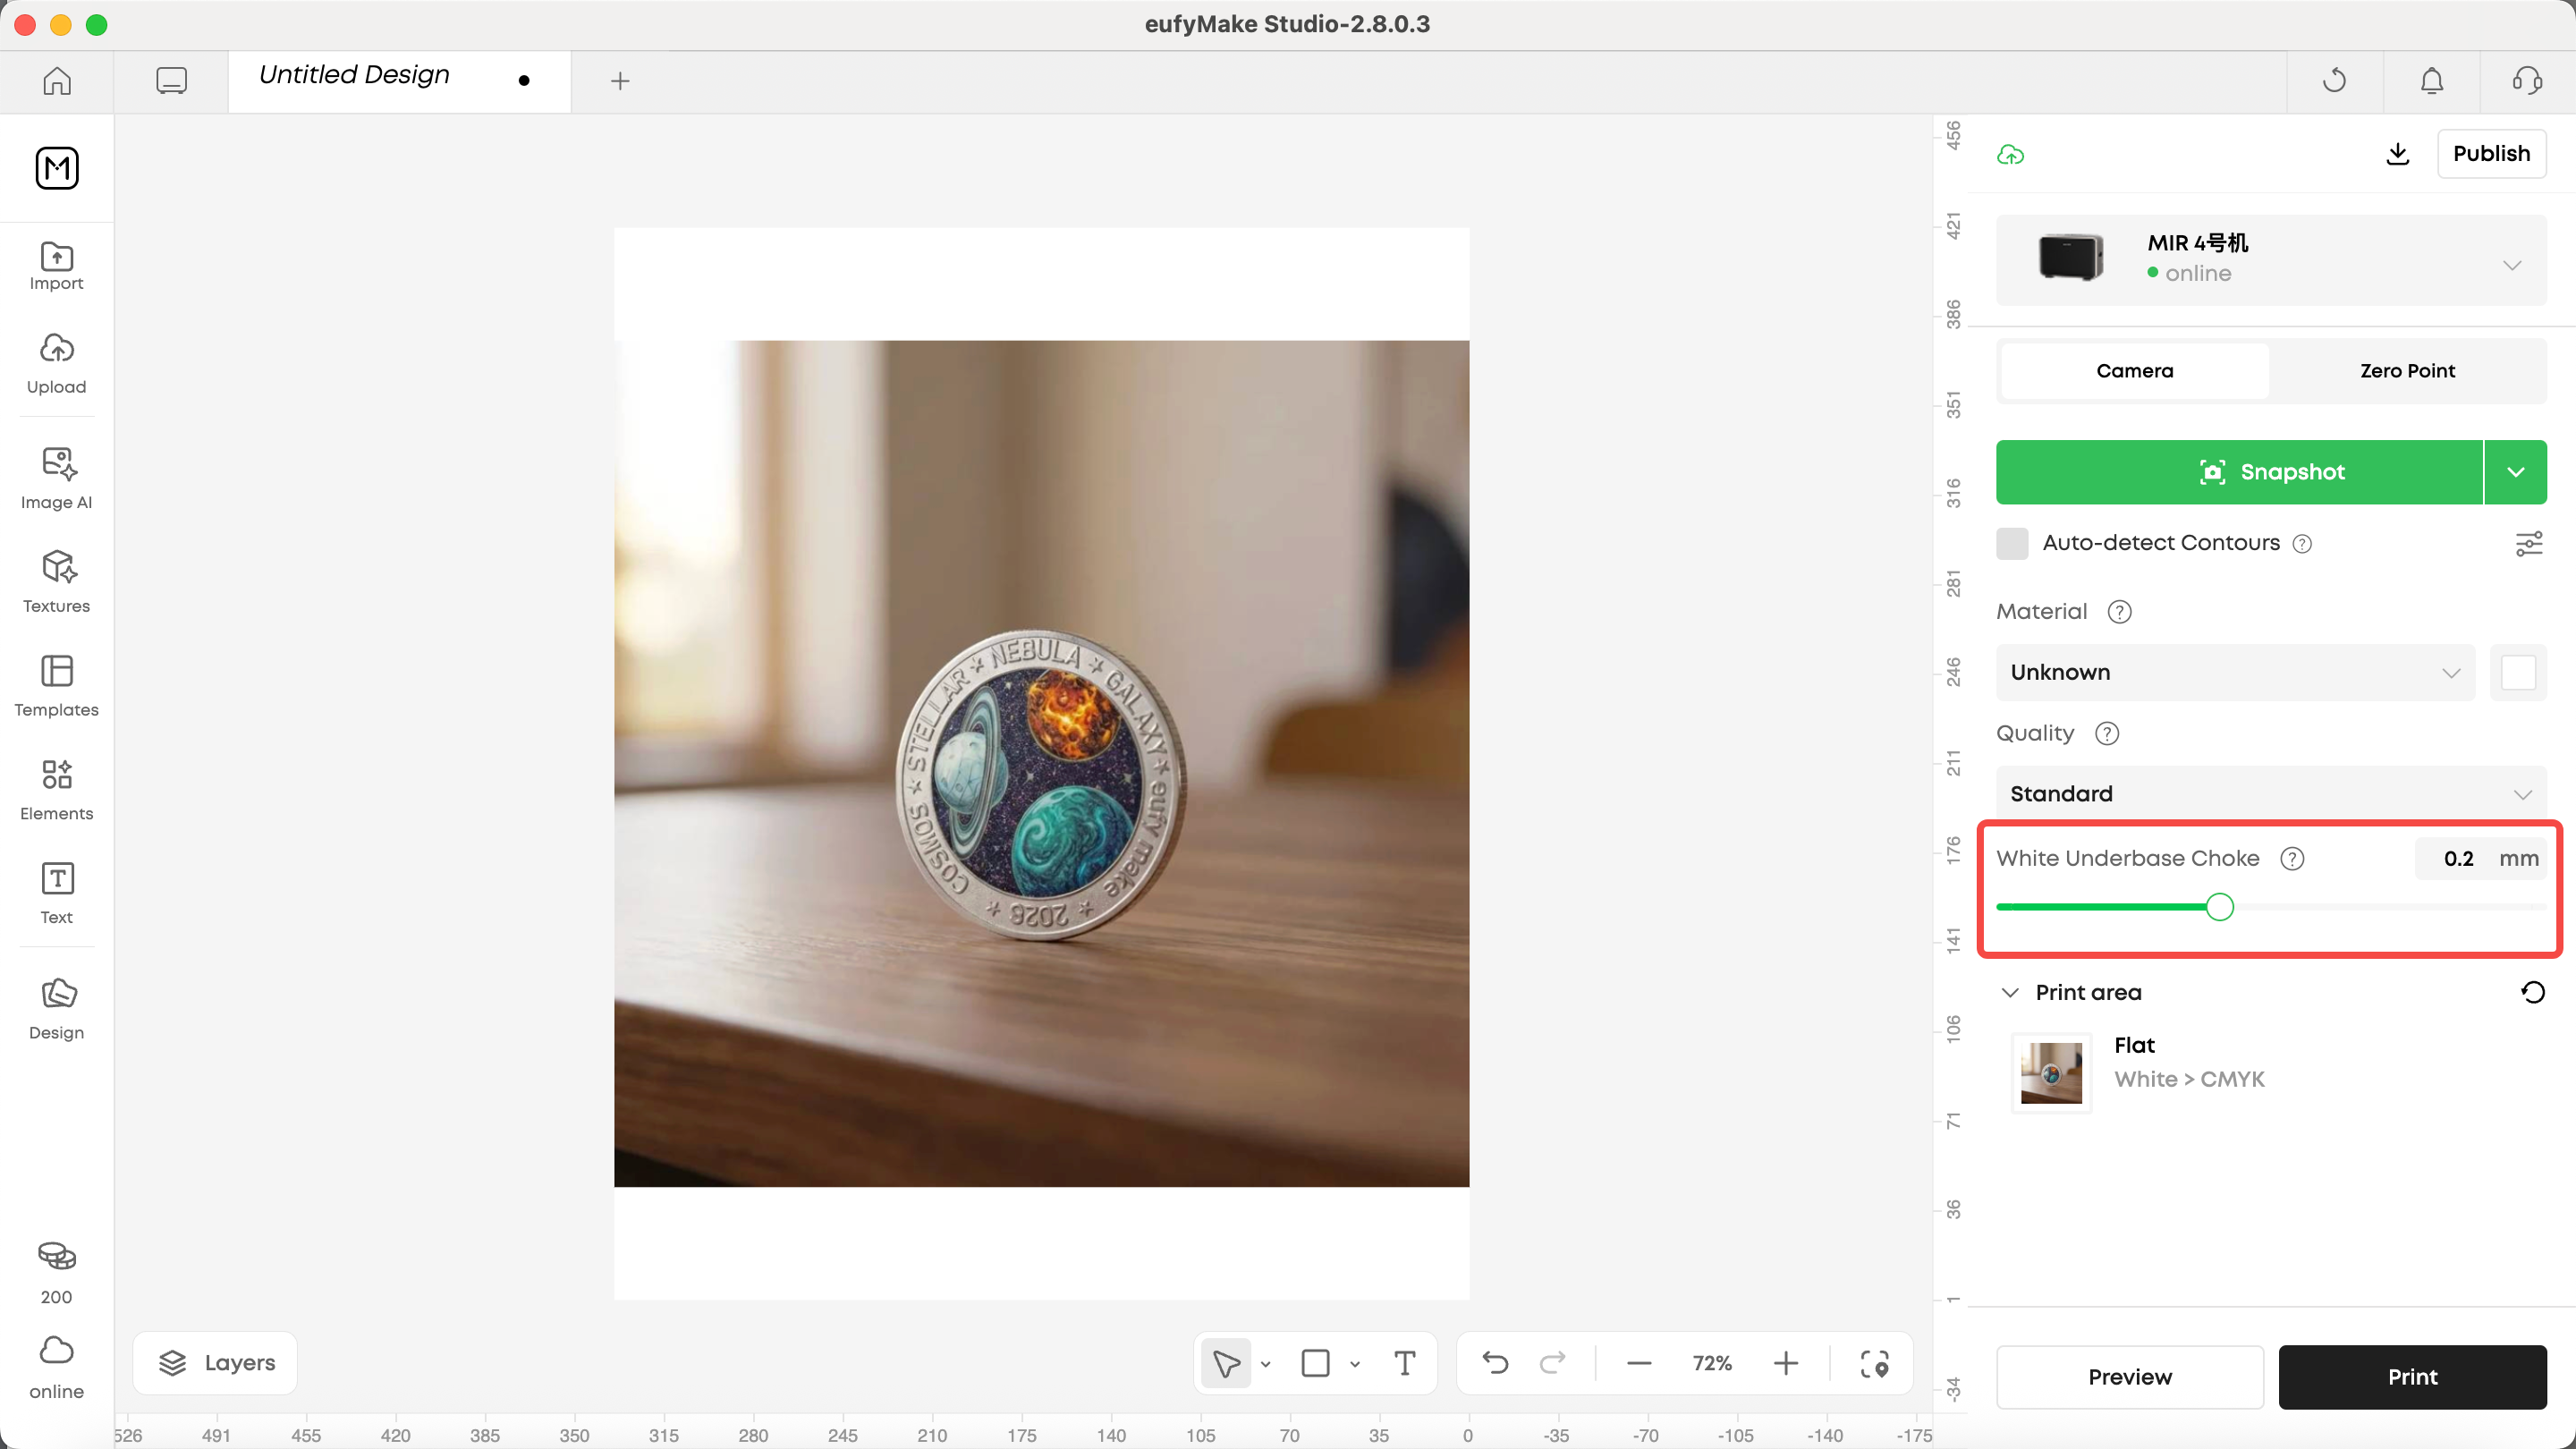
A: It is a White Ink shrinkage parameter used to reduce white edge exposure.
Working principle:
- Makes the White Ink base layer slightly smaller than the CMYK Ink edge
- Prevents White Ink from showing through the CMYK edge
Recommendations:
- Default value: 0.2 mm
- If white edges appear: increase appropriately
- If edges appear dark or fine lines become too thick: decrease appropriately
- For very fine White Ink text or thin lines: consider reducing to 0
¶ Q3: Quality
¶ How should I choose between Draft / Standard / High Quality?
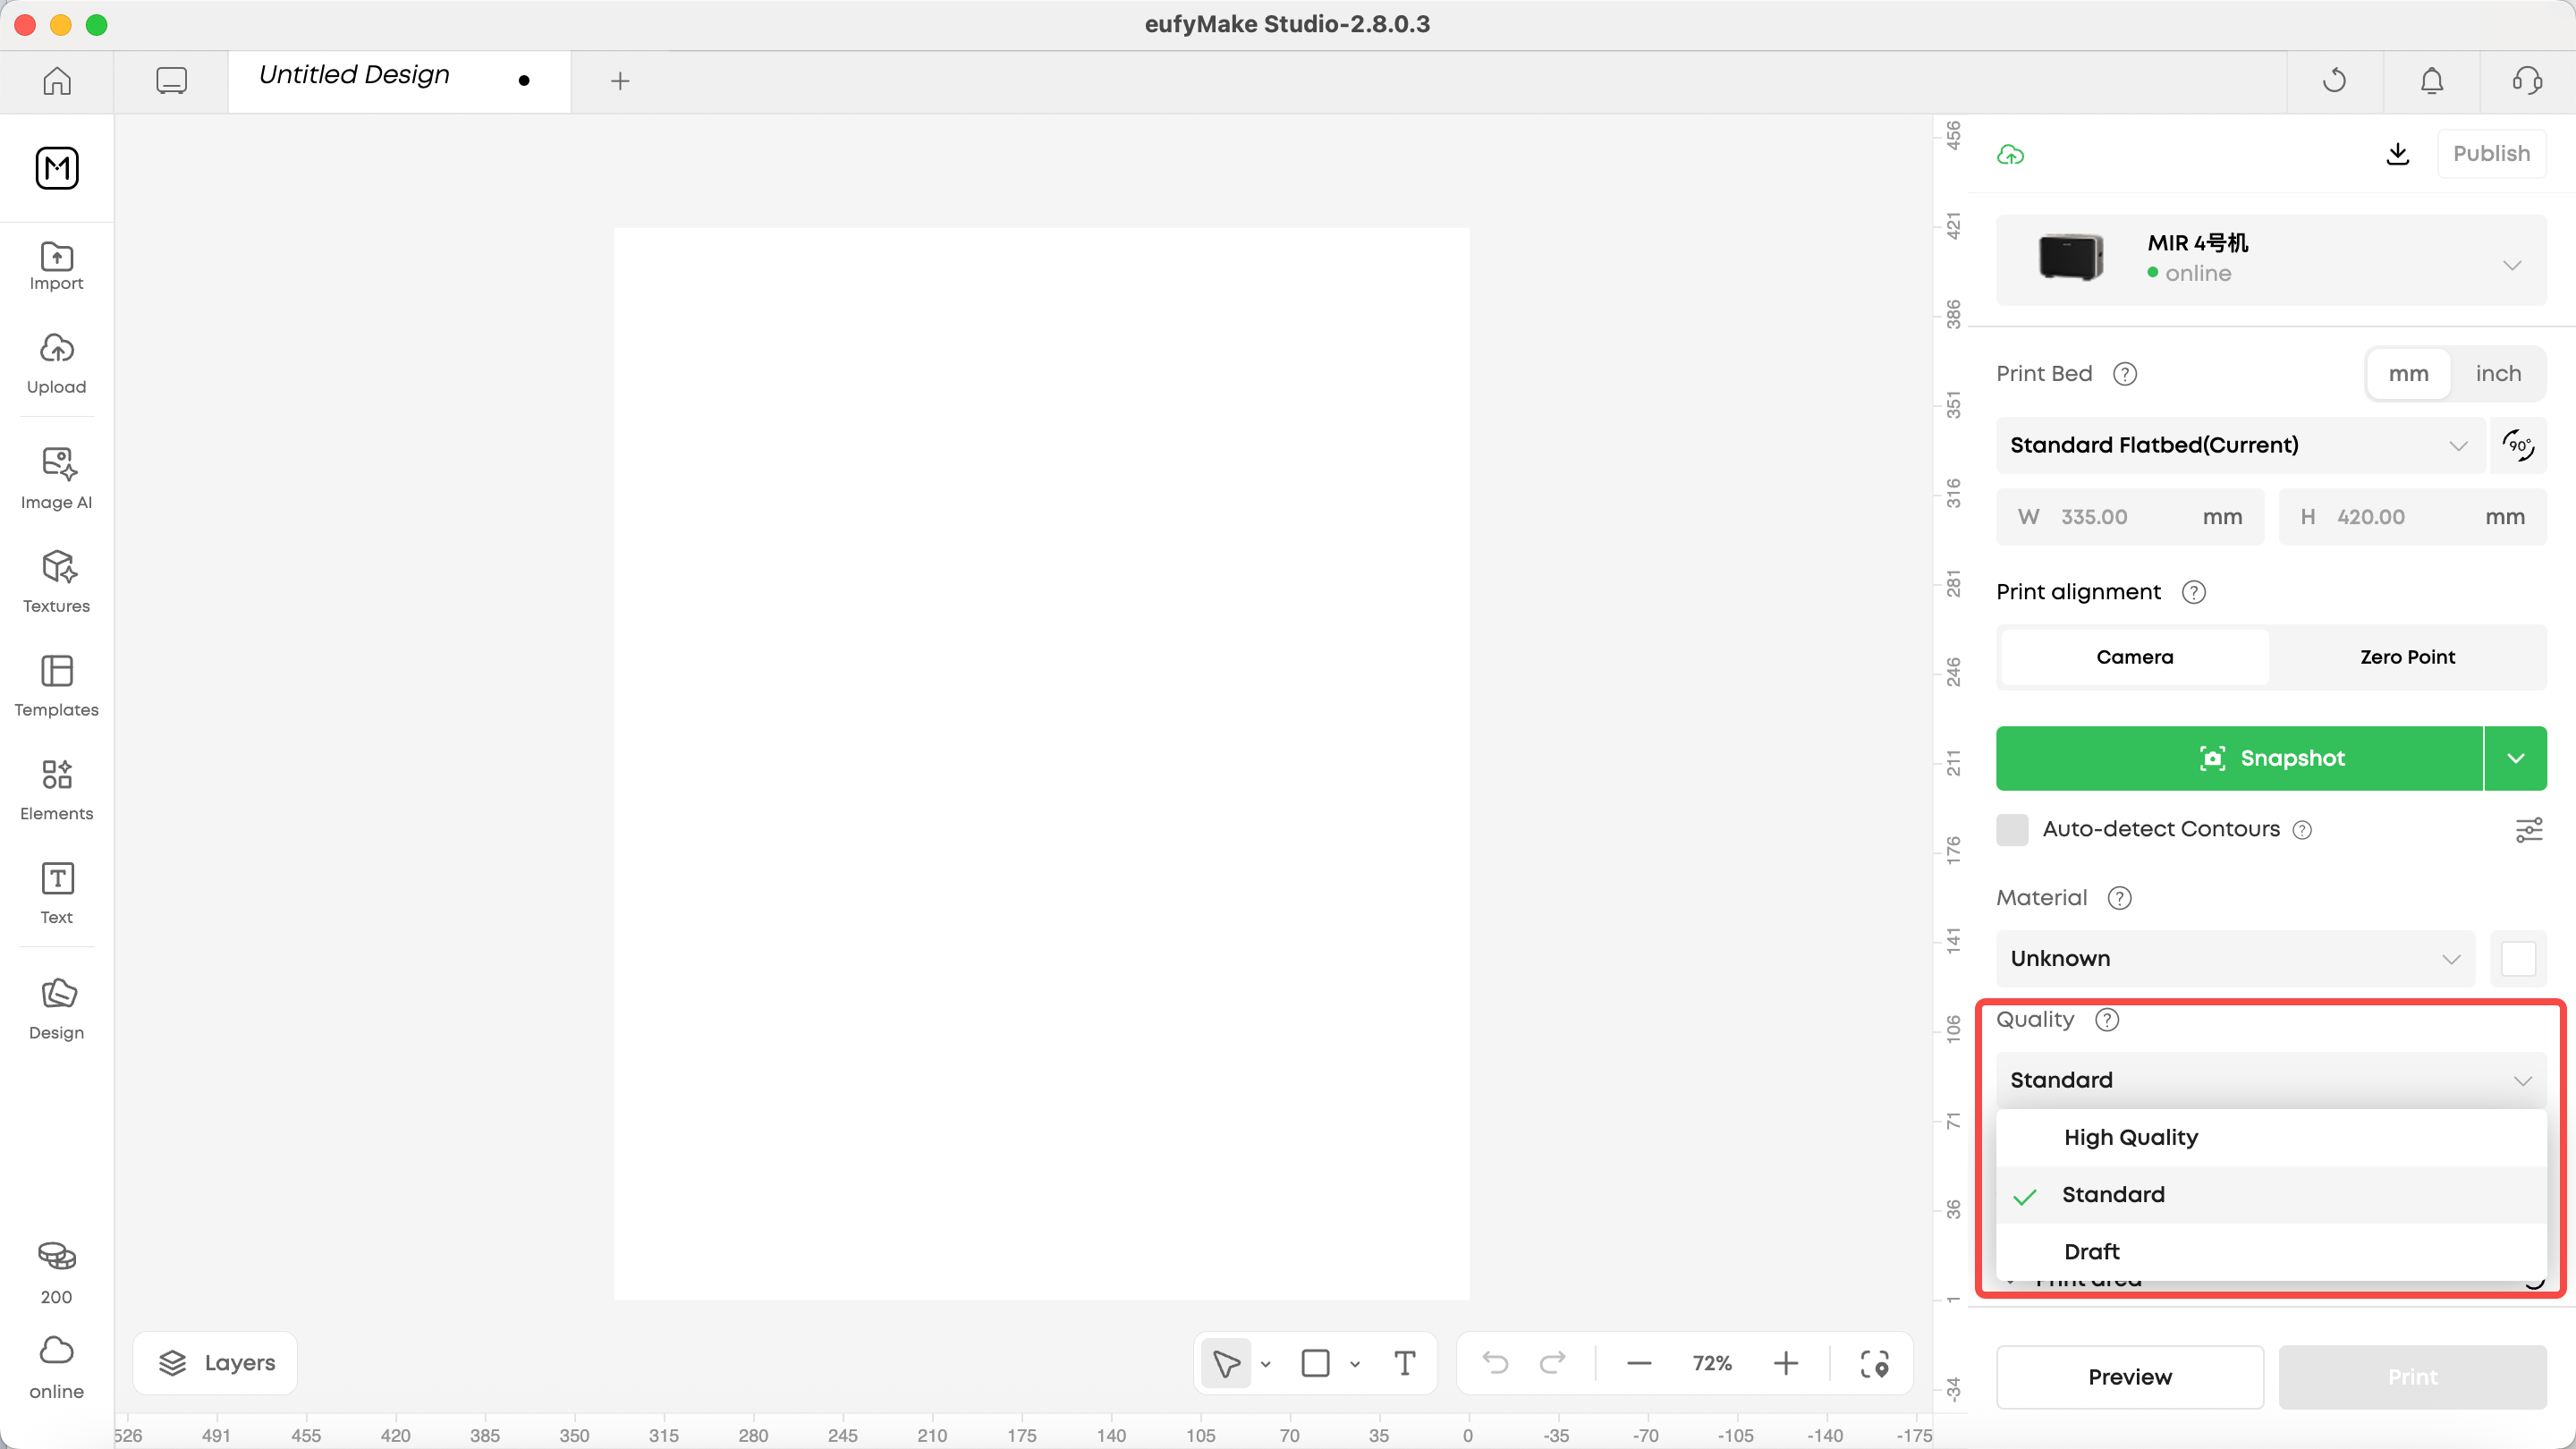
| Mode | Applicable Scenario |
| Draft | Position testing, size testing, quick trial prints |
| Standard | Most everyday formal printing |
| High Quality | Fine patterns, final products, high-detail output |
Practical tips:
- New material testing: start with Draft or Standard
- After confirming position and adhesion are fine, switch to High Quality
¶ Q4: Craft Mode
¶ How should I choose between Flat, Flat Raised, Pattern Texture, and Relief Texture?
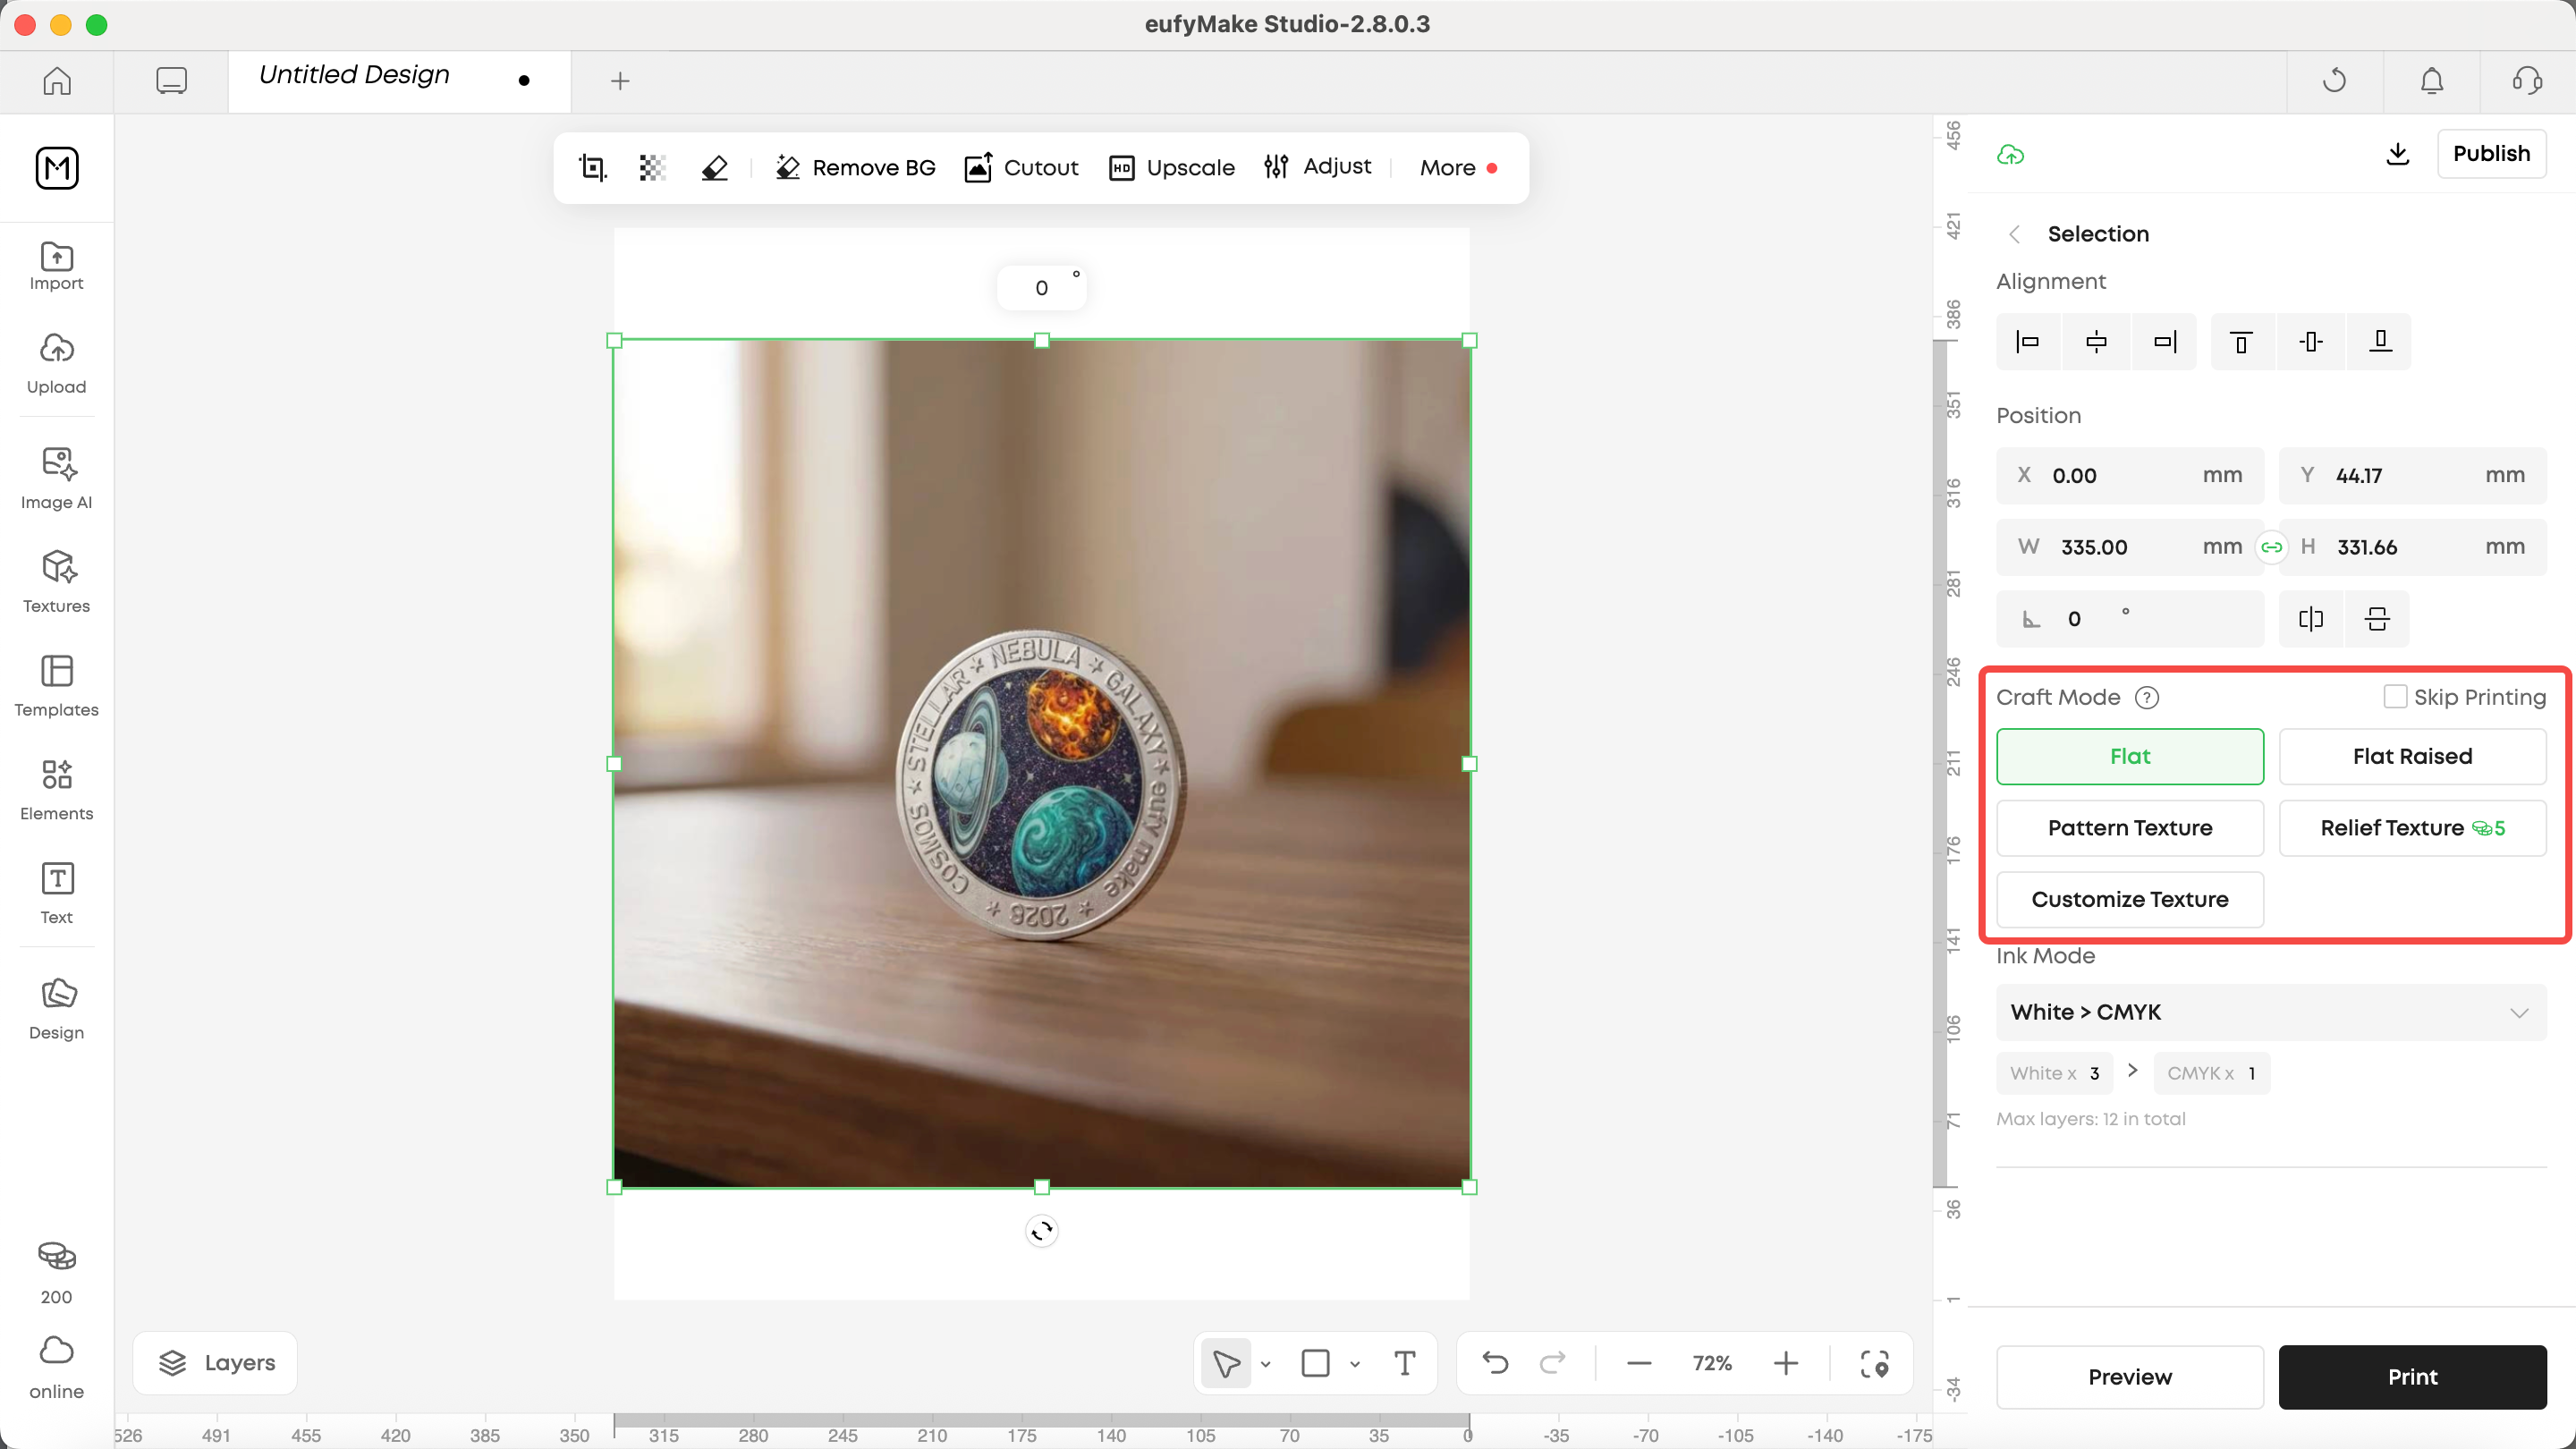
A: First decide whether you want a flat effect or a 3D texture effect.
Selection logic:
- Flat: Standard flat printing, most stable, suitable for most applications
- Flat Raised: Slight raised effect, suitable for logos, text, small-area decorative enhancement
- Pattern Texture: Pattern texture, suitable for decorative effects
- Relief Texture: Stronger relief effect, suitable for more pronounced thickness expression
- Customize Texture: For advanced use cases requiring depth maps
Recommendations:
- For the first test on a new material, start with Flat
- After confirming adhesion and positioning are fine, try texture modes
- The stronger the texture mode, the higher the requirement for material surface stability
¶ Q5: How to estimate ink consumption and printing time?
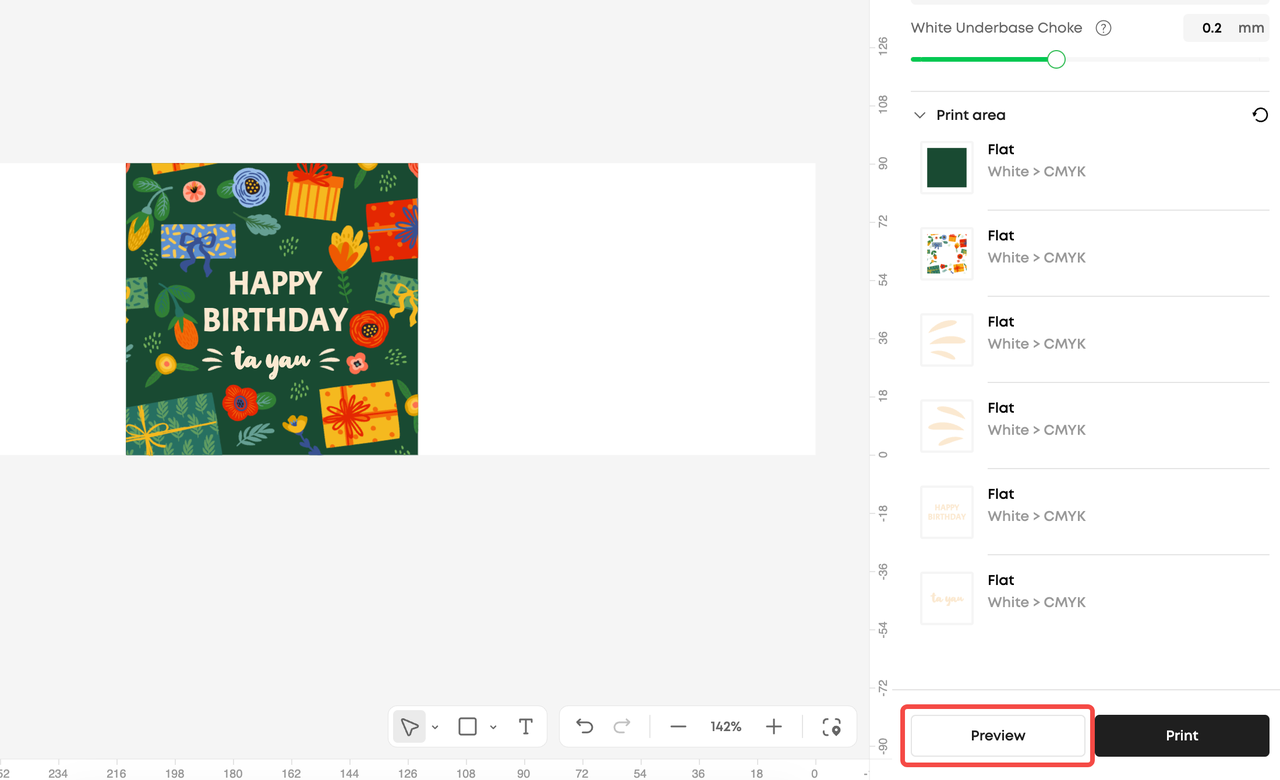
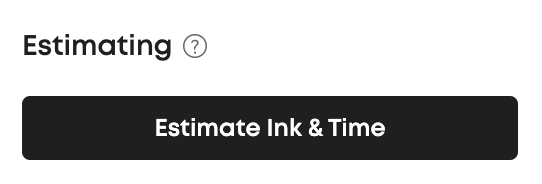
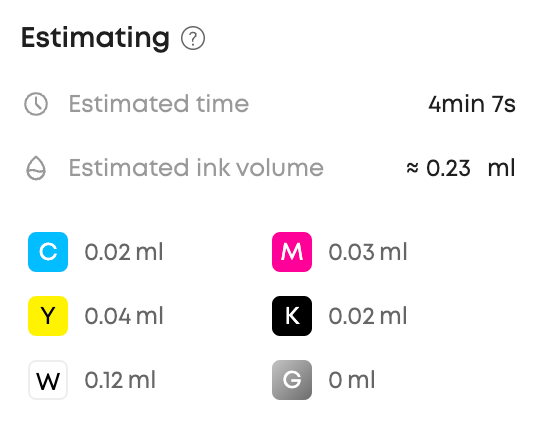
A: After completing the project parameter settings, you can check on the Preview page.
Steps:
- Complete project parameter settings
- Click Preview in the bottom-right corner of the software
- On the Preview page, click Estimate Ink & Time
Additional notes:
- Even if the software is not bound to a device, you can still view the estimated ink consumption and time for a project
- Estimates are for reference only; different materials, pattern coverage, modes, and layers will affect actual consumption
¶ Q6: Why can't parameters be directly copied when switching to a different Substrate for the same pattern?
A: Because what affects the print result is not the pattern itself, but the combination of the material surface, ink layer structure, and environmental conditions.
Influencing factors include:
- Material surface energy
- Whether it is transparent, reflective, or textured
- Whether White Ink underbase is needed
- Whether pre-treatment is consistent
- Ambient temperature and humidity
- Whether the object is flat and securely fixed
It is recommended to re-confirm at least:
- Material Type
- Ink Mode
- White Ink settings
- Whether pre-treatment is needed
- Positioning method
¶ Q7: Photo Alignment, Zero Point Alignment, Manual Positioning
¶ How should I choose before setting parameters?
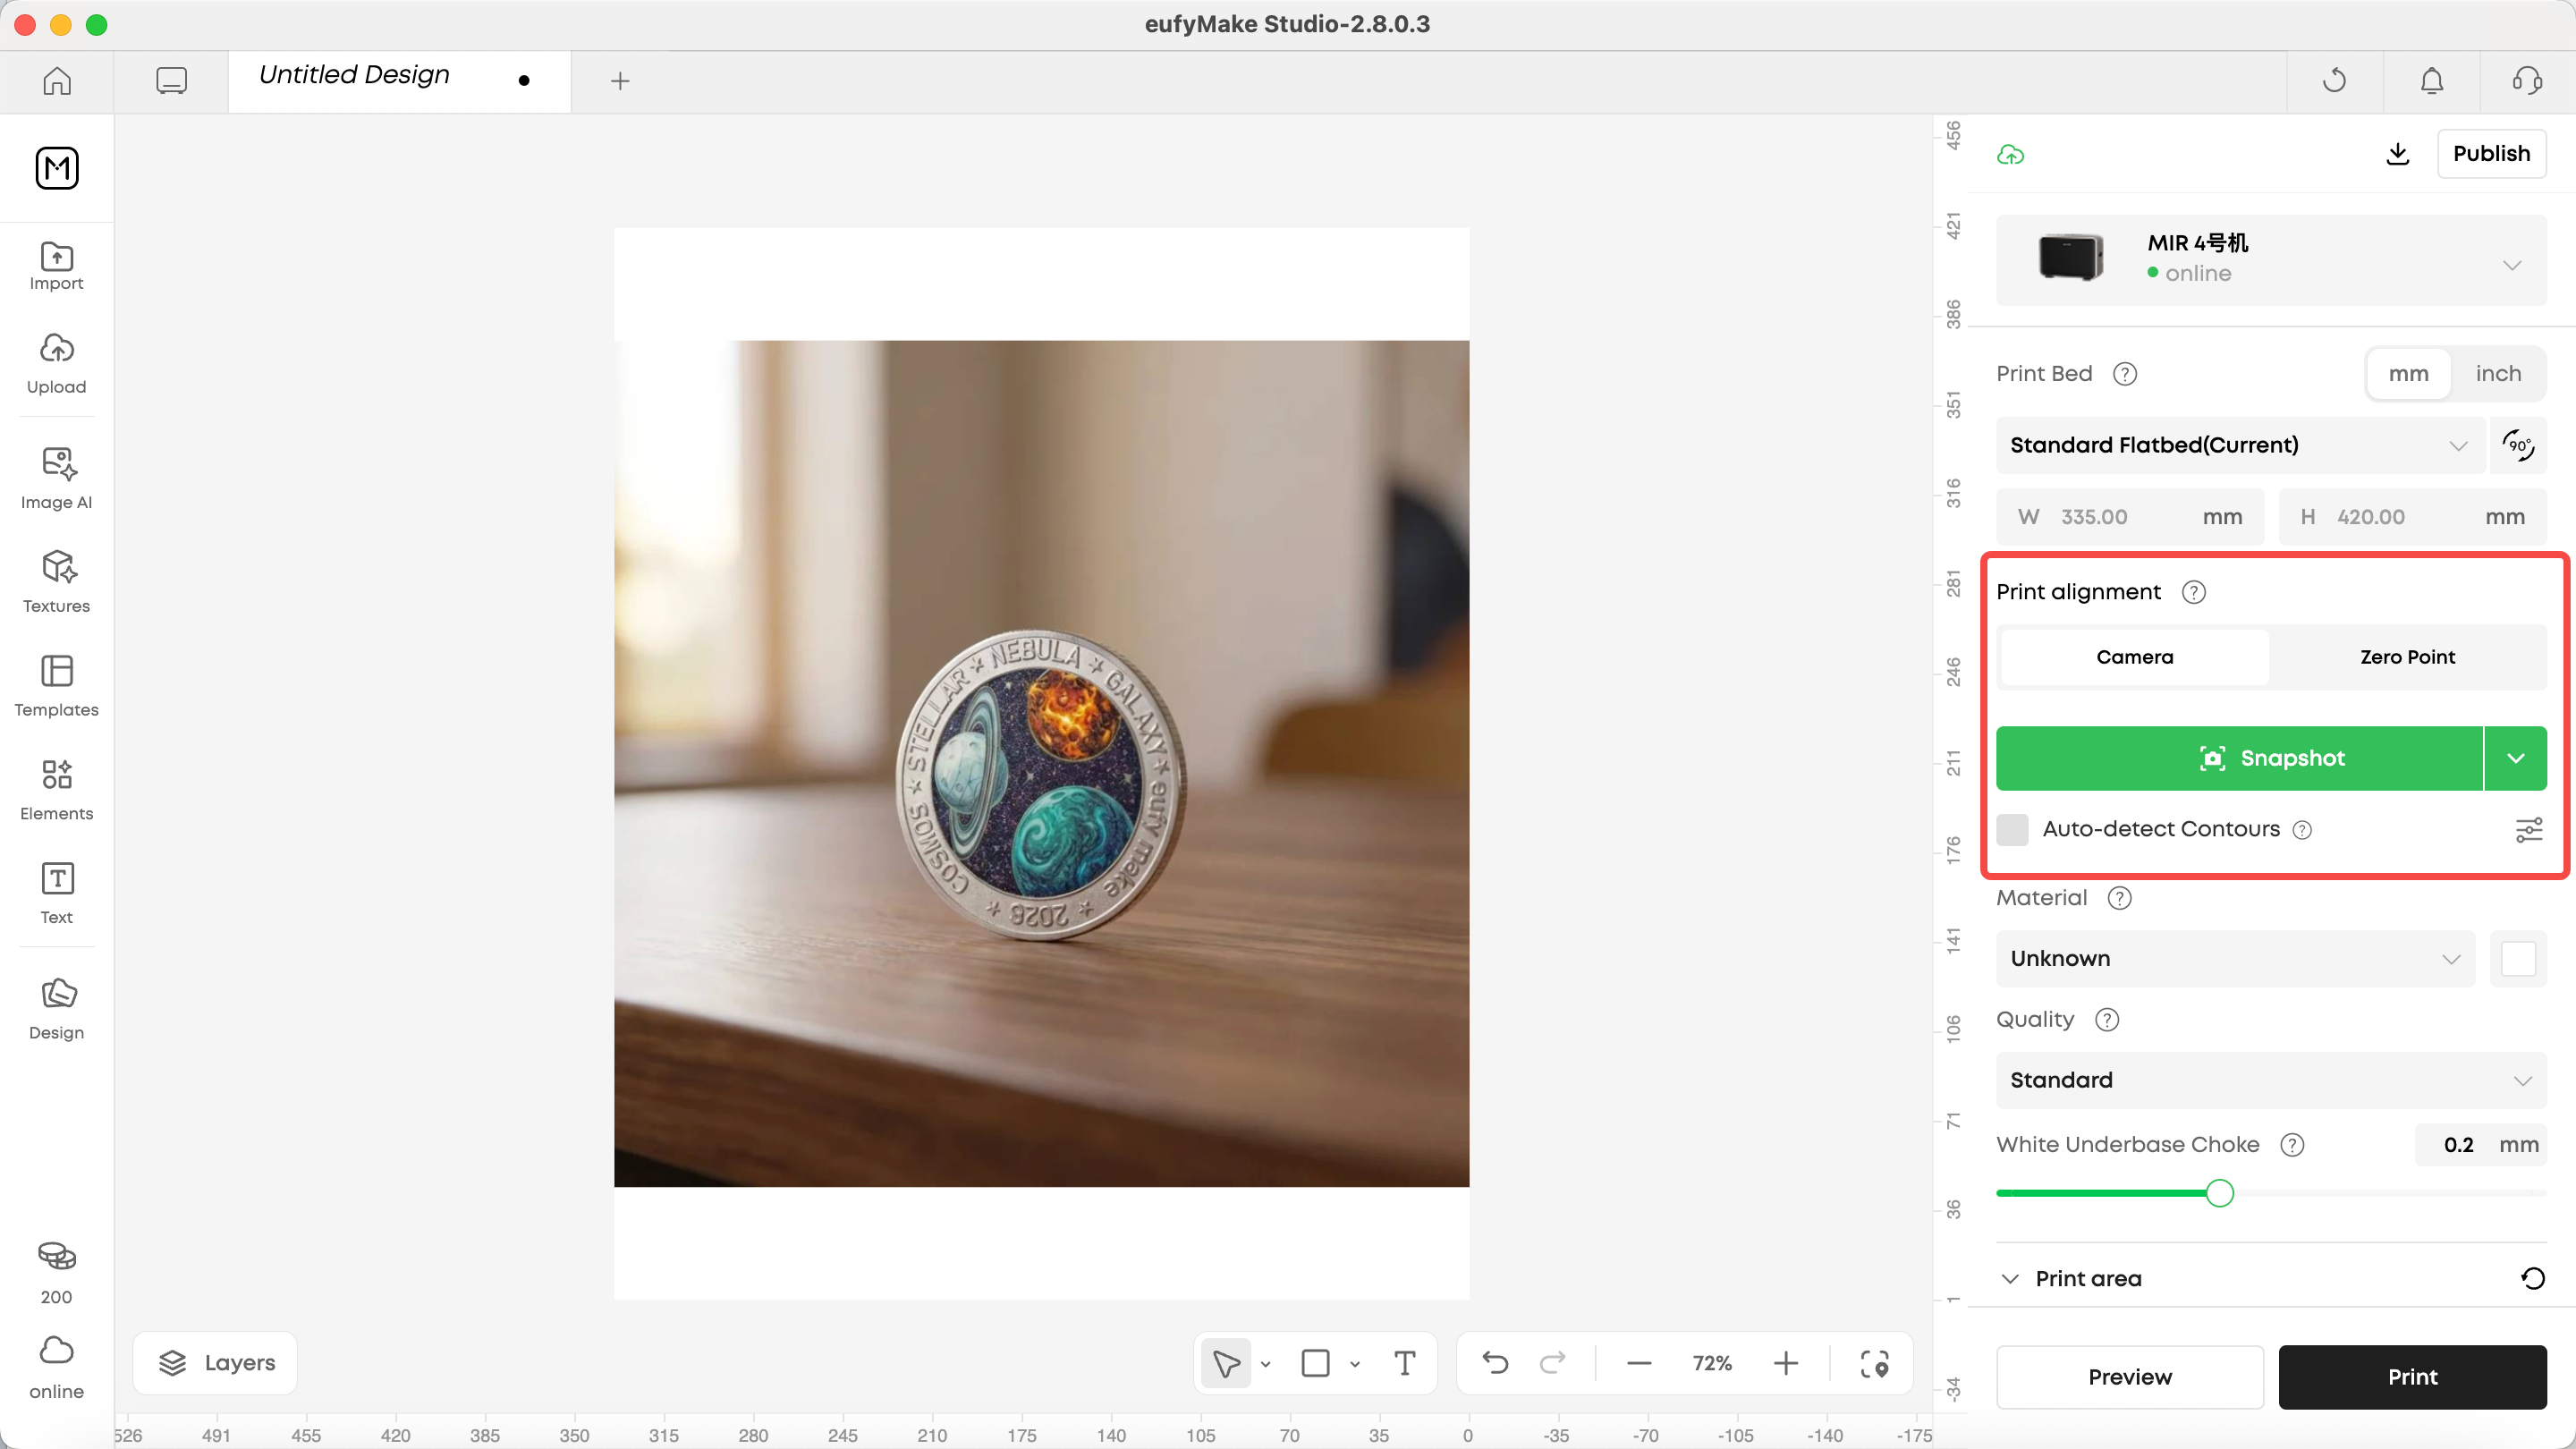
A: Choose the correct positioning method first, then talk about parameters.
Recommended rules:
- Irregular objects: prioritize Photo Alignment
- Regular objects requiring precise coordinates: prioritize Zero Point Alignment
- Transparent or highly reflective objects: Zero Point Alignment or Manual Positioning is recommended
Notes:
- If the object is moved after taking a photo, you must re-take the photo
- Transparent and reflective objects can easily affect recognition boundaries
- If the positioning method is wrong, adjusting parameters later will hardly produce stable results
¶ II. File Import FAQ & Tips
¶ Q8: When importing a file, why does the image look clear but the print comes out blurry?
A: The most common cause is insufficient source file resolution, or the import scale being too high. The print effect usually reflects the file quality faithfully: if you can already see pixelation, fuzzy edges, or noise when zoomed in within the software, these issues will likely be even more pronounced in the final print, and will not be automatically optimized or sharpened.
Recommendations:
- Use clear original images whenever possible; avoid repeatedly re-saving and compressing
- Do not forcibly enlarge small images to a size far beyond the original
- For fine text, lines, and logos, prioritize higher-quality source files
- Check edges and details in Preview before formal printing
¶ Q9: What should I pay attention to when importing assets with a transparent background?
A: First confirm that the "transparency" is genuine transparency, not a white background disguised as transparent.
Recommended checks:
- Whether the background has been truly removed
- Whether semi-transparent edges meet expectations
- When printing on transparent material, whether White Ink underbase is needed
Special reminders:
- If the file itself has a white background, even if the imported image looks clean, it may still print out white blocks or background edges
- For transparent materials, if you want the pattern to be more solid and not see-through, White Ink mode should generally be considered
¶ Q10: What kind of files are more suitable for direct import and printing?
A: Files with a clear subject, simple background, defined boundaries, and a clear target size are most suitable for direct import.
Assets more suitable for direct use:
- Logos
- Solid-color graphics
- Illustrations with clear boundaries
- High-quality product images
- Sticker images that have completed transparent background processing
Assets recommended to be processed before import:
- Phone screenshots
- Social media images that have been recompressed
- Portraits or product images with complex backgrounds
- Images with excessive fragmented semi-transparent edges
Why do edges appear unclean or frayed after importing an image?
A: Mostly because the source file's cutout quality is insufficient, or the edges themselves have gray borders or semi-transparent stray edges.
Recommendations:
- Clean up edges before importing
- For complex contours, retain reasonable edges appropriately; do not over-cut
- Always do a trial print first, especially for portraits, handwritten text, and complex decorative patterns
¶ Q11: What should I pay special attention to when importing files for texture, relief, or custom texture printing?
A: Texture-type printing is more sensitive to file detail. It is recommended to first confirm whether the image hierarchy and structure are suitable for expressing thickness variation.
Recommendations:
- Do not directly use ordinary flat images for strong texture printing
- Images with unclear hierarchy may produce messy results after relief processing
- For custom textures or depth maps, prioritize files with clear black-white relationships and distinct hierarchy
- Always verify the 3D texture effect with a trial print before final output
¶ Q12: Any practical tips when importing multiple images or complex patterns?
A: Organize files first, then layout. Do not try to edit assets on the fly while importing.
Recommended practices:
- Unify assets orientation and naming in advance
- Filter out blurry, dirty-edged, or unclean-background files first
- When printing multiple patterns simultaneously, check the margins and placement logic of each pattern first
- For batch tasks, prioritize assets with consistent style and size
- Before printing, check all positions and edge statuses in Preview at once
¶ Q13: If I don't know whether it's a file issue or a parameter issue, how do I distinguish?
A: Check the file first, then Preview, and finally adjust parameters.
Recommended troubleshooting order:
- First check whether the source file is clear, edges are clean, and the background is correctly processed
- Then check whether blurriness, pixelation, or position abnormalities already appear in Preview
- Only when both the file and Preview look normal, proceed to adjust Ink Mode, White Ink, Print Quality, and other parameters
Simple judgment:
- If it is already unclear in Preview, it is most likely a file issue
- If Preview looks normal but the final product is abnormal, it is more likely a material, positioning, or parameter issue
¶ III. Quick Reference Tables
¶ 1. Parameter Recommendations
| Parameter | Recommended Starting Point |
|---|---|
| Print Quality | Standard |
| White Underbase Choke | 0.2 mm |
| Ink Mode | Draft |
| Positioning method | Zero Point Alignment |
¶ 2. General Principles
| Scenario | Suggestion |
|---|---|
| New material testing | Trial first |
| Positioning for transparent or reflective objects | Zero Point Alignment preferred |
¶ 3. File Import Quick Checklist
| Check Item | Recommendation |
| Resolution | Prioritize high-quality original images |
| Background | Confirm genuine transparency; avoid white-background disguise |
| Edges | Clean up gray borders and frayed edges before importing |
| Size | Prepare assets at the target print size |
| Transparent or reflective objects | Resolve positioning method first, then adjust patterns |
| Texture or relief | Always do a trial print to verify 3D effect first |